Several weeks ago, I was unpacking my holiday decorations and suddenly decided that I needed a few more Christmas trees.
No, I wasn't looking for anything flocked.
Or anything that would require chopping.
 |
| This post is sponsored by Dixie Belle Paint. |
In fact, I didn't even want anything with branches.
I had enough of those.
What I craved was something a bit more rustic, something wooden, with a cottage style Christmas vibe and definitely vintage.
Or at least something that looked that way.
Bolstered by my recent paper doll shopping success, I started my search for the perfect decor pieces online.
And quickly came up empty handed.
It's not always easy to find what you want, when what you want only lives in your head.
That's when I decided to go with Plan B (which is actually way more fun anyway) and create some trees of my very own.
I knew we had a ton of plywood scraps in the garage, so that was a start. The rest of the plan came together when I hit the Dixie Belle website looking for inspiration.
And as soon as I saw the Distressed Damask Decoupage Paper, I knew exactly what I was going to do.
How To Make Decoupage Wooden Christmas Trees
Create charming Christmas trees from scrap wood and decoupage rice paper in no time.Supplies:
Plywood scraps, I used 3/8"
Jigsaw
Paper tree pattern
Ryobi All In One Rotary Tool
Dixie Belle Brush
Dixie Belle Applicator Pad
Dixie Belle Clear Coat in Satin
Dixie Belle Distressed Damask Rice Paper
Dixie Belle Voodoo Gel Stain in Tobacco Road
Exacto Knife
Scissors
Pencil
Three is a magic number when it comes to design.
So I used an old piece of paper to sketch out a small, medium and large tree and traced the shapes onto the wood with a pencil.
They weren't perfect, and that's ok, it added to the whimsy.
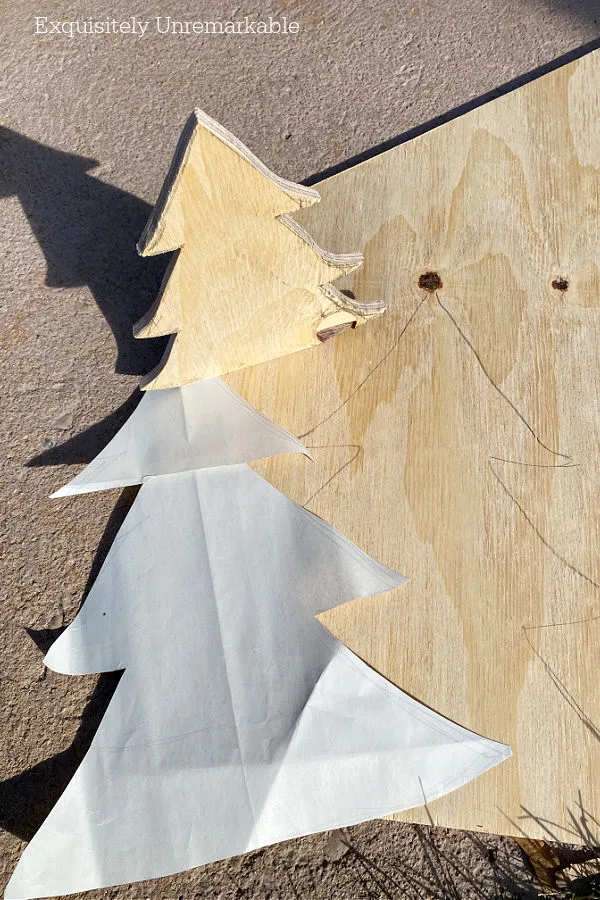
Next up, I had the mister use his jigsaw and cut them out. Again, not perfect and again, all good.
When he was finished with the big cuts, it was up to me to sand the edges and get rid of any of the rough spots.
For this task, I used the small sanding attachment on my Ryobi All In One Rotary Tool. It made quick and easy work of that job, so I was done in a jiffy.

With the construction done, I was able to move my mini forest inside and get creative.
I knew that I wanted my trees to be decorative on both sides. I'm a big fan of using the front and back of my creations.
I do it often.
It allows me the opportunity to give my creations a dual personality, it you will, to fit my fickle decorating whims. And I love that.
For this particular DIY, if you recall, I wanted something rustic and something with cottage flair. The decoupage paper had the cottage part covered.
To achieve the rustic look, I simply stained the wood with Voodoo Gel Stain in Tobacco Road. It's the same stain I used on my fireplace mantel makeover.
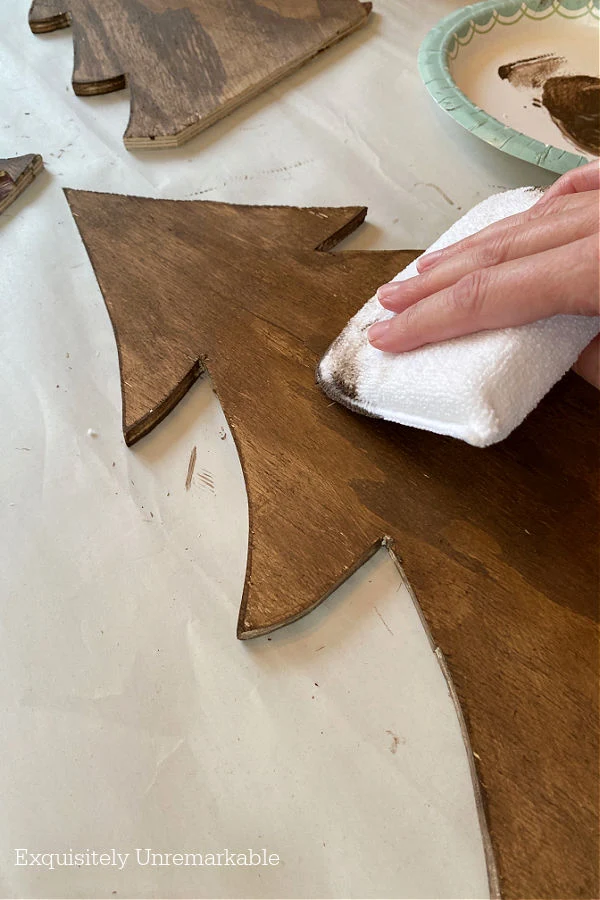
And it did not disappoint.
The color sank into the wood, highlighting its natural grain, revealing interesting patterns, dark and light.
Fabulous.
While the trees dried, I prepared the rest of my supplies for the next step.

Now, this particular pattern of rice paper came in one very large sheet. So I had to cut it into sections before adding it to the wood.
That actually worked out very well, since I was able to position certain parts of the pattern over the trees, to create the most pleasing design.

I have to say, the paper was unbelievably easy to work with, much easier than the napkins I usually use for decoupage.
It was sturdy and did not wrinkle or tear. At all. I barely needed my ziplock baggie trick.
The process was simple. I just brushed on Dixie Belle Clear Coat in Satin. It works much better than Mod Podge and doesn't smell.
Not even the teeniest bit.
Then I laid down my paper and smoothed it out with my hands.
The paper is weighty so there aren't many bubbles or wrinkles and what is there, smooths out once you add a top coat.
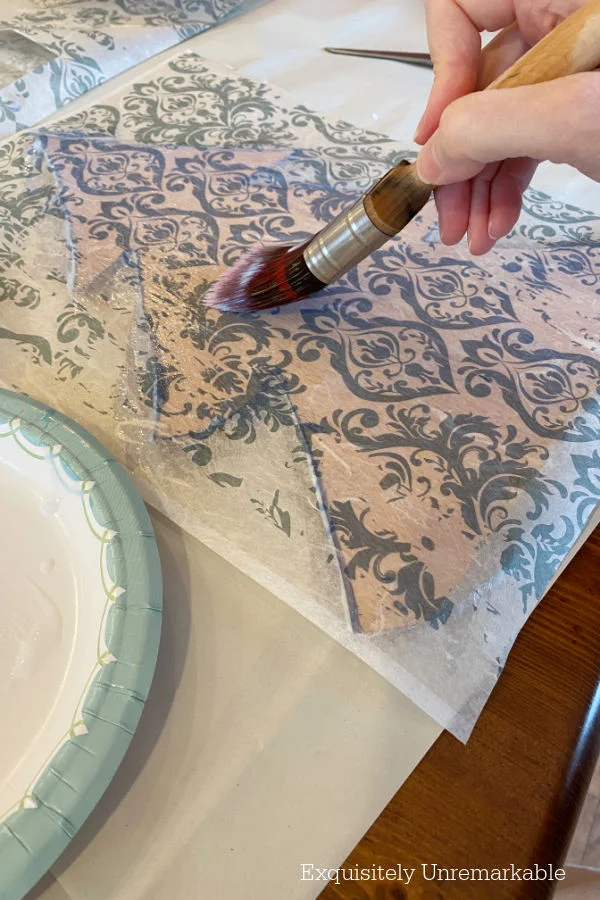
As a little aside here, up until the moment I applied this paper, I was sure I was going to paint the trees with a cream color first.
However, once I stained the other side, I thought it would be more fitting to just place the paper over the raw wood.
And I'm so glad I did.

When my paper was topped, again with the satin clear coat, I let it dry thoroughly.
Then I trimmed each piece with scissors and a got in tight with an exacto knife.
And voilà!
My vision was complete.

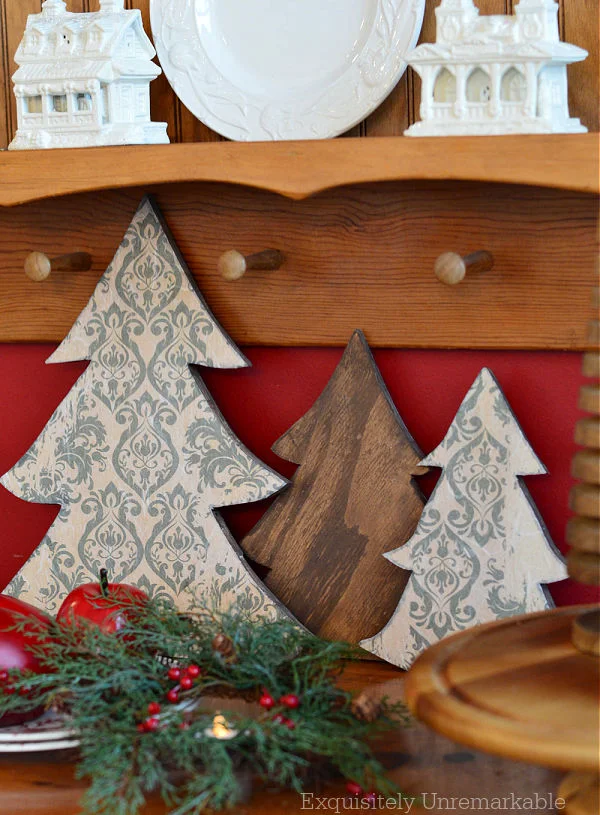
A trio of rustic, cottage style, vintage {looking} Christmas trees.
Super charming. And super versatile.
I've been moving them around the house and flipping that back and forth as the whim strikes.
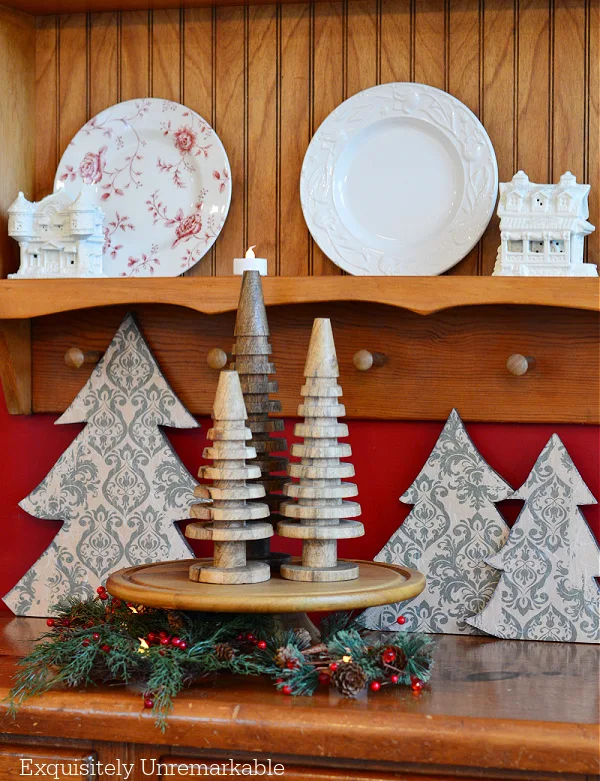
Enjoying the view.
And the quiet satisfaction that I created it myself.
What crafty Christmas dreams have you been having lately?
We'd love to know!


You go with your crafty self. The trees are great. Have a great rest of the week. xoxo
ReplyDeleteThanks so much, Kris! I had fun with this one. I love an easy craft and that decoupage paper is my new addiction! I hope you have a lovely week, too! xo
DeleteYour handmade trees look lovely!
ReplyDeleteThanks Cecilia! They’re a fun addition.
DeleteOh ny word I love these.
ReplyDeleteI'm checking their website. I finally have a bit of down time.
Before my baking bonanza begins
Pinned!
Oh, a baking bonanza! That sounds wonderful, Cindy!!
DeleteI absolutely LOVE these and plan on "borrowing" your idea!!!
ReplyDeleteBorrow away, Tammie!! Those are words I love to hear...and thanks!!
DeleteYes, yes, yes! I love these! Another Kim victory! To answer your question, I'm working on a crafty Christmas dream/vision that involves Dollar Tree wooden pieces, along with foam board, some chalk paint, free printables and decoupage. You know how we love those wallet-friendly crafts! Hugs.
ReplyDeleteThank you, Nancy!! What a wonderful comment and it sounds like you have a wonderful project in process, too. I can't wait to see your crafty Christmas creation! Hugs!
DeleteThese are perfect! I love the print on the paper, and the way you can use either side. It's another example of your creativity. Nice job!
ReplyDeleteThanks so much, Mari! That paper got my attention right away, too. Very delicate...
DeleteI am admittedly a non-crafty person, so I read with awe and admiration about how these ideas formulate inside your head,and actually get created, just as you envisioned them. These trees are super cute, and I like how you can move your forest from place to place around the house, flipping it around, this way and that. Fun!
ReplyDeleteThank you, Amy! As a kid I loved creating things, I even went to college for art and design. Then somehow I dropped it all, worked PR in the city, went back for my certification and master's and taught the littles for several years. It wasn't until I started blogging that art/ crafts/ design came back into my life in earnest..and now it doesn't seem like I can turn it off! Haha. I just feel lucky that there are people like you who stop by to peek! ❤️
DeleteHappy Holidays, Kim, your wooden Christmas trees are so pretty!
ReplyDeleteThanks Marie!! I like them enough to keep them out all year...but I won't. Maybe.
DeletePerfect!!! I think the boss will have to cit me a tree or two!!! He will love you for this idea! ;^)
ReplyDeleteBlessings, J
Haha! Apologize to him for me in advance, J! 😉My husband moaned when I told him what I wanted, but once he started cutting, he got very into it and kept telling me I needed more!! I told him to save his enthusiasm for Easter. How cute would a colony of paper covered bunnies be?? Blessings!!
DeleteThose turned out so cute!
ReplyDeleteThanks so much, Penny! I have to say I'm addicted to that rice paper.
DeleteIt’s wonderful that you and the mister were able to make those wood trees together. The trees look great with the rest of your decorations.
ReplyDeleteThanks Julie! He was a big help with this one. I’m slowly getting better about using power tools, but anything with a blade still freaks me out a bit!
DeleteI love your trees, Kim! They're perfect for Christmas and with that paper, will carry you right through the winter.
ReplyDeleteThanks Ann! I do love that paper and you're right. I can leave them out for a good long time. I actually have a green piece of furniture in my bedroom that I might embellish with rice paper pattern. I'm slightly smitten!
DeleteAs always... you are a creative superstar. Love it.
ReplyDeleteYou are way too kind my friend…thank you. xo
DeleteWhat a fantastic wooden Christmas trees.
ReplyDeleteThanks Maria! They were so simple to construct.
DeleteThey're lovely, Kim and hand made is always fun made, in so many ways.
ReplyDeleteThanks so much! They were fun to make. I love an easy DIY.
DeleteI haven't done anything crafty this year since we're still settling in from our move in Sept. I absolutely LOVE what you did with the trees!! And all that was on rice paper? I may have missed something in your tutorial, but these are perfect.
ReplyDeleteThanks Florence! Yup...it's a patterned rice paper and you just apply it with any kind of decoupage paste. It's really durable so it doesn't tear or buckle while you're working with it. It's become my new crafty obsession!
DeleteSeriously the cutest trees! I can't wait to try the decoupage paper! Great project Kim! Pinning 😊
ReplyDeleteThanks Cindy! You'll love the rice paper. It's a dreamy craft supply!
DeleteSo pretty!
ReplyDeleteThank you! They were so easy to make.
Delete