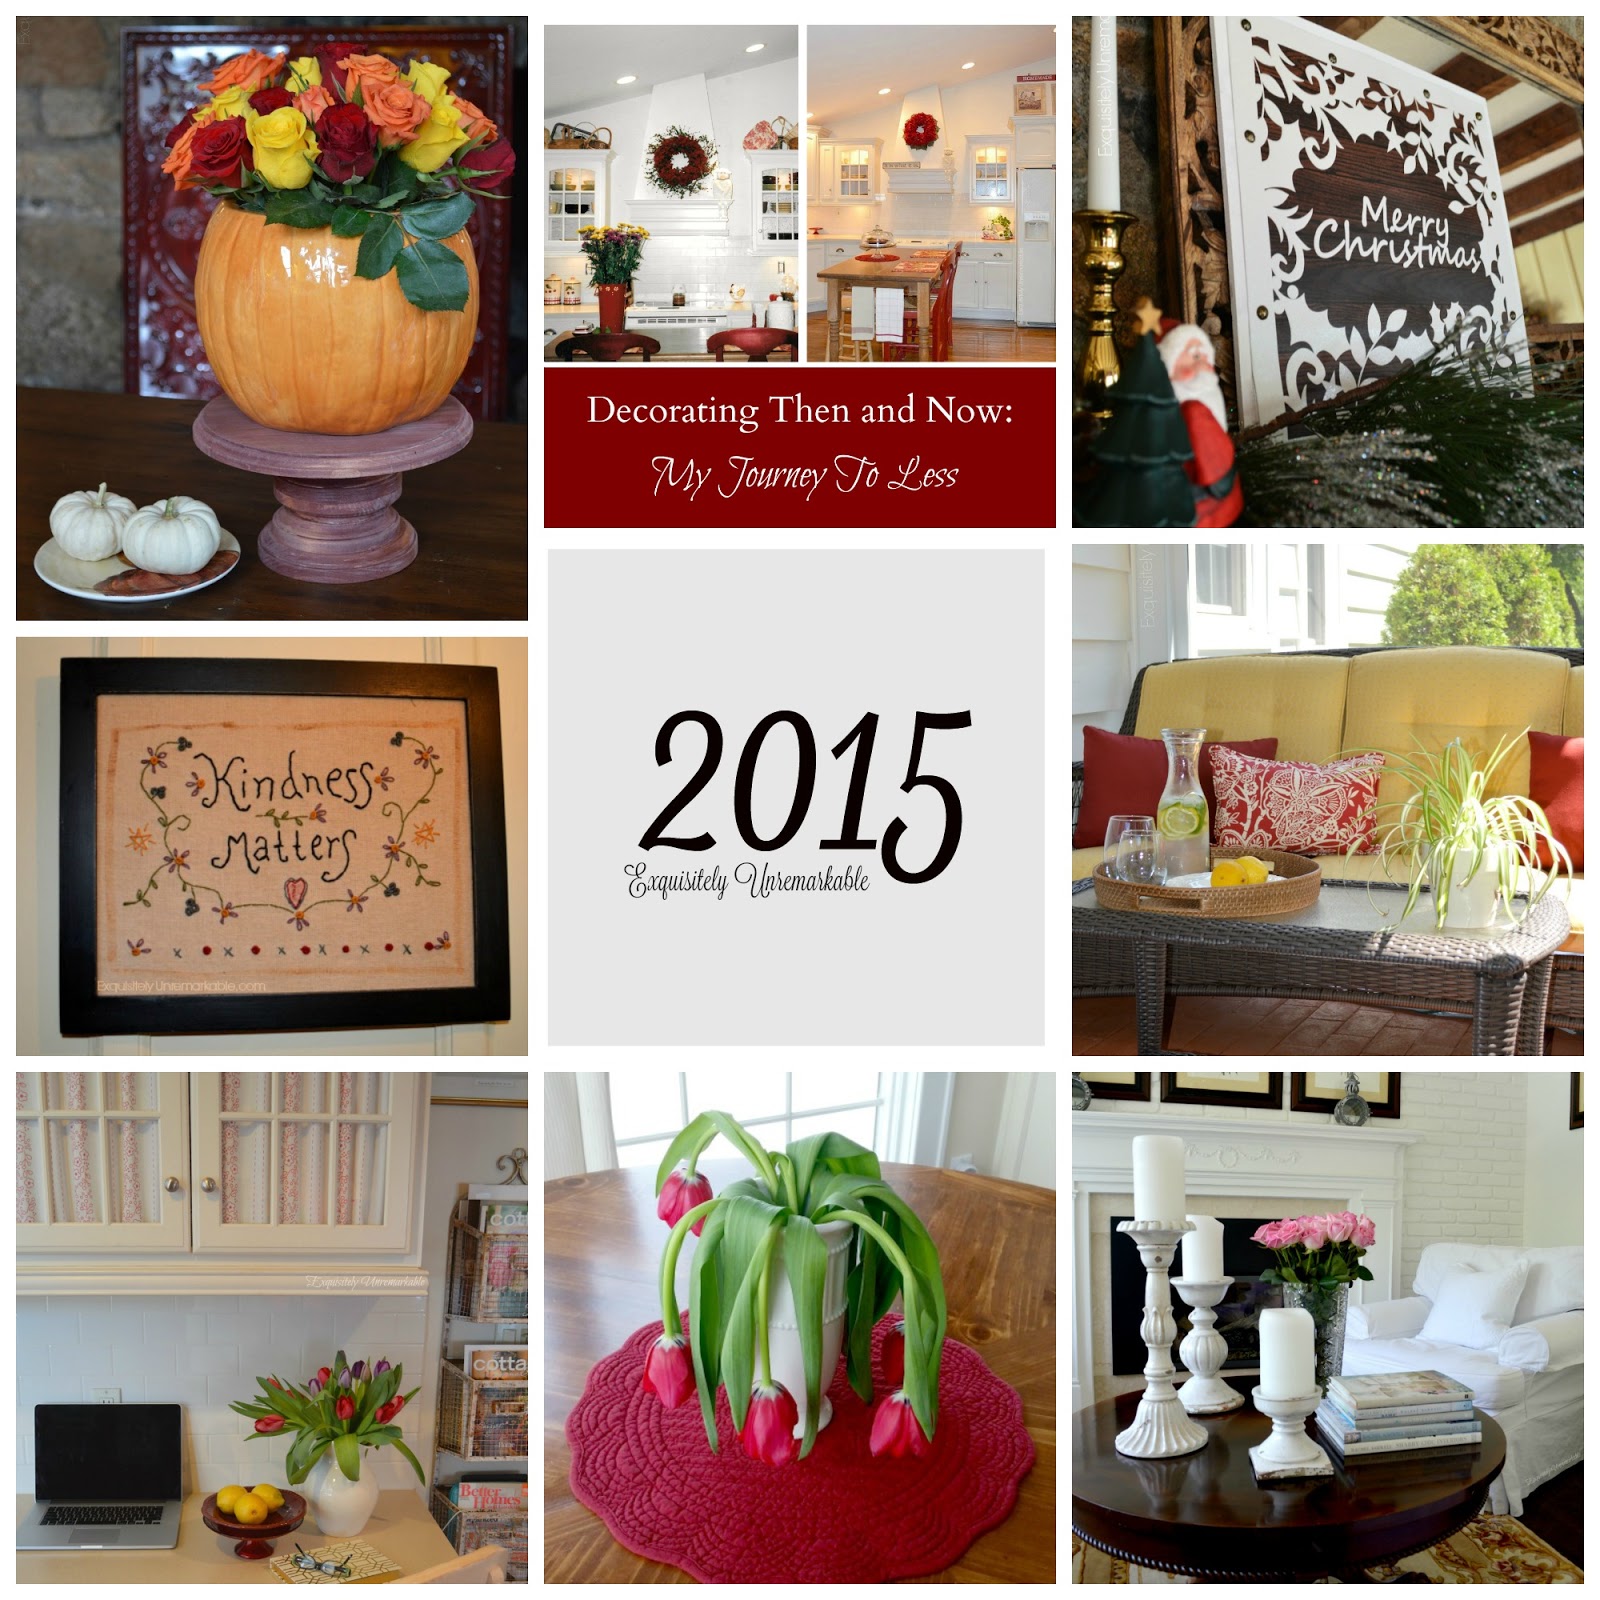
Ah, the end of the year. Time to take stock of 2015 and share the best of the best. At least that was the plan, but you know, I've done that before ~ twice actually ~ and while the most popular posts are always fun to highlight, this year, I thought I would share my own personal favorites with you. One from each month of the year.
The perfect present for this red loving girl, from my perfect friend Liz. When I was little, Christmas was absolutely perfect. There were always tons of family members gathered in plaid and pearls dancing along to the Yule Log, there were so many presents I could barely see the floor underneath all of the crumpled wrapping paper and people laughed and hugged, ate and sang, eggnog in hand, nonstop from Christmas Eve until late Christmas night. It was ~ Christmas card illustrated, movie depicted, exactly what it was supposed to be ~ perfect.
Turn a gift bag into a pretty home decor accent. It's a great way to recycle those gift bags or make a custom piece with a dollar store bag! Hello Friends! Today, I have another home decor idea using gift bags. I know that most of you are probably done with your holiday decorating by now, but I thought that I would put this one out there now in case you are looking for some last minute inspiration. Plus, gift bags are going to be on clearance in the next few days.

Looking for a super easy apple crisp recipe for a cast iron pan? Well, look no further. This one is simple, quick and ready in a jiffy. My husband is the chef around here. Oh, I cook out of necessity, and I'm not bad at it. I make a mean Bolognese . And a delicious quiche . I just don't enjoy it. It's a chore...but not to my hubby. Nope.
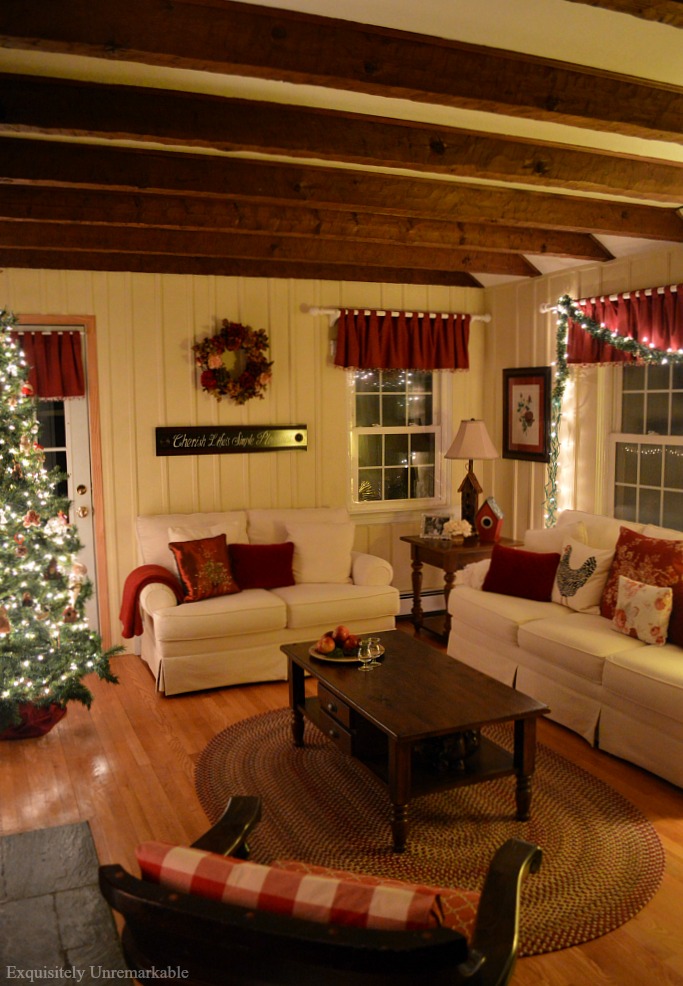
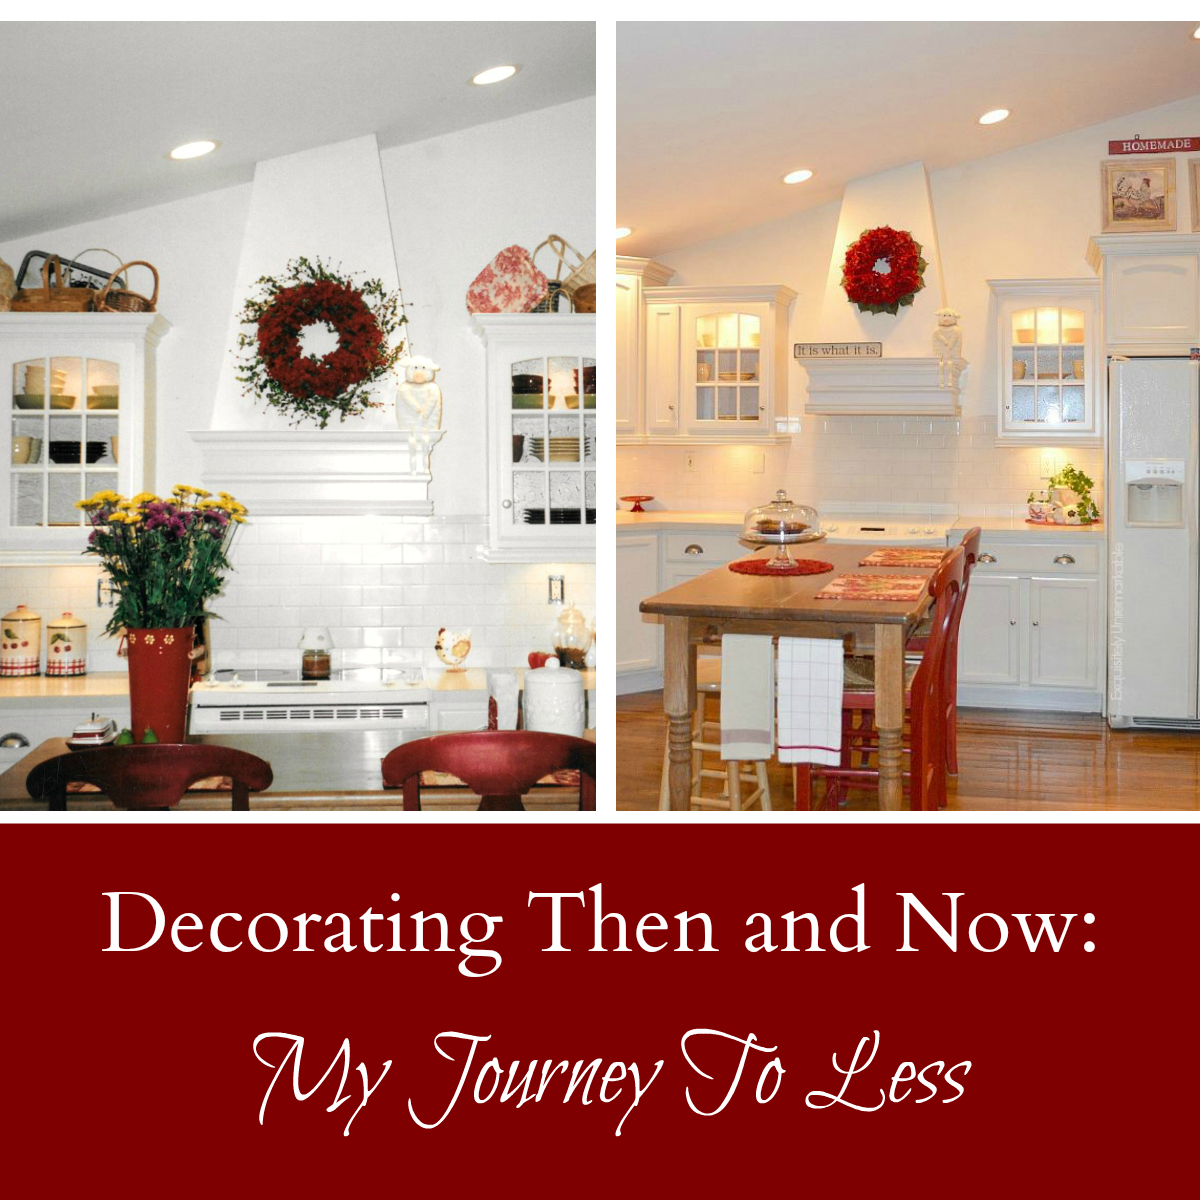
There's a reason for the all the Christmas decorating in December. And when I'm done hanging garland I sit and think about it. How about you?? Phew, I'm all done decorating my home for Christmas and while I thought about taking you on a full tour of the place, I have decided against it. You see, it'd be pretty redundant. My December decor is basically the same this year, as it was last and if I've added anything new, well, I've already shown it to you. Sticking with the old plan may not leave me with anything fresh to feature, but as my mom used to say, if it ain't broke...well, you get the idea.
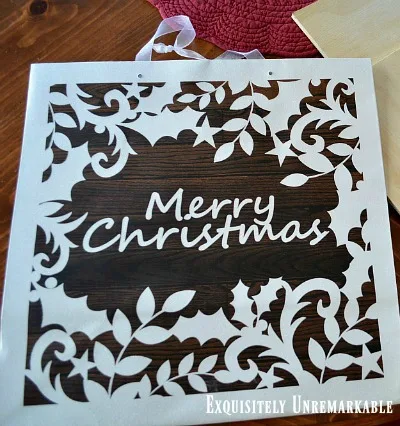
Whip up an easy, yet elegant wooden sign for Christmas with a holiday gift bag and a few upholstery tacks. It's a quick and easy way to get a custom sign for the holidays. It's the most wonderful time of the year and I have been crafting away, enjoying the fireplace, the decorations, all the festivities that the season has to offer. Today, for example, I am sharing another DIY to help you cheat your way to an elegant looking wooden sign. This one is also made from a Christmas gift bag. I know, I know. I'm obsessed.

Make an easy sign for Christmas, or anytime, with a pretty dollar store gift bag. The artwork is lovely and the how to is super simple. So for years I have been saying that I'm a fickle decorator, that I don't like to spend a ton of time or money on home decor, because I change my mind often. When things don't work out or don't sit right, I want to be able to fix them without feeling guilty about my investment, be it time or money. Any yet, I don't think I have posted about a time when that has occurred.
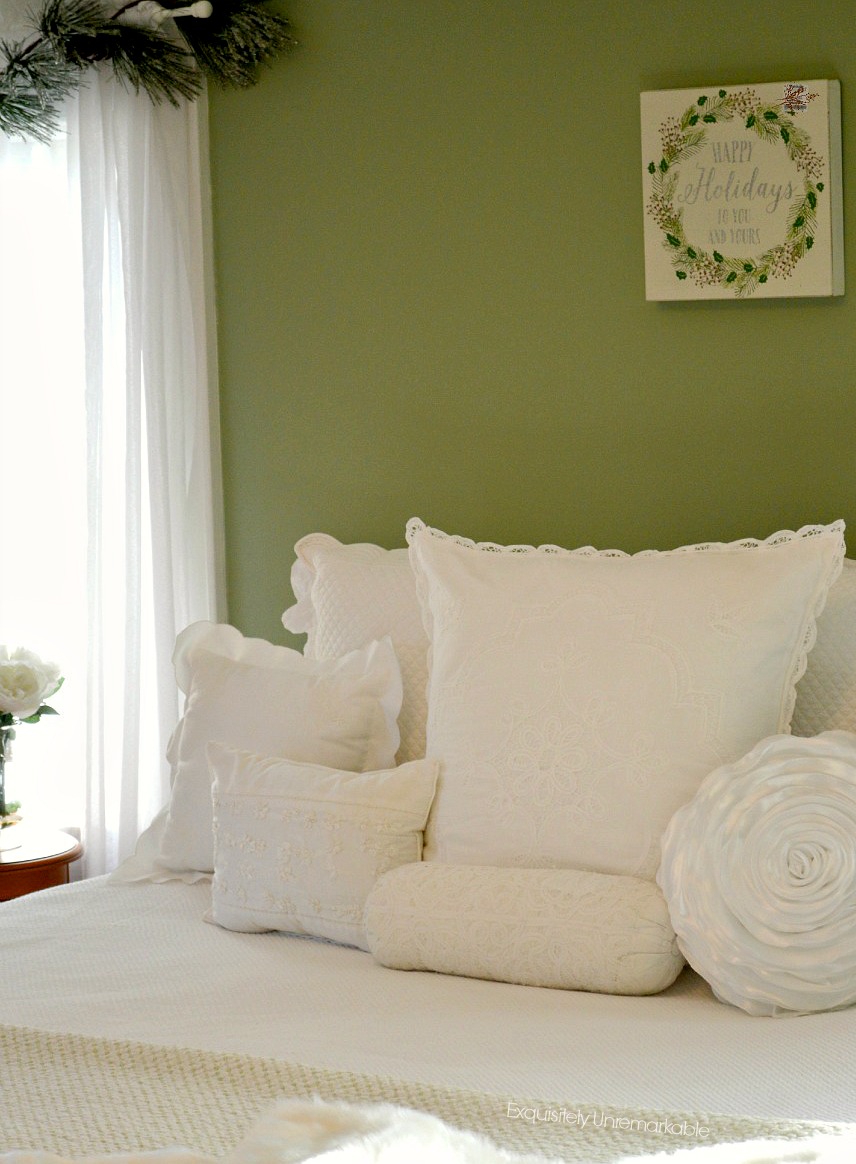
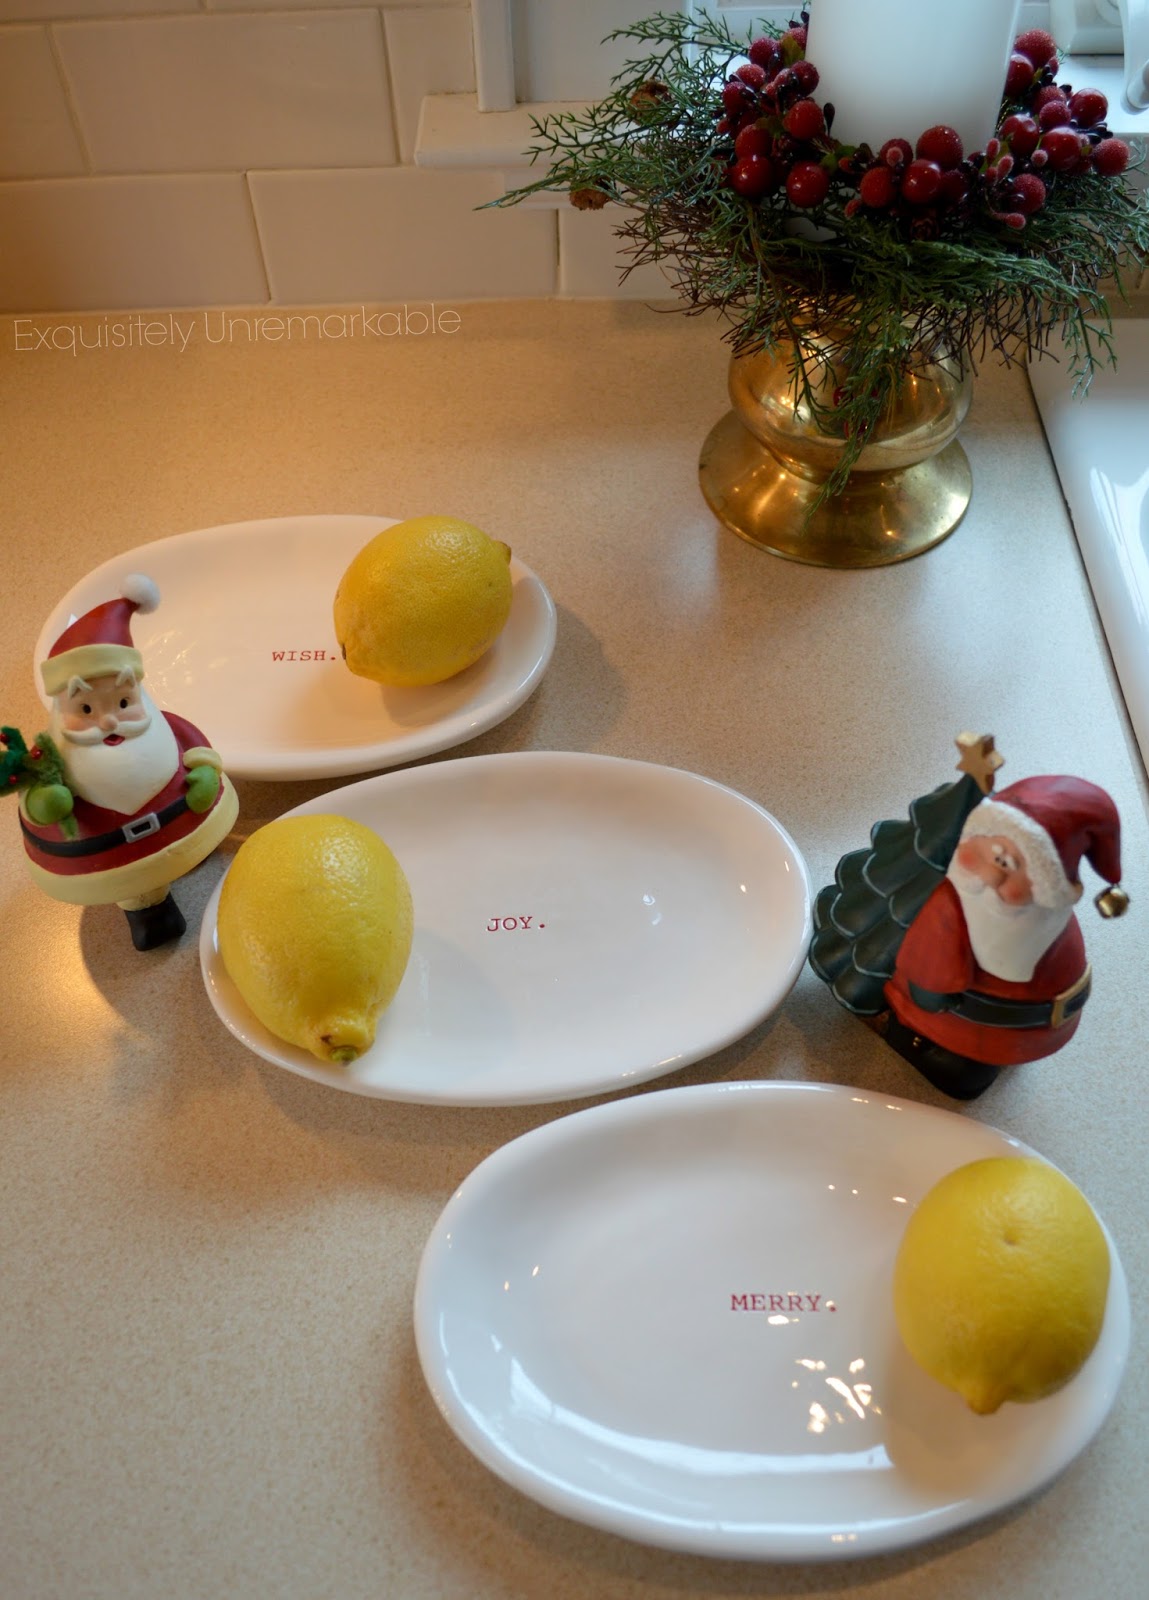
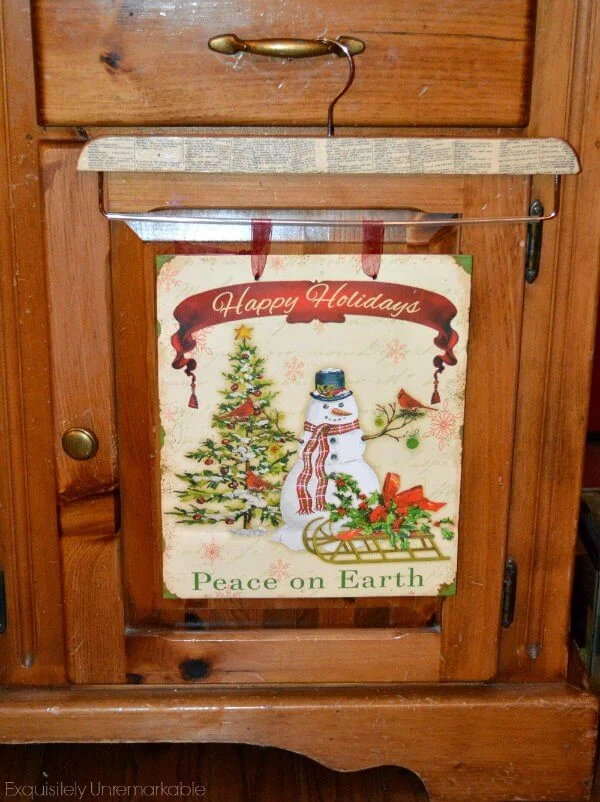
This year, as I decorate my sweet cottage for Christmas, I am going for a look that is simple and clean. Nothing fussy.

Here's a quick way to transform your furniture using pillow shams. Takes just a few minutes to totally change the look of your room. Today I started decorating for Christmas. I'm far from finished. I'm taking my time, concentrating on the details and weeding out old pieces that I no longer want or need. I am going for a simple, rustic aesthetic, just like last year, so lots of little makeovers are taking place around here. Some are solely for the holidays, others will last long into the new year. This chair is getting the best of both.
So the holidays have already semi-officially begun around here. The weather is crisp. The grocery stores are packed and the smell of cinnamon and baked goods permeates the air. The kids are excited for a shortened week of school and there's a giant turkey in my fridge. Yup. We're on our way to Thanksgiving.

I made a simple coat for our resident Elf On The Shelf. The kids were certain that if he had a warm coat, he would be more motivated to leave the house every night. That's the reason he wasn't moving. Sure it was. About a decade ago, Buddy the elf, came to live with us. I had seen him in a catalog and thought he was darling, the idea that one of Santa's elves would live with us for the holiday season was original and exciting. The kids loved him and were happy with our new tradition, even on the days when he didn't move. They weren't suspicious of his immobility.

I shop online at Christmas time. The mall is so been there, done that...how about you? I do a lot of my Christmas shopping online these days. Ok, ok, I do almost all of my Christmas shopping online. I can get great deals, really unique items and I can do it all with a click, while I'm curled up, right next the hubby, in front of the fireplace.
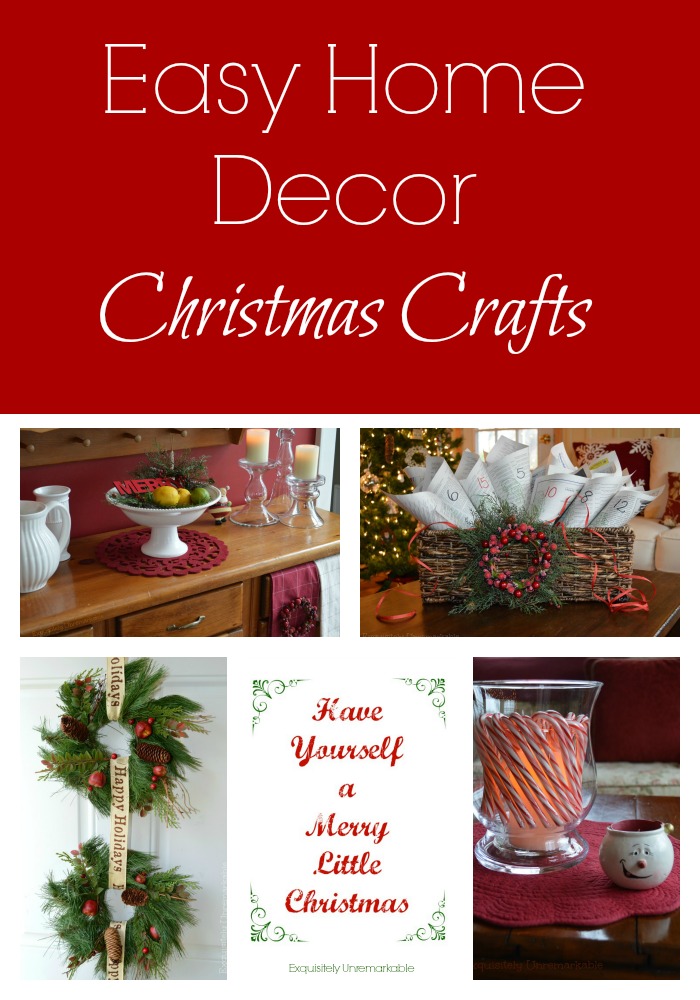
Last year, I decided to pare down my holiday decorating. In keeping with my new simplified style, I put out less stuff, kept the look clean and a bit rustic. I left a lot of our decorations in the bins and selected only the truly special items for display. I did however make a few very easy home decor Christmas crafts. I mean what's Christmas without crafting, right?
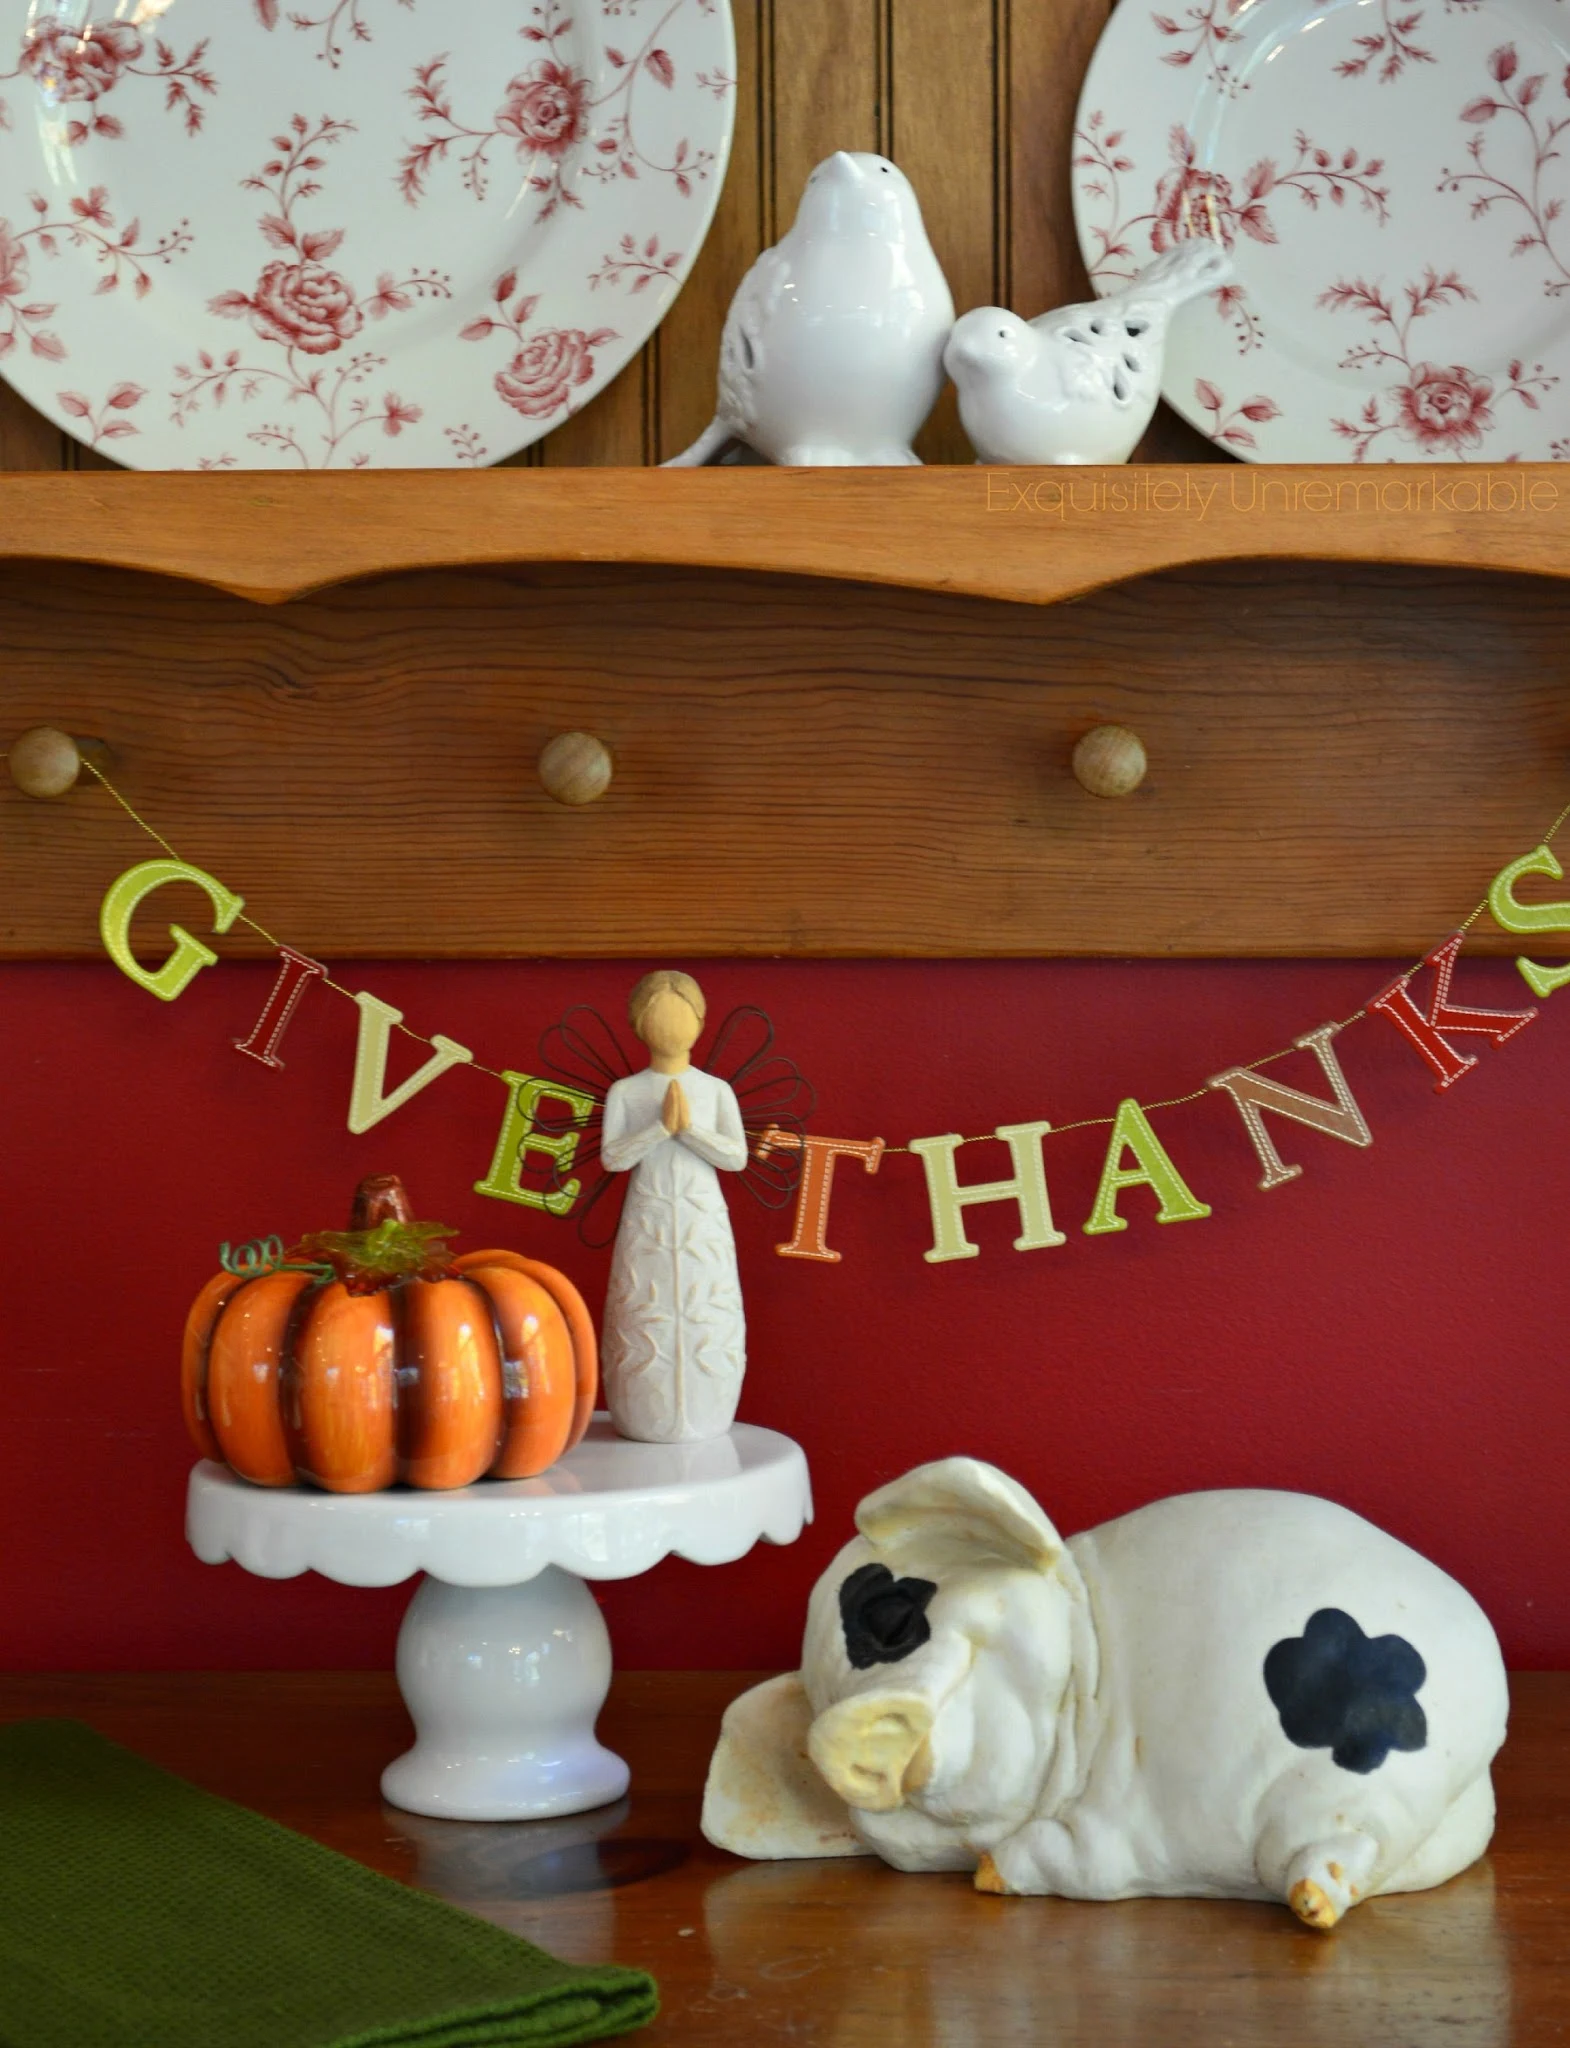
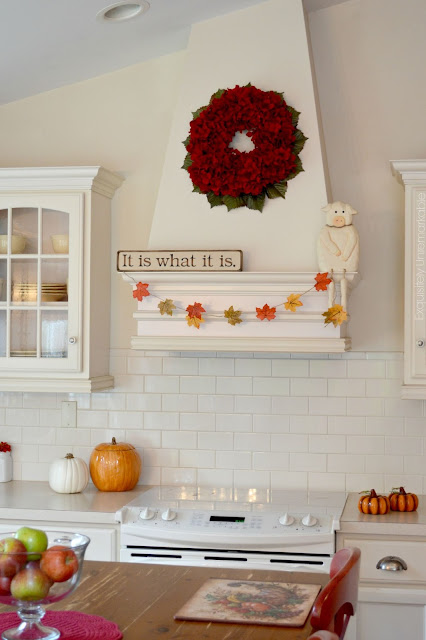
Lettered banners are an easy and fun way to decorate for the holidays. Here's a super easy and versatile Thanksgiving garland that you can whip up in no time. Ah, Thanksgiving, it's coming and guess who's hosting it this year? That's right, the girl who hates to cook! Ironic isn't it? That's ok, I'll manage, but what I'm really excited about is that it gives me the motivation to decorate for the holiday! I don't usually put out too much in between Halloween and Christmas, but this year, I decided to add a little color with a little Give Thanks banner. A banner, I know, big surprise! 😉
So we moved into this house a little over a decade ago and I was thrilled to finally have some real space to decorate. I know, I know, what space? True, it's a small cottage, but you see, we had just moved ~ literally across the street ~ from a teeny cottage, just 975 total square feet. My new digs felt palatial. Of course, what do people do when they have tons of wide open space? Fill. It. Up. And I did.

Craft and DIY projects are plentiful around my house, but I have to be honest, it's not always because I am so in love with making things. When it comes to decor, I'm pretty lazy. I am a product oriented girl and while I do enjoy some processes, most of them time, I'd rather just skip straight to the pretty. Unfortunately, it's not always that easy. There's often quite a bit to consider. So, just how do I decide if it's better to buy what I want or DIY?
I honestly don't know where to start today, so I guess I'll just get right to it. Right here...right now, I am saying out loud that I hate October and I hate mammograms. I'm not really sure which one is worse to admit. I mean in the dreamily decorated land of blogging, October is a flagship month. It is the harbinger of autumn decor, crock pot meals, fall front porches and cozy home tours. You cannot hate on October. It just isn't done.

Make a super simple DIY wooden cake stand or cake plate without cutting, drilling or sanding. Here's an easy tutorial that only requires paint and glue. Fabulous! I have a serious cake plate addiction. The elegance of their shape draws me in and everything, from food to flowers, looks better when elevated. Naturally, I have too many, stands in all shapes and sizes. Some are made of ceramic, some of glass and some are tin ~ you name it, I've got it. Except wood.

Make a beautiful carved pumpkin vase or planter the super simple way. No knives or rot to deal with, just use a fall or Halloween cookie jar. Check out the easy how to and pretty inspiration ideas. Guess what? You know those pretty DIY pumpkin vases and planters that are absolutely everywhere this time of year? Well, I made one!
Several weeks ago two pieces of business mail arrived at my home on the same day and I told my husband that I needed a PO Box immediately. He didn't understand. "It's two letters. Two. I think our own mailbox can handle it." Ok smartypants, that wasn't really the point. It wasn't about volume, it was about investing in my business, in myself. I explained how my freelance work was picking up and how the blog was growing. I needed a separate address. Needed . "It just looks and sounds more professional." "It just sounds more expensive."

Be prepared for the unexpected and when it happens, because it will, try to make the most of it. When I was taking classes toward my graduate degree for teaching, I remember one class above all the rest. It wasn't the subject matter I recall. I honestly can't even picture the teacher, but it was something she said that sticks with me to this day and has served me well, not only in the classroom, but in life. What were those fabulous words of wisdom? Well, she said, "Be prepared for the unexpected and when it happens, because it will, try to make the most of it."
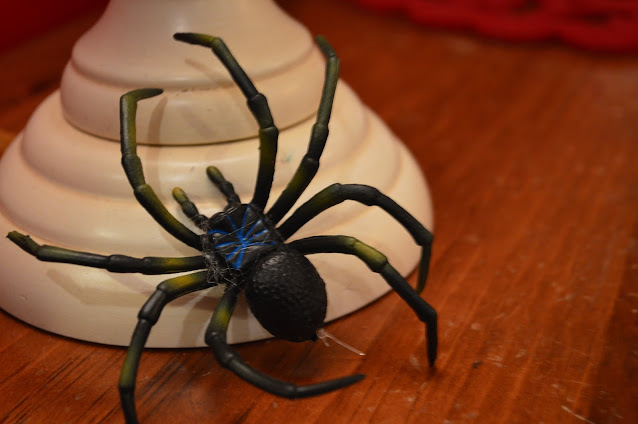
Ah October, a truly terrifying month filled with scary decor and frightening tales, and while I am not a fan of either, I have both for you today. The spider you see is about as spooky as it gets around here. I stretch a little webbing over a wreath, set him ~ or her ~ inside and poof! I'm decorated for Halloween. Magic.

About a month ago, we began the process of redecorating my daughter's bedroom. In my mind, I had this project wrapped up by the time school started. Well, now we are looking at Halloween costumes and the room is still in limbo. What's the hold up? Lighting. She can't seem to find anything she likes in the stores we've been to. I get it, she's limited to what's on the shelf and she hasn't found her muse.
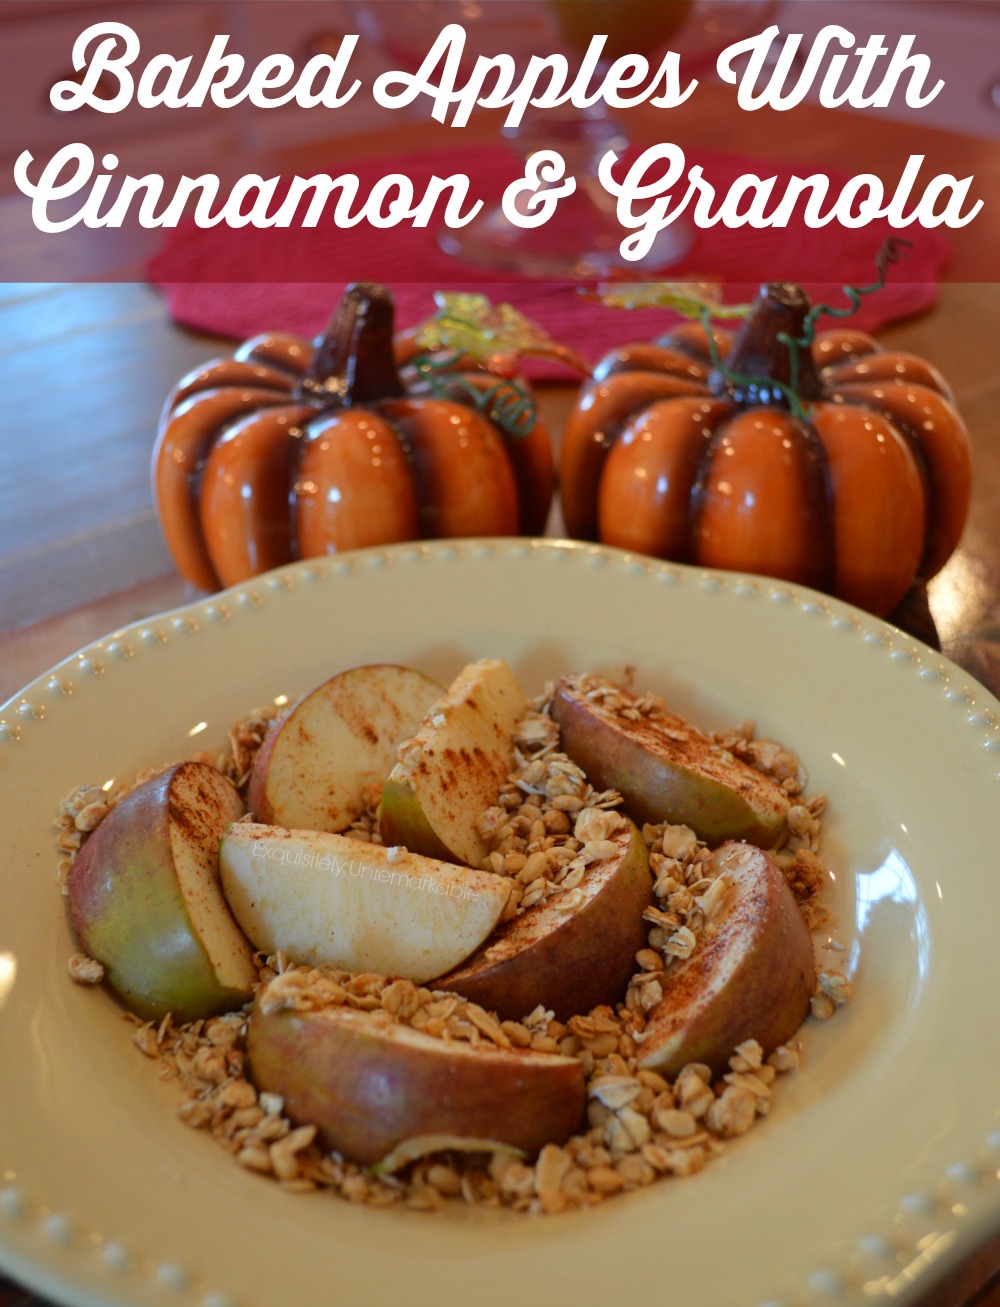
Dig out those fall fashions and recipes, like this easy baked apple, to keep you warm this season. Of course, I just wear my bathrobe. That's ok, right? October has arrived and a cool breeze has blown in with it, right on cue. Yesterday, we had the air conditioning on. It was humid and hot. Today, it is coat weather. Well, sweater weather anyway.

It's no secret that I don't really like to cook. Frankly, I don't really like to eat that much either. I am more of an eat to live kind of person, instead of the other way around. That's ok, to each his own, but people who know this about me are often perplexed when I tell them that the kitchen is my favorite room in the house. You don't like food, but you love the kitchen? It's really not that big of a mystery, I love the kitchen for the fabulous decorating opportunities, especially in the fall.

This morning was a bit nutty around my house and we all woke up late, to boot. I had a sick child suffering with a cold, a family member to call and say happy birthday to, a husband working from home and a lunch date to make around all of it. In the middle of the chaos I sat down at my computer to check my emails and there they were, tons of them congratulating me for making the shortlist of nominees for the Amara Blog Awards. I was stunned...
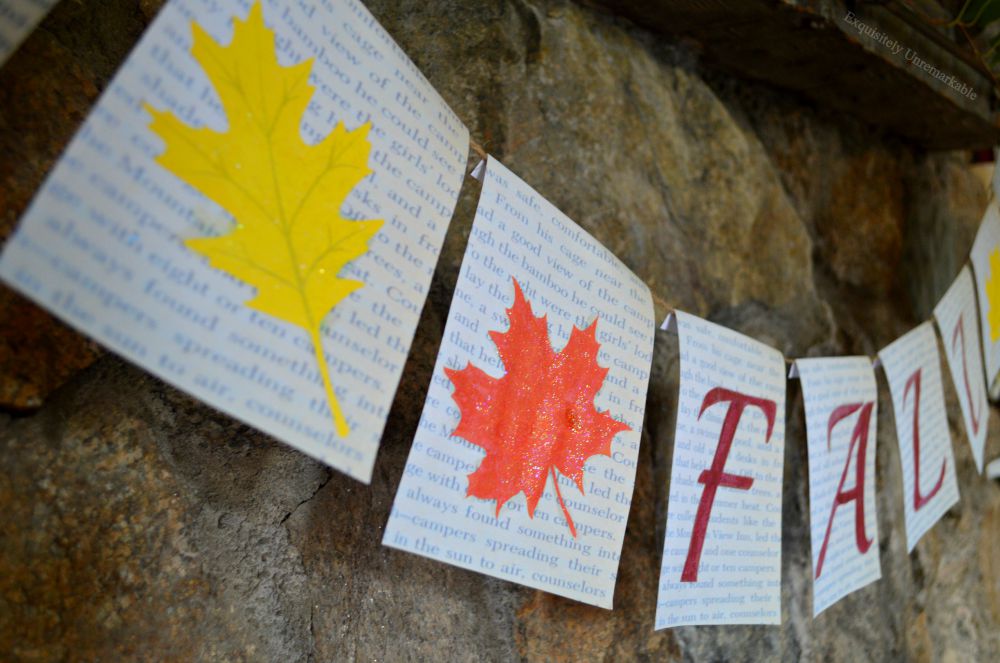
It's almost fall and even though I have been fighting it, looks like it's showing up anyway. So I decided to whip up a super, super simple fall book page leaf banner to welcome the season. It's my attempt at "if you can't beat 'em, join 'em". Plus, I figure, if I'm going to be cold, I should at least have something pretty to look at.
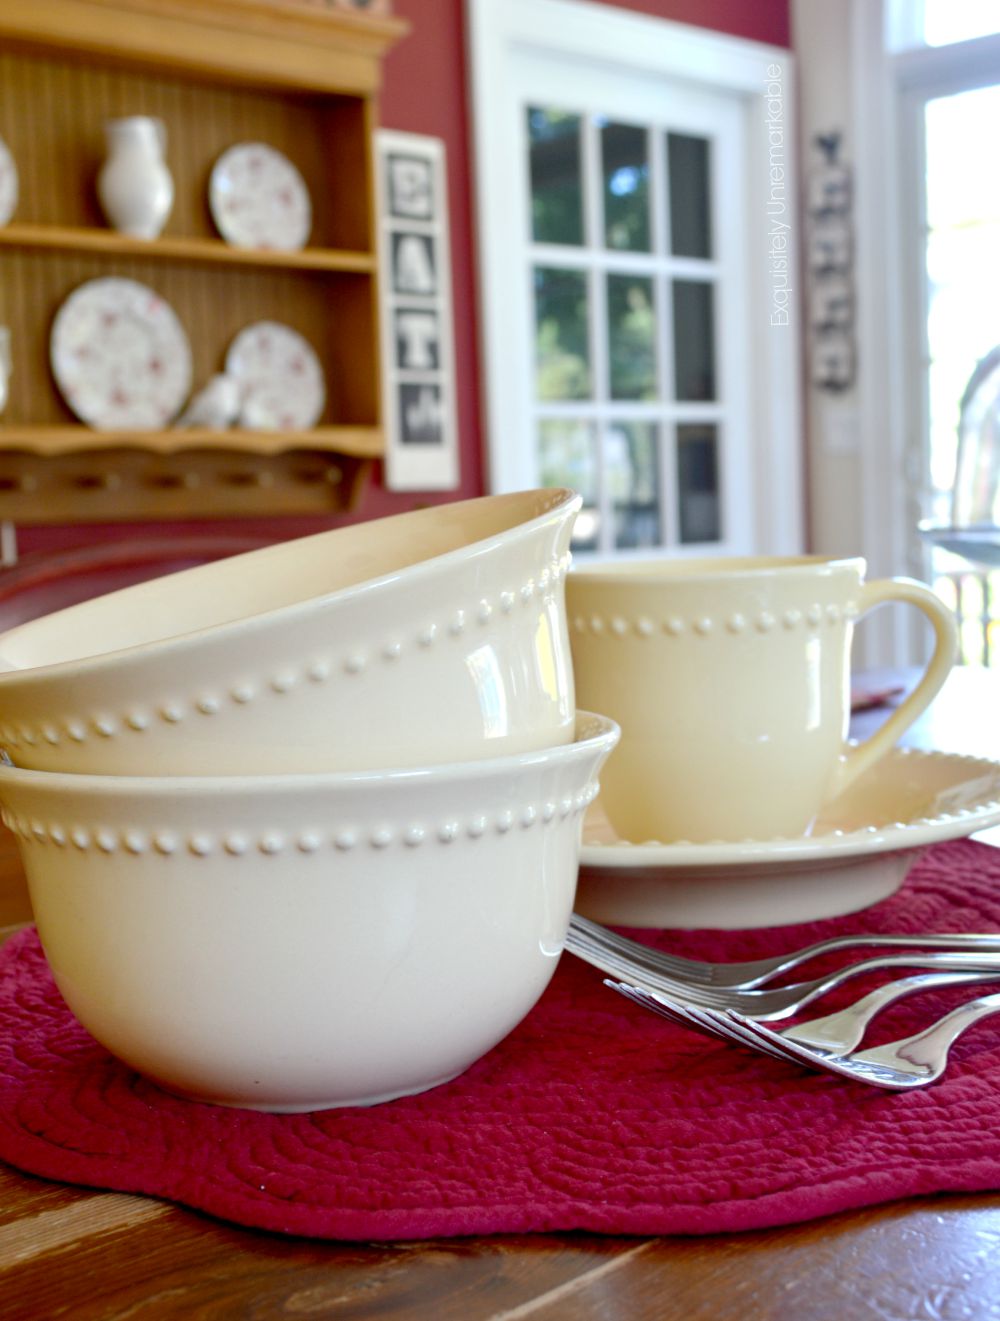
My Pottery Barn dishes have disappeared and no one knows where they went. It's a mystery and I am not happy. There's a mystery in my home today and I don't know about you, but I am not fond of mysteries. My tale begins many years ago, in the houseware's department at Macy's. I was newly engaged and registering.

It's time to dress your house for fall. No need to shop or spend a ton of money. Here are a few simple and inexpensive ways to welcome this season without breaking the bank. About a week ago, I proclaimed my love for summer and all the hazy, hot and humid it had to offer. I was not ready for fall, I was not going to decorate until the end of September or acknowledge its impending presence until the calendar forced me into it. Nothing and no one was going to change my mind.

*THIS GIVEAWAY IS NOW CLOSED AND THE WINNER HAS BEEN NOTIFIED Earlier this week I shared the two new pillows that I made from Paint-A-Pillow's fabulously easy stencil kit.
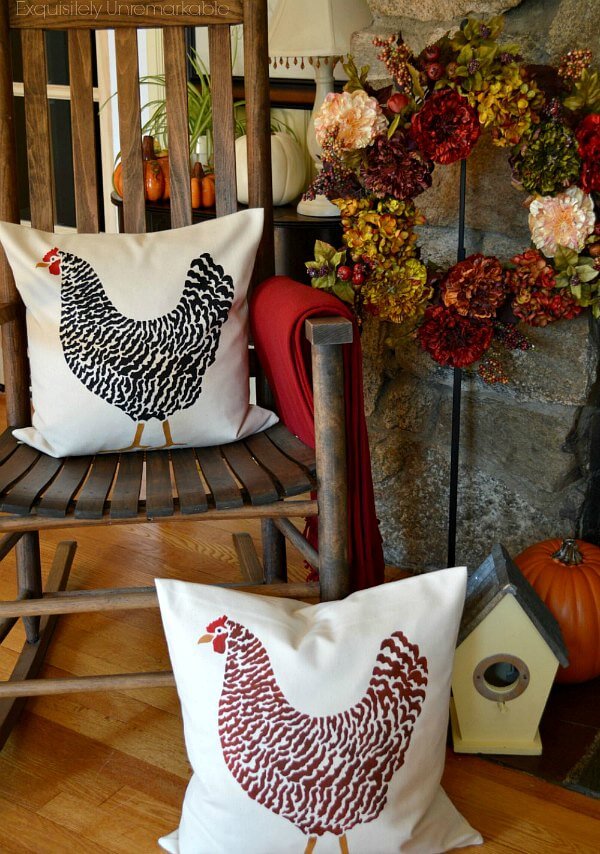
Want a custom decor piece? Try this super easy DIY to paint a pillow. Stenciling is back and it's a fun, craft with great results! Here's the step by step DIY. Way back in the late 1980's and early 90's, I was a very big stenciler. I loved the craft and I went crazy stenciling borders in just about every room of my home and all sorts of decorative items. Recently, I have fallen in love with stenciling again, both inside my home and out . My latest project is a pair of stenciled pillows and I am totally in love. They are a focal point in my fall living room !
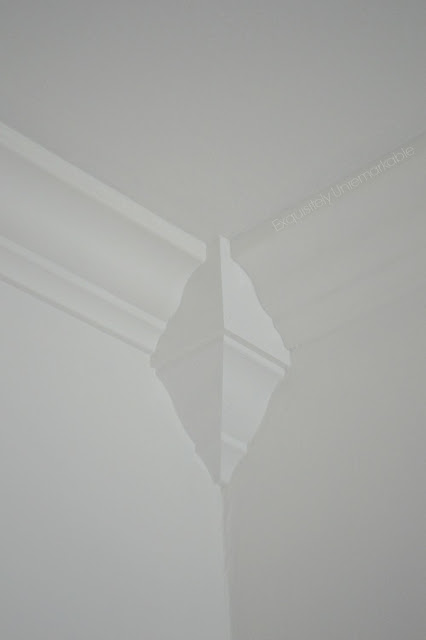
Looking for a quick way to install new corner moulding over an old one? Check out this easy DIY trick. Our house was built in the 1920's and has some really lovely woodwork and trim that was commonly installed during that time period. Unfortunately, when we moved in, we noticed that it was not consistent throughout the home. The windows and doors were framed with some fabulous thick, flat boards, but the ceiling mouldings were skimpy and very uninteresting.
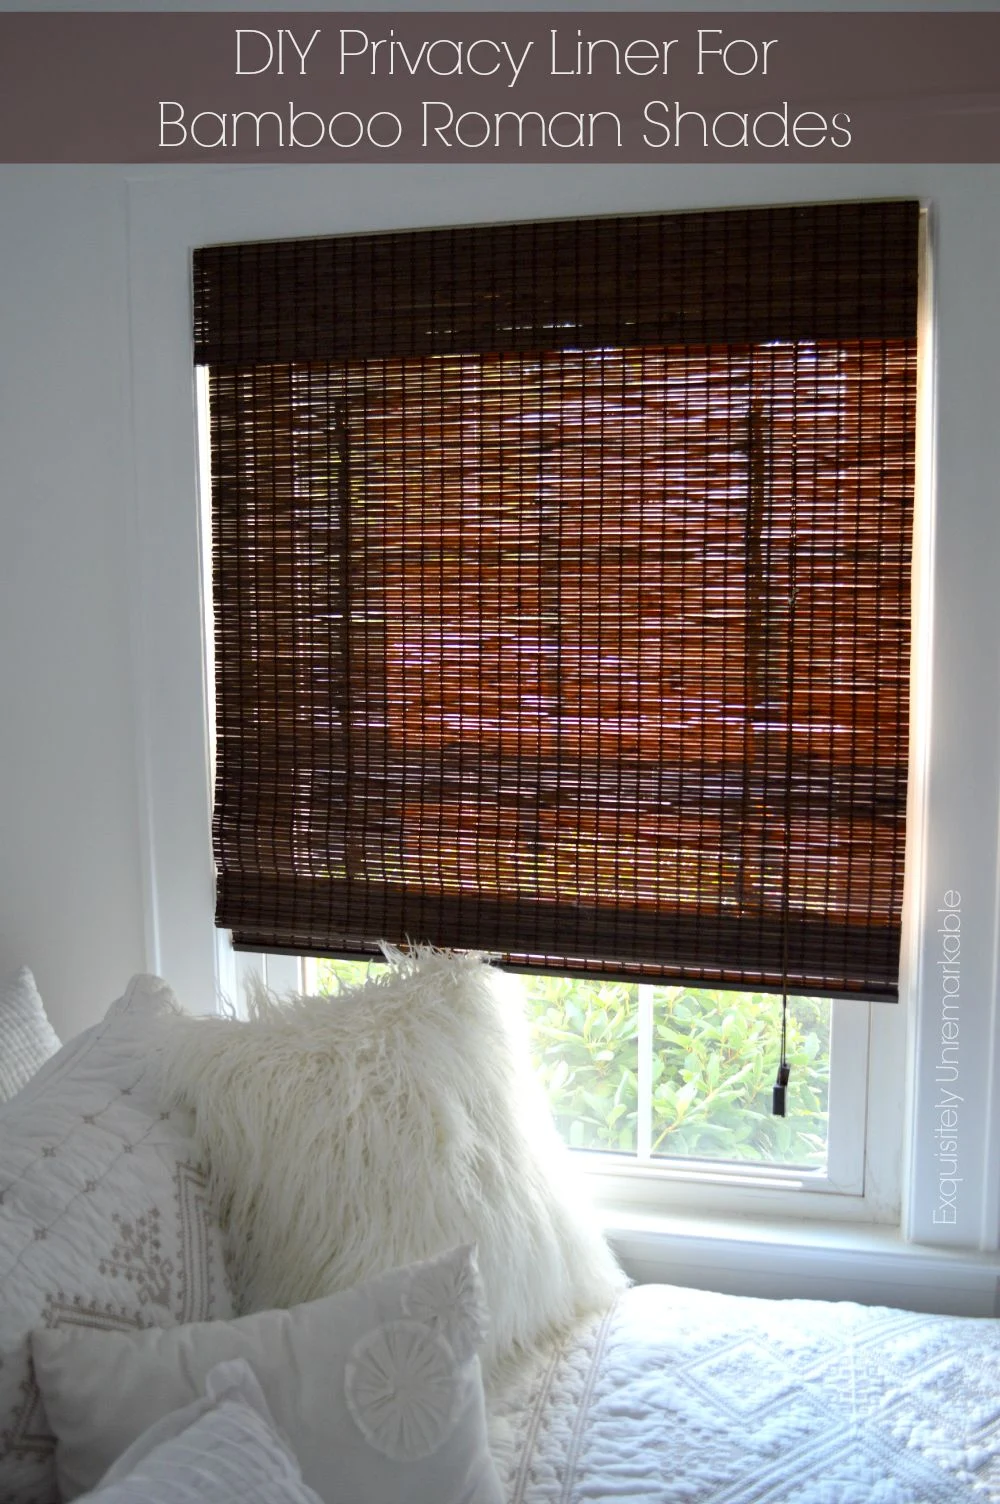
Make a privacy liner for a bamboo roman shades. It's a super easy and inexpensive DIY that will double as a room darkener. Check out the steps. So this weekend I tackled what I thought would be a very easy DIY. I was wrong. I added a privacy liner to bamboo roman shades. While it was not terribly technical, on the Exquisitely Unremarkable scale, it was more time consuming than I thought it would be. I like quick projects . Of course, in the end, it worked out perfectly.
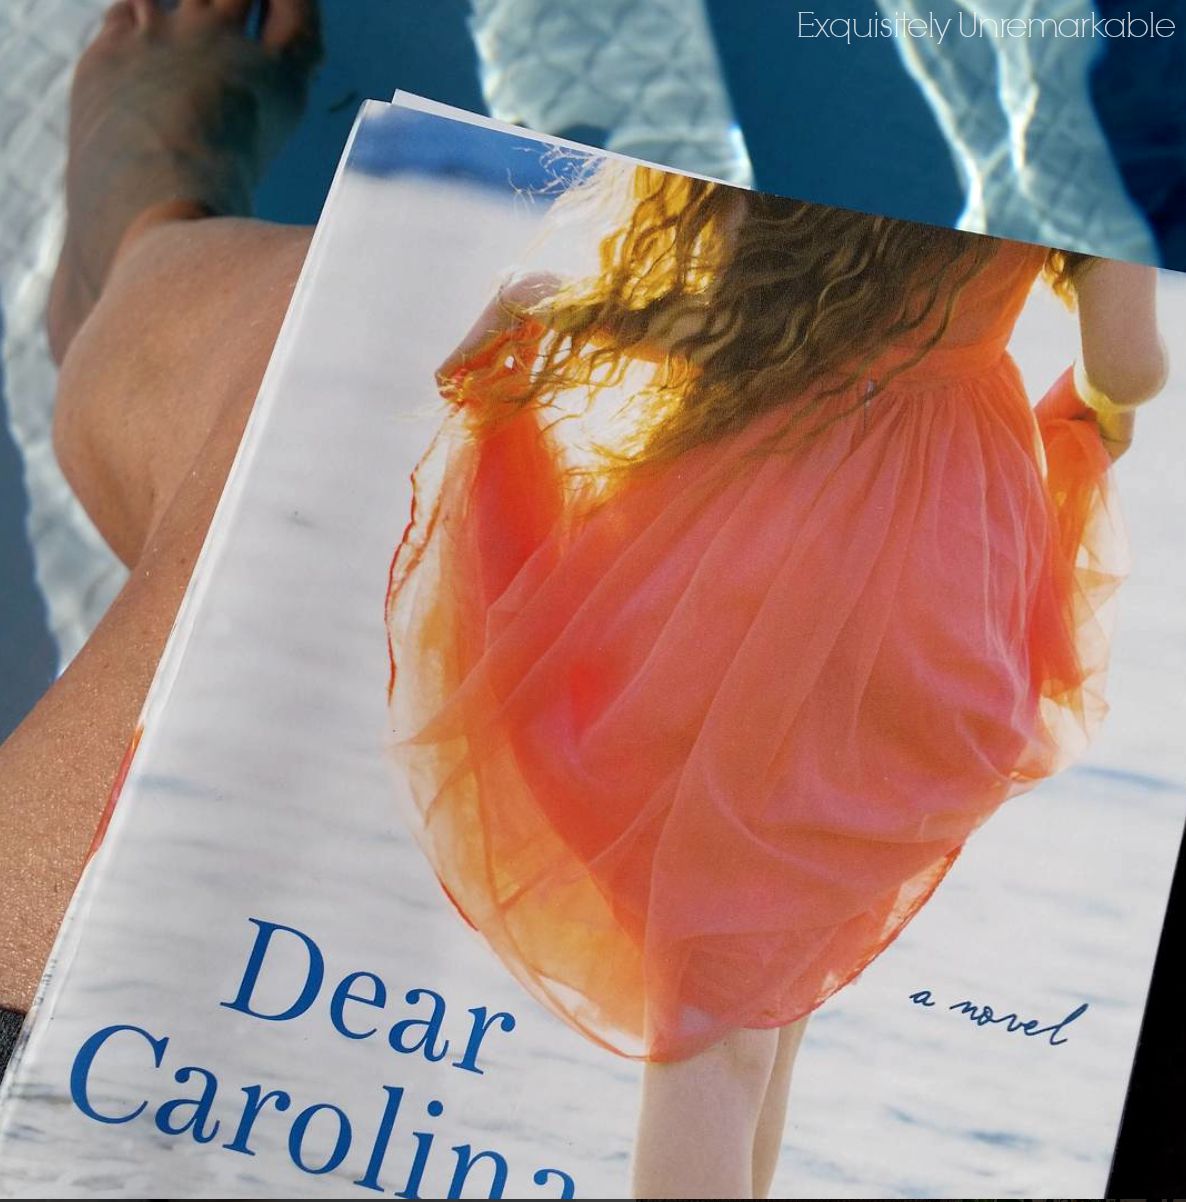
Dear Carolina is a sweet story by Kristy Woodson Harvey. If you like strong southern women, you'll love her tale of friendship and motherhood. Kristy generously provided me with a copy of her book It's been a long time since I've had the opportunity to read a book. I see books that I would like to dive into, make lists based off of your recommendations, but I never actually get the chance to pick them up. Life gets busy.
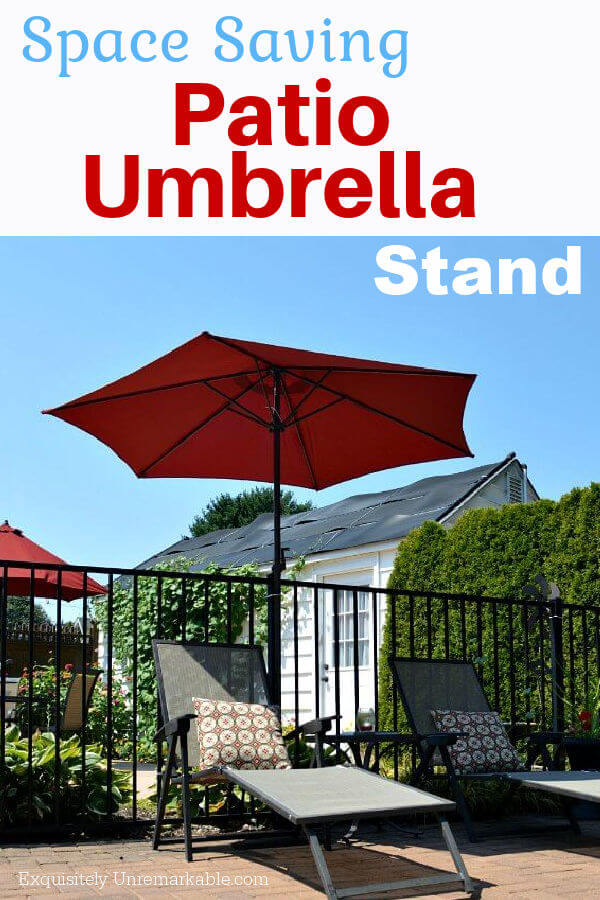
No room for an outdoor umbrella stand? No worries. Bolt the umbrella to a fence and you're made in the shade. It's a quick, easy and inexpensive summertime DIY. Come see. Everywhere you look, people are proclaiming that summer is over. Whoa, I say, not so fast. As a former kindergarten teacher, I'm very well acquainted with the calendar and each season's birthday. Fall does not arrive until the 23rd of September, people. We still have a full month of fun in the sun left and I for one am ready to take advantage of every last drop.
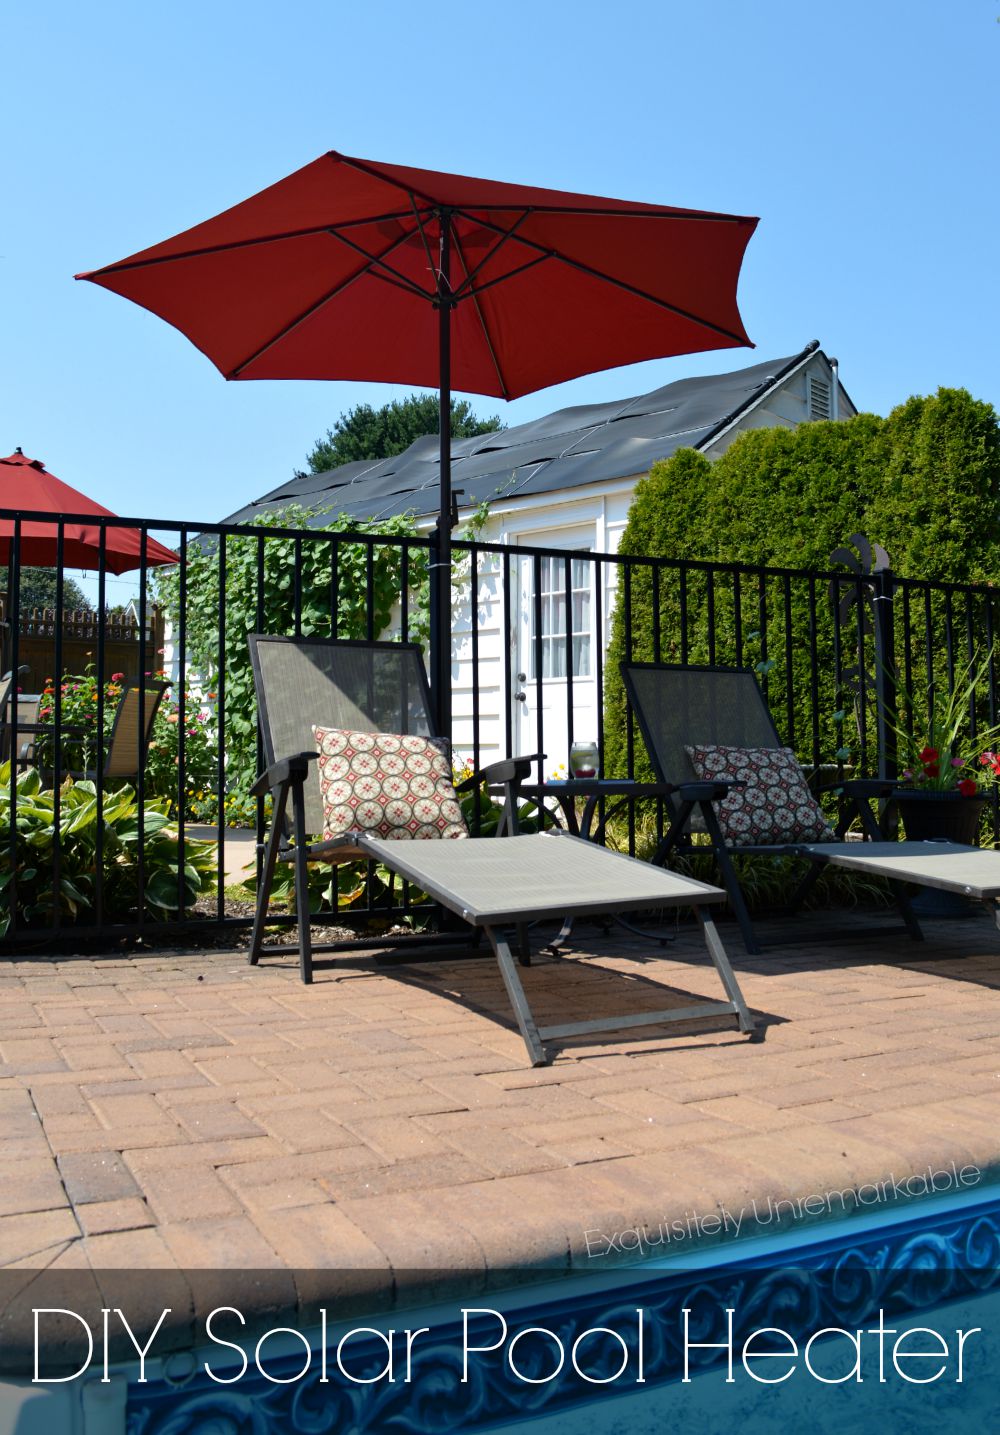
Last spring, my husband stained the concrete patio in our backyard to spruce it up and I shared the process in a lengthy DIY. A large site highlighted my post on their Facebook page and tons of comments rolled in. Most people wanted to discuss the concrete, but there was a lot of interest in my garage as well. You see, it's covered in solar heating panels for our pool. Not everyone got this, even after my explanation.

Looking for a quick way to update your old chandelier? Me too. I wanted a change in my kitchen and I was sure that a new light fixture was the answer. I just didn't expect to love my old one so much! Here she is, my naked chandelier. Isn't she a beauty? I've had this lovely light fixture since 2003, a long time, but you know, until recently, I never really noticed her elegant lines and pretty patina. That was all hidden behind her shades.
My daughter's bedroom has been pink since the first week we moved into this house, over a decade ago; at the time she was four. As you can imagine, pink lost its allure somewhere around the age of eight and she's been gunning for a color change ever since.

Apparently, there is someone out there who loves red just as much as I do...and they like the way I present that color, and a few others, so much, that they have nominated me for an Amara Interior Blog Award.
When it comes to decorating, one of my secret weapons to a perfect room, lies within the power of the price tag. Nope, it's not about buying things on sale, I mean I am a huge proponent of sale shopping, but that's not what I'm talking about.

Whip up an easy chicken francaise dinner in no time with my super simple recipe. You don't have to be a gourmet or have any special cooking skills to make this delicious meal that takes just minutes to prepare. I don't like cooking, but I do like eating, and while I could make do with cheese and crackers or cereal for most meals, my family would prefer not to. Can you believe them? To make everyone happy, I opt for very simple recipes. Today, I am sharing my quick and easy Chicken Francaise.
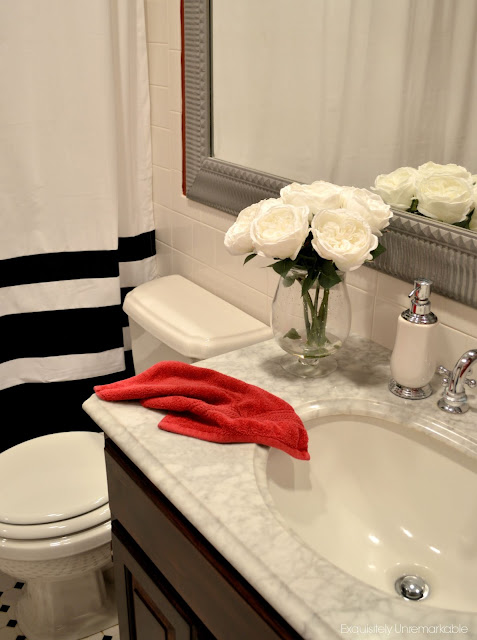
Looking for a super quick bathroom update? Swap that shower curtain out and change the whole look of the room. It's an inexpensive way to give your entire room a makeover. So what's black and white and red all over? Well, in my house it could be a lot of things, but today, it's my guest bath! Of course, in my little cottage, the term guest bath is misnomer. While it is the room used by guests, it is also our second bathroom and heavily used, on a daily basis, by some very messy teenagers. So while it looks pretty in these photos, that is not real life. In real life, the garbage pail is usually half empty, because the garbage is on the floor next to the pail. There's toothpaste in the sink, retainers and their cases on the vanity, a foot towel on the floor and those just for decoration towels, under the mirror, well, you already know how that story ends. The stubborn decorator in me ignores these facts and constantly tries to fight the tide. I want a pretty bathr

A few years ago, a girlfriend called to tell me that she had just heard the most wonderful sermon at church. It was an usual phone call, because church, religion, prayer, they weren't part of our normal conversations, but she was so taken by the priest's words that day, she just had to share. Apparently, the big news was that every ordinary day was truly an extraordinary day.
Make a professional looking wooden sign with wall art stickers. Just paint, peel and stick for a fabulous result! I've been making these lovely wooden signs using Dollar Tree wall art stickers and removable wall decals for quite a while and yet, I'm always amazed when I'm finished. They're perfect for any style decor, they cost almost nothing and can be whipped up in a matter of minutes. That's my favorite kind of project, one with a quick cheat.

Looking for an easy and original pillow cover idea? Make a simple envelope cover and adorn it with wood! A little unorthodox, but super cute. Check it out. I made the sweetest pillow this weekend and I am so excited to share. I recently refurbished a chair in my kitchen. It's just delicious in every way, except, it desperately needed a pillow.

Social Icons