Our home is a cottage.
Translation? It's small.
Yes, yes, it's cozy and full of charm.

And while I adore both of those adjectives, we all know that they're just more words for small.
So when we decorated our hallway, a million years ago, I focused on the walls and added one only tiny table to keep the path clear and unobstructed.
Well, once we tore up the carpet and painted the walls, the entire area looked a little less...cozy.
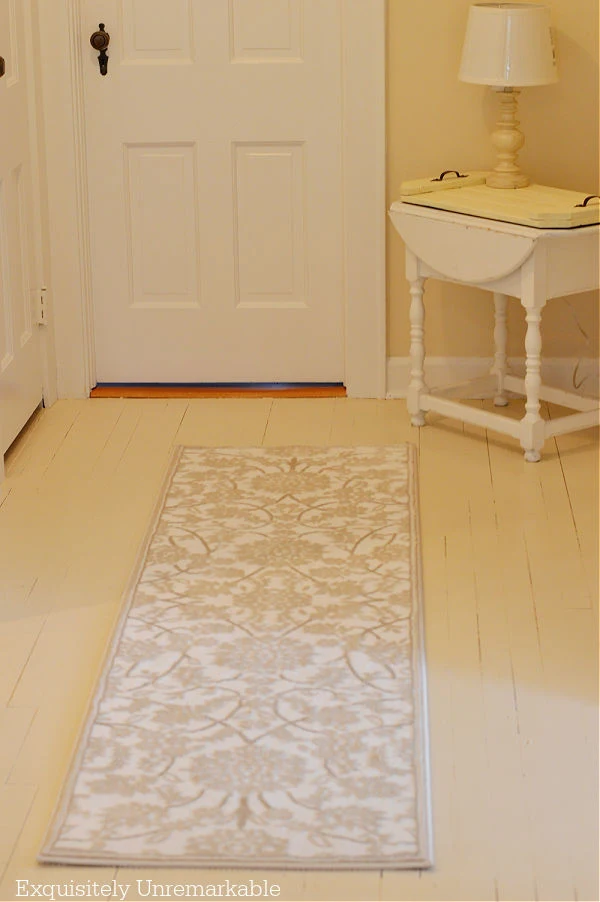
So I placed an old table and lamp in a formerly empty corner. And it made me smile.
Somehow, the addition made the space look larger and turned that pass-through into a room.
I was so committed to the new arrangement, I rescued a round table from the trash with plans to place it there permanently.
Until my daughter suggested a corner cabinet instead.
Genius.
It would give me a place to display my treasures, decorate the hallway with true style and if I were lucky, provide a bit of needed storage.
Now I just needed to find one.
That part wasn't as difficult as I thought it would be, thanks to Facebook Marketplace.

I found this dream for $25 on a Saturday morning and had it home before noon.
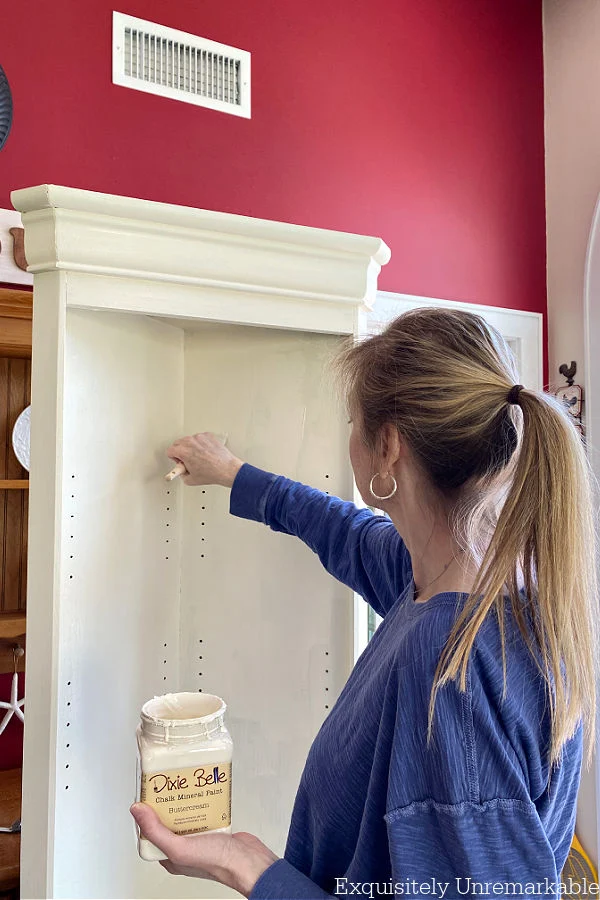
I was so enamored with my new piece, that it was painted by 2pm and moved it into the hallway by three. When it's true love, there's no need to wait.
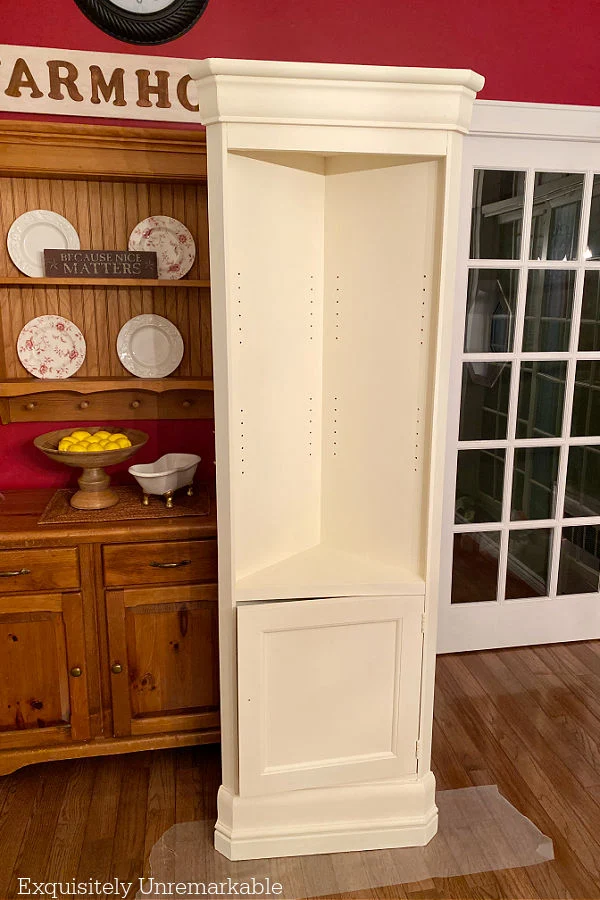
Of course, for $25, my new treasure did not come without flaws.
There were no shelves. How the owner lost them is beyond me...but for that price we could make our own.
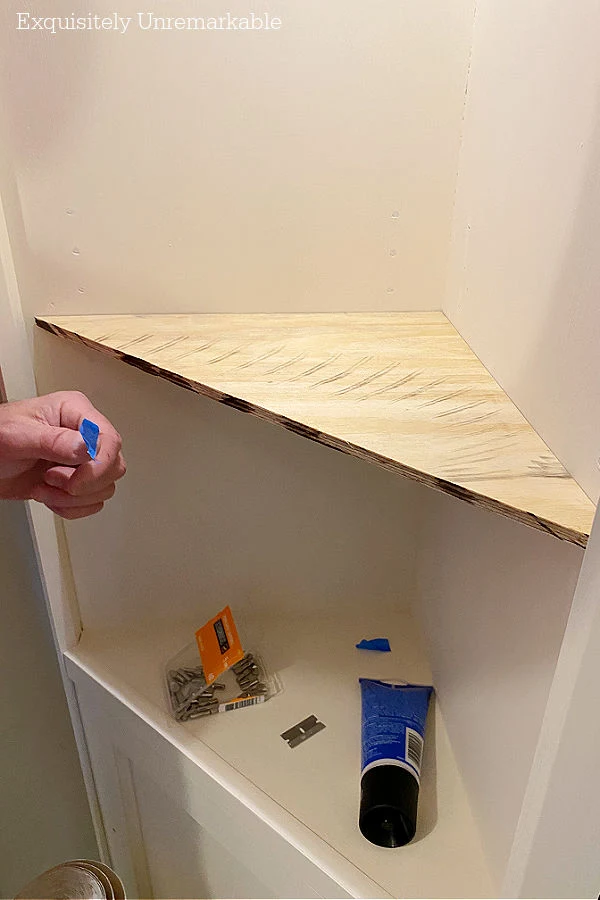
This corner cabinet looks like it was part of a larger entertainment wall unit.
There's a light in it, which is awesome, but the missing pieces were probably glass shelves so everything in the cabinet was illuminated.

They were rustic, fit the house and if I ever really wanted glass shelves at a later date I could always have them cut.

We had to add some wood filler to the peg holes we wouldn't be using to mount the shelves. They were almost invisible when the unit was dark, but with the new light paint, they stood out something awful.
Awful being the key word.
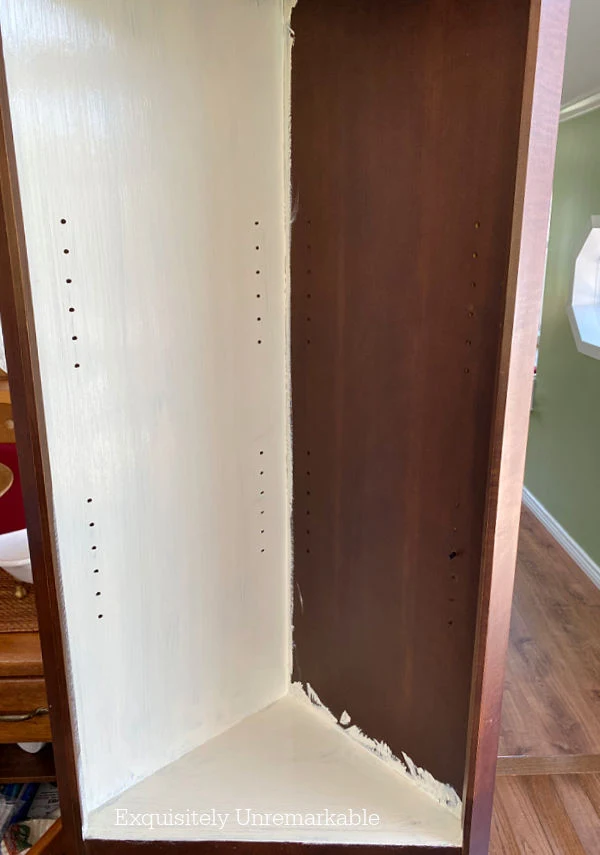
Once the filler dried, I just painted over it and I was all set.
But not for long.
You see, I originally painted the corner hutch in a color called Buttercream. It's the same paint I used to update an old glass vase.
Normally, it's my go to white/ cream color. It blends well with my decor.
Originally, I thought it would fade into the walls and make the piece look built in.
However, once we moved it into the hall, the paints were not the same.

Plus, we realized that in order to really make it look built in, we'd have to relocate an electrical outlet, remove the original mouldings, cut them around the base of the piece...and if I ever wanted to remove that piece (always a distinct possibility around here) we'd have missing mouldings in an almost 100 year old home.
So yeah, we didn't do that.
But now it wasn't built it, it didn't match the walls and it didn't pop.
And every time I walked by it, I was mad that it wasn't a very bright white.
White like the arched French doors it sat next to.
White like the mirrors that hung across from it.
White, light and bright in a dark hallway.
That's when I got out my wax paper tarp again - I'm such a pro - and painted it. White.
Much better. Not quite a home run though. I wanted the corner cabinet to have a little punch. A little style.
And yet, I wanted it to be neutral enough to display my red treasures and coordinate with the new family room decor yet to come.
Leaving the usual suspects out. The furniture transfers, colorful stencil patterns and mud textures.
That's when I stumbled upon that roll of paintable wallpaper.
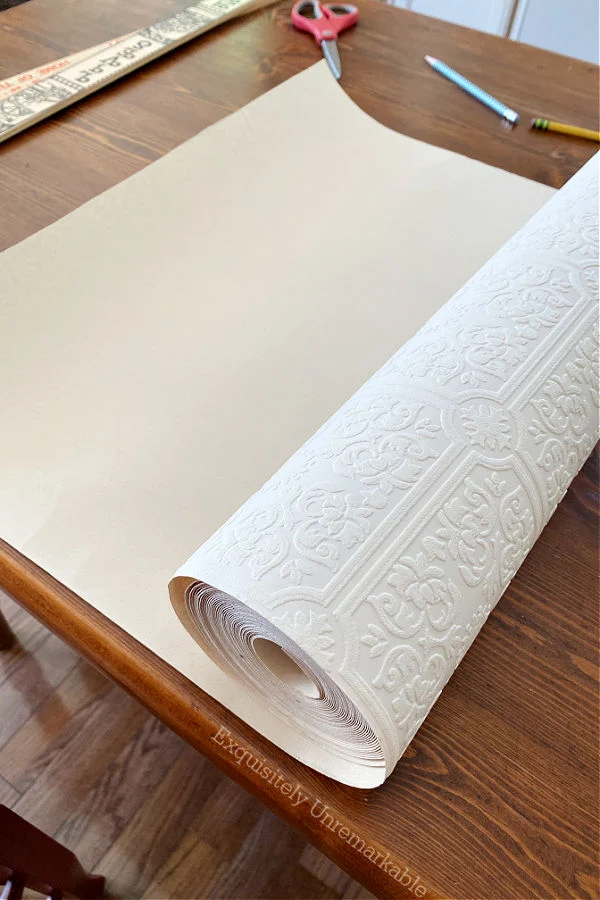
The same one, I used to makeover my thrift store wooden tray.
Truth be told. I wallpapered both simultaneously.
The tray was a little easier to do since I used a single piece for the craft.
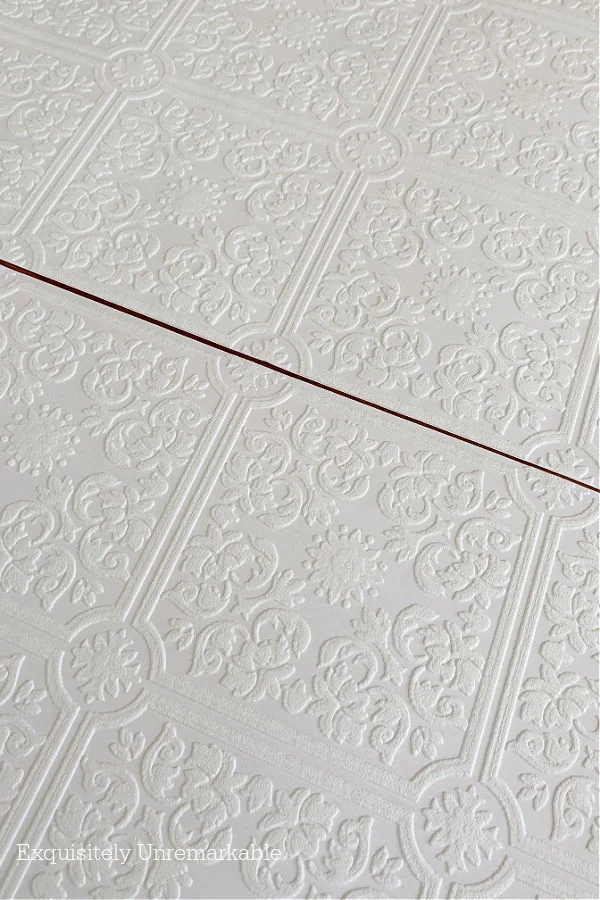
I didn't have to match up any of the pattern. With the hutch, I had to make sure that everything lined up while I was measuring and cutting.
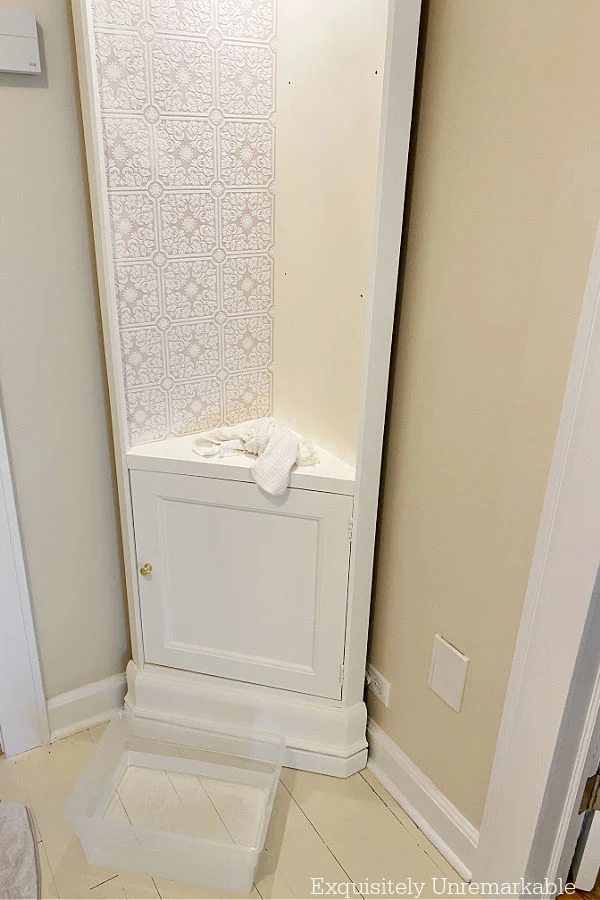
Once I had my sheets cut to size, I grabbed a small bucket, filled it with water, in the hallway, on my newly painted wood floors, and dipped the wallpaper in it.
Then I positioned each piece on the furniture and ran my hand and a damp rag over them to smooth them out. I repeated the process again on the inside of the hutch's cabinet door.

The only tricky part about this DIY was making a hole for the shelf mount pegs.
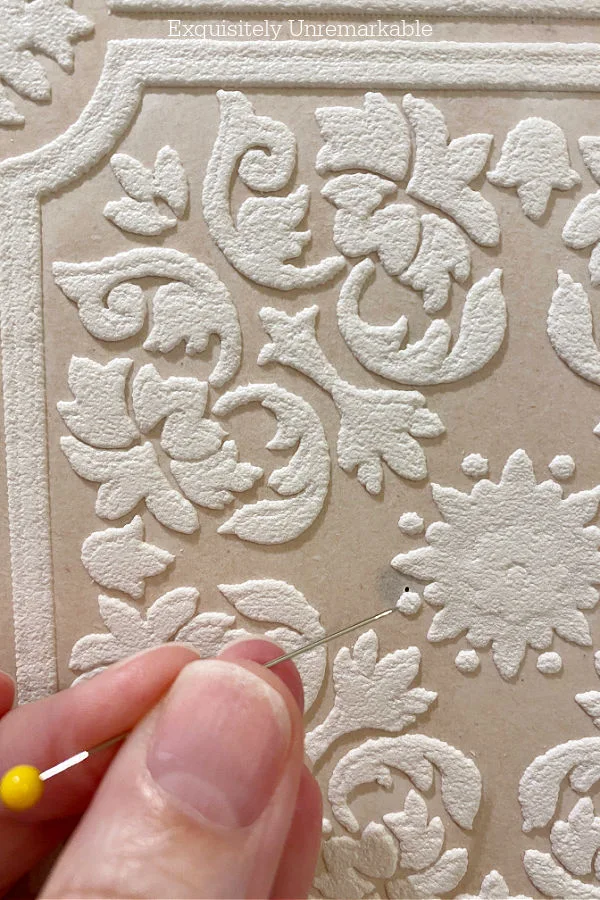
I didn't want to rip the paper, so I carefully scanned for each hole, then I took a pin and poked a teeny opening to mark it.

The wallpaper added so much interest to the corner cabinet.
Elegant, subtle and a bit nondescript. I was thrilled.
So much so that I covered a thrift store tray with it.
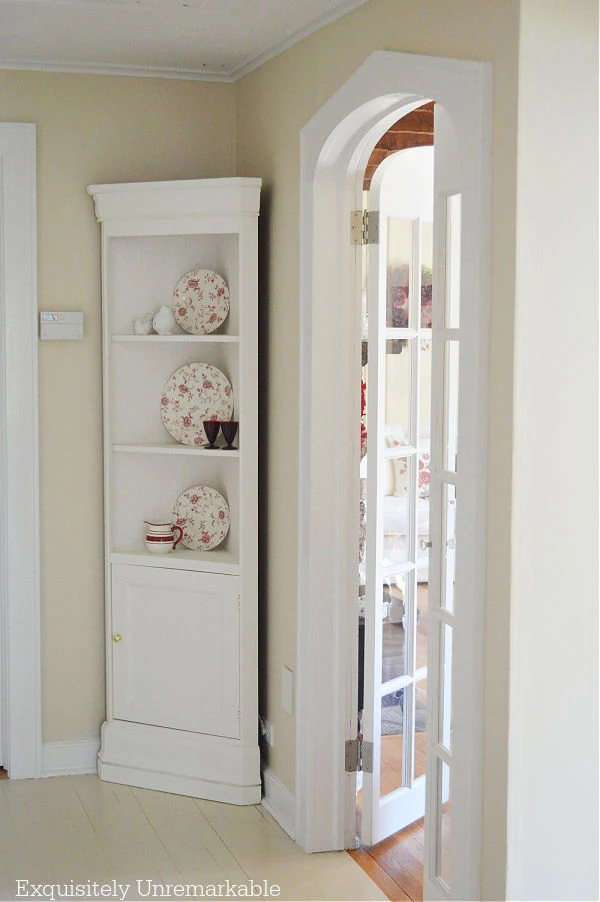
I have a few red pieces on the shelves. They're there as fillers until that green checked sofa and floral wallpaper arrive.
Then I can display items that will tie the two spaces together...like a few thrift store finds.
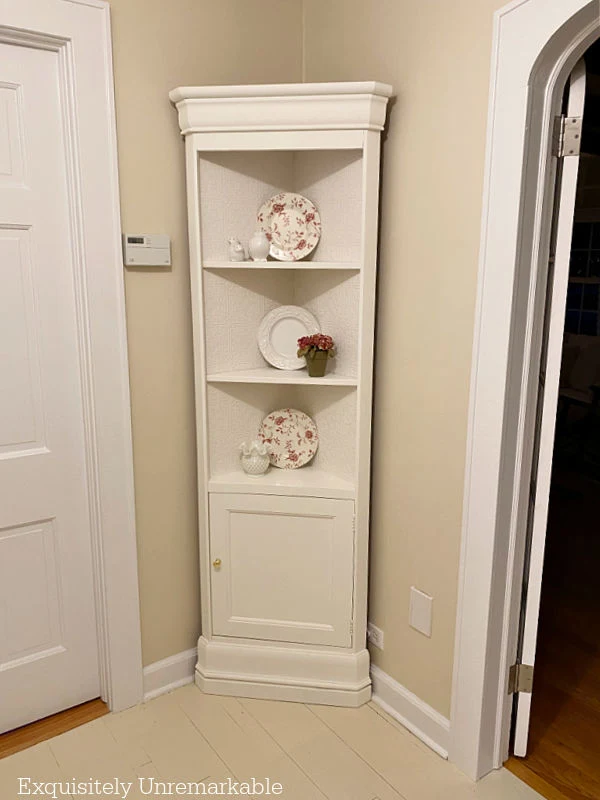
I may even repaint the hutch and/or the wallpaper in a bold, dramatic color.
Add a few furniture transfers or some rice paper.
Only time will tell.
After all, just because the hallway's small, doesn't mean my design dreams have to be.
What would you do with it?
Ps...remember that little round table I mentioned...stay tuned. I have plans!


I'd add legs to the base a bit taller than the baseboard so the cabinet would fit snug against the wall. Set the legs in from the corners 1.5" so they clear the baseboard. That would move it just far enough away from the outlet to still be useable.
ReplyDeleteAs for the decorating, I like it white! And the wallpaper is definitely the right thing!
Interesting! He was thinking of adding wood moulding to the sides to fill those gaps, but your idea has the wheels turning. I'm going to share your comment right now. See...I told you this was probably just temporarily complete. 😉 Thanks for the suggestion!!
DeleteIt's another home run! Painting it white and putting that wallpaper in it made such a difference! It fits just perfectly in that corner, and $25? I'm thrilled for you.
ReplyDeleteThanks so much, Mari! I can't believe it was $25. All the other ones I found were at least $100 and they were in terrible condition. Or too big! Tiny hallway problems!! Haha!!
DeleteAdding the paintable wallpaper along with the white paint looks so good. I am sure once you have the couch and wallpaper you will find just the right color to paint it to pop and pull the rooms together. Have a good week. xoxo Kris
ReplyDeleteThanks Kris! I may just leave it white and find the perfect accessories, too. I’m not sure yet. I know you get it though. Things change often around here and that’s ok! ☺️
DeleteLove your stylin’ and ability to think outside the box.
ReplyDeleteAnd I love your story riding along with . . .
Sweet little 25$ piece . ..
You just totally made my day!! Thank you so much for the sweet comment. 🥰
DeleteIt is lovely, Kim. My house has a corner cupboard that came with the house. It is a freestanding piece, like yours, but the lower front is carved to match the profile of the baseboards. It allows the cupboard to be pushed up flush with the wall. I am guessing that they used a technique like they use to butt up crown molding in the corner. There is a tool called a contour gauge that is used to copy the shape of the molding and transfer it to the cupboard where it can be cut out. In my case, the cupboard and baseboards are painted the same color so it isn't really noticeable. I don't have, or have used a contour gauge but they look easy to use. Pretty sure a coping saw or a dremel could cut out the curved pieces.
ReplyDeleteTHIS is what I love about the comment section on my site...so many super smart and ingenious people willing to generously share their creative ideas with me. Thank you!! I LOVE this and never would've come up with it on my own. I have to show my husband this comment, as well, and see if he's ever heard of a contour gauge. I know he has some of my dad's old tools in that mess of a garage. It's possible he has something in there to make it work. Thank you so much for taking the time to suggest it and share about your own corner cupboard. That is the one drawback about comments...I can't see all of your lovely treasures!! ☺️
DeleteKim you are on an uber creative roll. Are you going to sleep exhausted? I love it. The paper gives it such a rich look. What do you think of a fern or a basket or a fern in a basket (😊)on top? I know it’s more to clean and dust but I think it would anchor it nicely. Something tells me there will be more work to this piece!
ReplyDeleteHi Susan! I was considering something up there and I love the idea of a plant, thanks!! It would tie in a little bit of green with the new sofa, and it would bring some life into a dark and windowless space. That family room sofa is really holding up the works here!! 😂
DeleteHi Kim, I will have to try and figure out why I am showing up as anonymous. Let me know if you want me to email you a picture of the bottom of my corner cupboard.
ReplyDeleteLorri
Mom's Hobby Farm
Thanks Lorri!! I'd love to see it, yes please!! Also, you're not alone with the anonymous thing...Blogger is updating the comment system and it's wacky! I hope it's fixed soon.
DeleteI love it painted white. What a find! I think with a basket on top and one beside the bottom, as well as a seasonal banner hung across, and more seasonal items, you won’t really notice it’s not built into the baseboards. Also I would probably hang something on the wall. Our home is well over 100 years old and distracting the eye is just necessary! Nothing is perfect or level. This is Sherri and I enjoy your blog.
ReplyDeleteSherri, thank you so much for those great suggestions (I just love the banner idea!!) and for the kind comment about my blog. Big smiles over here!! So funny, I recently saw two faux topiaries in white planters in a thrift shop and I thought one would look great on the shelf, but I wasn't sure where to put the other so I passed. Now I know! It would be perfect on the floor, covering up that outlet! Now I need to find some artwork for that wall! Thanks for sharing your decorating fixes, I just know your 100 year old home is gorgeous!
DeleteI love it! I think the person that commented on the legs made a lot of sense!
ReplyDeleteI'm still working on that, Penny, but it's great to have so many suggestions.
DeleteThe wall paper looks great! I really like it white so whatever you display there will pop! I don't know if you could scribe it to make it fit against the wall. But you should think about 'floating' the cabinet above the baseboards by screwing it into the wall so it clears them and will sit tight against the wall. I think adding legs, as one reader suggested, may look odd. I will DM you a picture for inspiration :)
ReplyDeleteThanks Sara, I'll take all the inspiration and suggestions I can get. I'd love to make this really look like it belongs in my charming old house.
DeleteI love it, Kim! You and your husband are great at this. I wouldn't change a think. Do you know any other "red" bloggers out there, because I tend to just see the ones who love beige, white and gray. Not that I don't like those colors too.
ReplyDeleteBrenda
Thanks so much, Brenda!! Most of the red loving bloggers I follow are on Instagram. I'll have to put together a list and share.
DeleteKim it looks like it was made for that corner! I love everything about it and the dishes are perfect there!!
ReplyDeleteThanks Mary!! Those dishes are my favorite. I'm glad to have a place for them.
DeleteI like it. :-) I also like what the first comment shared, maybe add legs? I love the wallpaper idea that you did, well done on that idea, it really made it lovely.
ReplyDeleteThanks Carla! I really do have to think about all the great suggestions for that piece. I love this creative and generous community!!
DeleteKim, that is gorgeous! The cabinet itself is a home run, and fits your small space perfectly, and the wallpaper idea is brilliant! I love the whole look, and if you decide to put legs on it, it's going to be so cute. I always wonder if the people who get rid of things would want them back if they saw how cute they turn out!! That's just me though. Hee hee.
ReplyDeleteThanks Florence! Hahaha...I know someone who takes pictures of their madeover furniture and they put it in the mailboxes of the houses where they found the trash!! I wonder if they want it back, too.
DeleteGreat find! Knowing me, I would add a pot plant on top that would tie in the reds. I would pick something faux, so no watering, and have it trail down a bit. Looks like it fits the corner perfectly. Adding feet to the bottom may make it unstable - just a thought.
ReplyDeleteI definitely need a plant, Gina! And not watering would be ideal, since I am not a good plant mother!!
DeleteAnother awesome find, Kim and done up to perfection for that spot. Maybe the hubby can make a false bottom extension for the corner cupboard that raises it up above the original moulding and put some of the moulding across the front of the false bottom? No idea if that makes sense. Either way it looks lovely.
ReplyDeleteI love that idea, Michelle. I'm going to send this suggestion to him. Thanks for sharing your creativity with me!!
DeleteYou did a great makeover to the cabinet Kim. What a difference it looks painted white and with the wallpaper. It looks great in the corner and I hope you have fun decorating the shelves.
ReplyDeleteThanks Julie! I really did like the plain and painted, but now I love it!
DeleteYou are a woman after my own heart, Kim - instant gratification is my M.O. But still, getting the cabinet painted within hours of finding it is speedy work! It looks great, and the wallpaper definitely was a great add. Enjoy decorating it!
ReplyDeleteThanks Amy...and yes, speedy and instant gratification. Well, sometimes. I have a roll of fabric that's been sitting in my kitchen for weeks. I guess I have selective speediness!!
DeleteKim,
ReplyDeleteI LOVE this sweet corner wall cabinet and adore what you have done with it!!
So very pretty and to me , it looks perfect there....Thanks so much for stopping by and for taking the time to leave such a sweet comment!!
Hugs,
Debbie
Thanks Debbie! It was a right place, right time kind of find and I do love it.
DeleteIt usually pays to wait for just the right piece at the right time. Looks like you lucked out finding this beauty at such a perfect price! The makeover was worth it, it looks fabulous!
ReplyDeleteThanks so much! You're right, it was very worth the wait...I can't believe the deal I scored.
Delete