I found an old glass cutting board at the thrift store for $1.99.
It was scratched up, but with a little bit of decoupage magic, I turned it into a showstopping, functional new addition to my cottage style kitchen.
Here's how I did it.

Several years ago, I found an old glass cutting board at the thrift store and decided to give it a makeover.
It was a pretty piece and in pretty good condition.
I just didn't like that paper bag pattern.

So I grabbed this paper guest towel and gave it a makeover.
One that was more fitting for my home. And fall.
Unfortunately, after one season in the kitchen, it disappeared and found its way to the bathroom.
Where my girls were using it to protect the wooden countertop my husband built from the heat of their curling irons and straighteners.
It worked wonders, but I lost my kitchen helper.
So you can imagine my excitement when I found this cutting board in a thrift store last month.
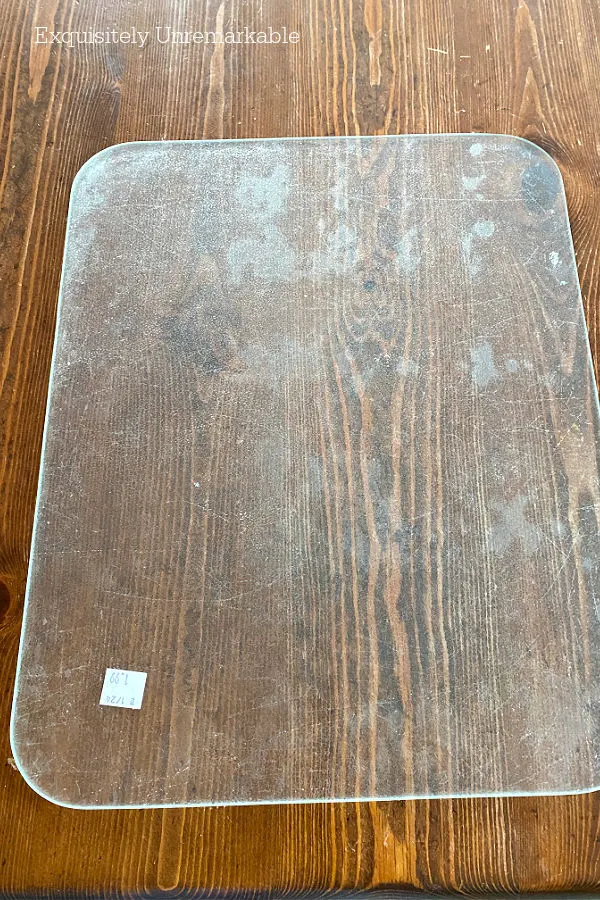
I grabbed it immediately.
It was a little beat up, scratched and scuffed, but it was only $1.99 and I knew that my DIY would cover up all those markings.
Plus, this cutting board didn't have a design on it that needed to be scraped off, like the last one.
That made the makeover even easier this second time around.
I love when that happens. I also love it when I already own all the other supplies I need for a project.
In this case I had a ton of napkins and rice paper tucked away in my craft armoire. So many fun choices, new and old.
At first I thought I'd use an old favorite. Red geranium guest towels that I'd used on a wooden crate makeover.
They were the right color and the right size, but then this unopened package of floral dinner napkins literally fell out of the cabinet and onto my head. Clearly, meant to be, so I went with it.
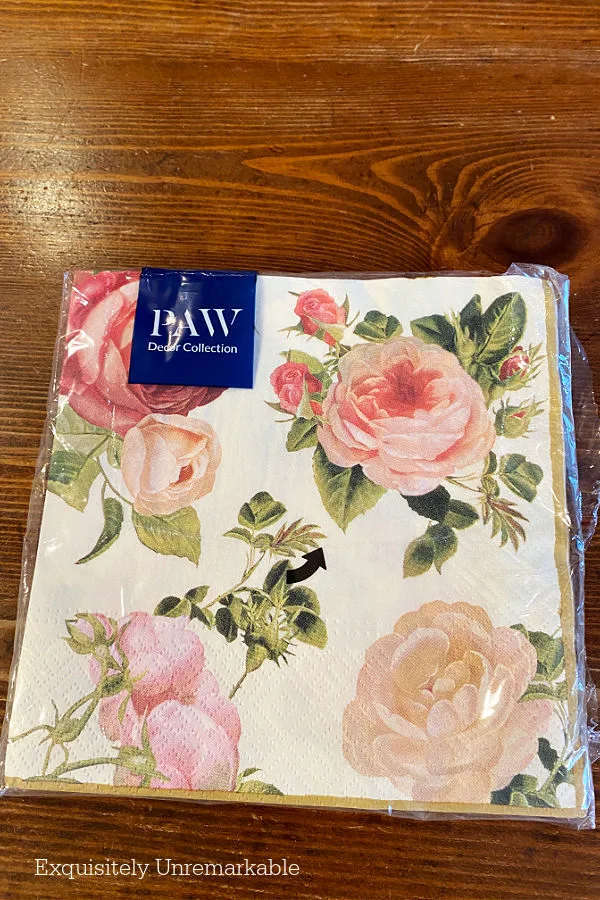 |
| See The Floral Napkins Here |
I played around with a few scenarios until I found a design that I liked.

Then I got down to business.
How To Decoupage A Glass Cutting Board
I started by washing the cutting board with dishwashing soap and water to remove any dust and the sticky price tag residue.
Luckily, it came off easily and I didn't need to use my favorite, all natural goop remover trick.
Next up, I dried it thoroughly and let it sit while I carefully separated the napkin layers to ensure I would only be decoupaging the patterned one.
I went slow, because I didn't want to tear any of the top patterned layer.
It can be a little tricky to spot all the layers, since some napkins are two ply and others are three and that third one is often tightly secured to the top.
Sometimes, I have to admit that I've willingly sacrificed a napkin and torn it to check the layers. It's the easiest way to get them apart especially if they're stubbornly stuck together.
It's worth it though, because if I miss a layer, it's a real mess to undo the decoupage and start again.

With my napkins ready to go, I grabbed my satin sealer, which I always use as my decoupage medium of choice, and added it to the bottom of the cutting board with a brush.
You could also use Mod Podge, I'm just not a fan.

When the entire surface was coated I placed my napkin on the cutting board with the rose patterned side down.
Again, my napkin was a square, so I had to use two napkins to cover all the glass.
I decided the best - and easiest - way to do that was to line up the gold edges of the napkins to create a decorative border where the two met.
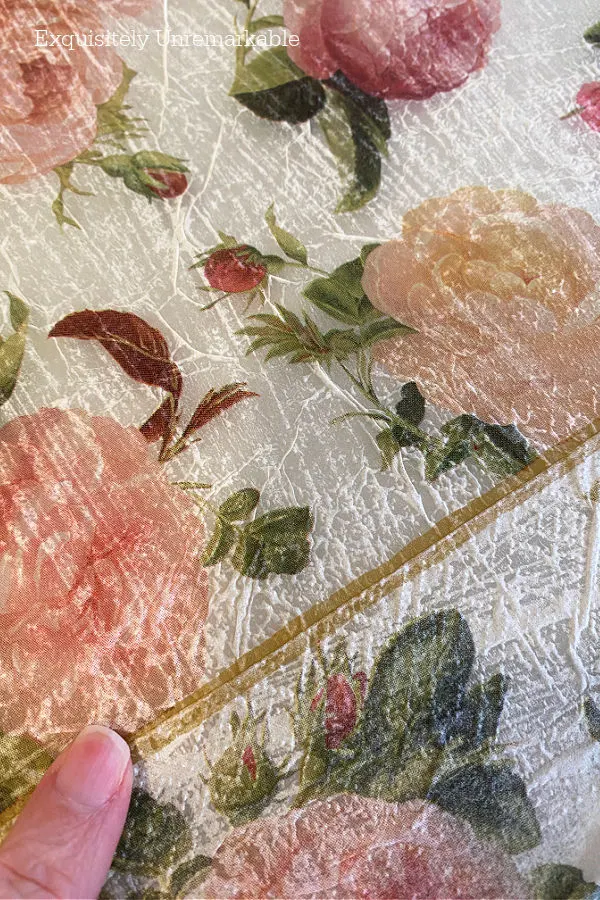
This way I didn't have to worry about trying to match up the roses or cutting them out to patch them in. Everything lined up nicely and it created a natural border.
That's when I got out my trusty vinyl glove.

It's my go to tool for smoothing out the wrinkles and bubbles that pop up.
My fingers don't get sticky and pull on the napkins and tear them as I move my hand along the top of the wet napkin.
If you don't have a glove, I find that a piece of clear plastic wrap or a zippy bag works equally as well.

When everything was smooth and set, I added another layer of decoupage over the napkin to seal it in place.

Then I left it alone for several hours while it dried completely. The last step in this part of the process was to remove any of the napkin that hung over the edges of the cutting board.
I used a small sanding pad for that.
I've found that as long as the napkin is completely dry, this is the easiest way to finish the edges.
Before I started decoupaging the cutting board, I realized that it didn't have feet of any kind. That wasn't ideal.
It certainly made it easier to decoupage, I didn't have to remove the feet before adding the napkin.
However, rubber feet would protect my countertops and tables and protect the decoupage surface, as well.
So I added them.
I had a package of these self-adhesive protective bumpers in my stash, so I just peeled them away from their backing and stuck them to the bottom of the glass cutting board.
One in each corner.
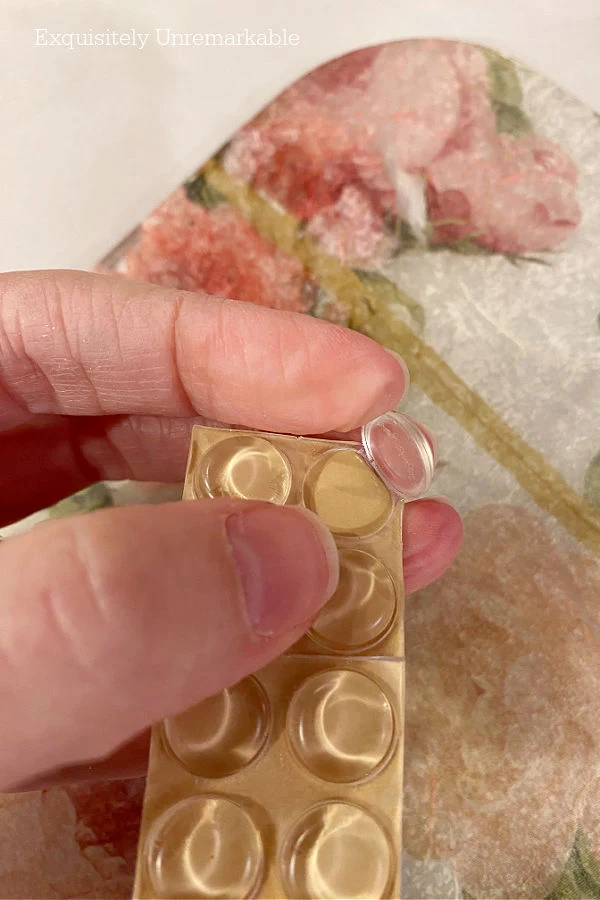
When I was done, I had a lovely and very useful new addition to my kitchen.
The scratches and scuffs were completely camouflaged and all I saw was a wall of roses. Plus, with the pattern only on the backside of the cutting board, I can use it for food with no reservations about safety.

Even better, the Dixie Belle Clear Satin Sealer, that I used to decoupage the napkins onto the glass, is water resistant and can be wiped clean after 7 days of curing.
That means I can use the cutting board and then wash it off and dry it without worrying if the bottom gets a bit wet.

Of course, if I want to use it strictly as a display piece, I can do that, too.
In fact, right now it's propped up behind my stove to add a little spring flair to my countertops.
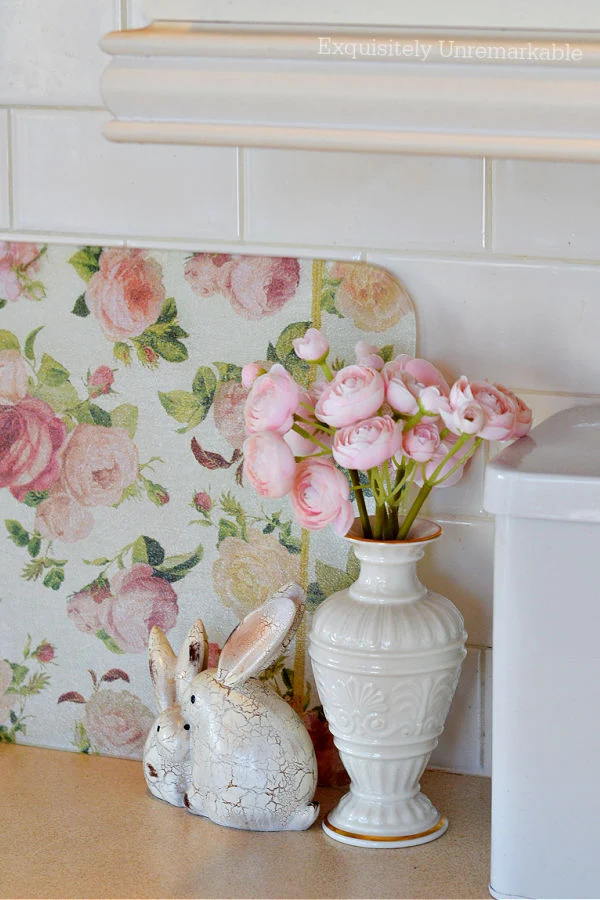
Not bad for a $1.99.
And you can bet that this time, I'm not letting it out of the kitchen.
Sorry girls.
😉
What do you do with old glass cutting boards?
Here are a few other cutting board makeovers:
Happy Thrifting, Friends!
Luckily, it came off easily and I didn't need to use my favorite, all natural goop remover trick.
 |
| Glass Cutting Board Here |
Next up, I dried it thoroughly and let it sit while I carefully separated the napkin layers to ensure I would only be decoupaging the patterned one.
How To Separate The Napkin Layers
I went slow, because I didn't want to tear any of the top patterned layer.
It can be a little tricky to spot all the layers, since some napkins are two ply and others are three and that third one is often tightly secured to the top.
Sometimes, I have to admit that I've willingly sacrificed a napkin and torn it to check the layers. It's the easiest way to get them apart especially if they're stubbornly stuck together.
It's worth it though, because if I miss a layer, it's a real mess to undo the decoupage and start again.

The Decoupage Process
With my napkins ready to go, I grabbed my satin sealer, which I always use as my decoupage medium of choice, and added it to the bottom of the cutting board with a brush.
You could also use Mod Podge, I'm just not a fan.

When the entire surface was coated I placed my napkin on the cutting board with the rose patterned side down.
Again, my napkin was a square, so I had to use two napkins to cover all the glass.
I decided the best - and easiest - way to do that was to line up the gold edges of the napkins to create a decorative border where the two met.

That's when I got out my trusty vinyl glove.

It's my go to tool for smoothing out the wrinkles and bubbles that pop up.
My fingers don't get sticky and pull on the napkins and tear them as I move my hand along the top of the wet napkin.
If you don't have a glove, I find that a piece of clear plastic wrap or a zippy bag works equally as well.

When everything was smooth and set, I added another layer of decoupage over the napkin to seal it in place.

Then I left it alone for several hours while it dried completely. The last step in this part of the process was to remove any of the napkin that hung over the edges of the cutting board.
I used a small sanding pad for that.
 |
| Similar Sanding Pad |
I've found that as long as the napkin is completely dry, this is the easiest way to finish the edges.
Adding Rubber Feet
Before I started decoupaging the cutting board, I realized that it didn't have feet of any kind. That wasn't ideal.
It certainly made it easier to decoupage, I didn't have to remove the feet before adding the napkin.
However, rubber feet would protect my countertops and tables and protect the decoupage surface, as well.
So I added them.
 |
| Rubber Bumpers |
I had a package of these self-adhesive protective bumpers in my stash, so I just peeled them away from their backing and stuck them to the bottom of the glass cutting board.
One in each corner.

When I was done, I had a lovely and very useful new addition to my kitchen.
The scratches and scuffs were completely camouflaged and all I saw was a wall of roses. Plus, with the pattern only on the backside of the cutting board, I can use it for food with no reservations about safety.

Even better, the Dixie Belle Clear Satin Sealer, that I used to decoupage the napkins onto the glass, is water resistant and can be wiped clean after 7 days of curing.
That means I can use the cutting board and then wash it off and dry it without worrying if the bottom gets a bit wet.

Of course, if I want to use it strictly as a display piece, I can do that, too.
In fact, right now it's propped up behind my stove to add a little spring flair to my countertops.

Not bad for a $1.99.
And you can bet that this time, I'm not letting it out of the kitchen.
Sorry girls.
😉
What do you do with old glass cutting boards?

Here are a few other cutting board makeovers:
- Wooden Cutting Board Charcuterie Board
- Wooden Cutting Board Sign
- Wooden Cutting Board Makeover For Fall
Happy Thrifting, Friends!


I love it! I have a glass cutting board and the design is wearing off. After reading this it may wear off sooner than later. 😉 thanks for posting all the instructions. BTW I am so glad I found your blog. It brings happiness to my day.
ReplyDeleteOh my goodness! Thank you for that very, very kind comment!! You have no idea how happy that makes me! ❤️ I'm also so glad that you found this DIY helpful. I'm not sure if you saw it, but there's a link above to the first glass cutting board I did a few years ago. It has a backing I removed. It might help you remove yours! 😉
DeleteJust beautiful Kim and it matches your cottage style so much. Have a great rest of the week. Hugs. Kris
ReplyDeleteThanks so much, Kris! It was definitely worth the $1.99 investment! 🤣
DeleteOk - you frequently surprise me, but this one really got me! I thought "What will she do to make this pretty?" And then I started reading and I thought "using 2 napkins isn't going to work". Well, I take it all back! I love that gold stripe on the side and it turned out so pretty! It's a great addition to your kitchen for a real bargain!
ReplyDeleteHaha!! Thanks so much, Mari! It was definitely a fun makeover and, trust me, those square napkins had me on the ropes for a bit, too.
DeleteThis is such a beautiful transformation, Kim. Roses are my favorite flower so I may be a bit partial!
ReplyDeleteThanks so much, Ann! I've had those napkins for a long time. I'm so glad I was finally able to find a way to showcase them.
DeleteOh, that's a very pretty upcycle. I have a glass cutting board that I got eons ago at Goodwill. I am currently using it under my coffee pot. Its got a kitschy fruit photo on it that somehow goes with my kitchen and makes me smile. (:
ReplyDeleteThat's the best kind of design, Gina, one that make you smile!!
DeleteI always learn so much from your posts! Again, you mentioned the Dixie Bell Satin Sealer, which I will be using (at some future date!!) based on your recommendation. I love the napkin pattern you choose; feminine, elegant and just plain pretty! I did pick up a thrift glass cutting board; it's a kind of a vintage botanical scene and like you, I sometimes prop it up against the back splash in my kitchen. Thank you for the inspiration!!
ReplyDeleteKristine, I love that DB Satin Sealer. It has no odor and works really well. Mod Podge used to be my go to, but I never liked the smell and thought it stayed tacky for far too long. That's a great find, a glass cutting board that's in good shape and one that has a pattern you like. It sounds lovely! ☺️
Delete❤️❤️❤️❤️
ReplyDeleteThank you!! Love the hearts! A picture's worth a thousand words.
DeleteThis turned out so great! You really are so clever!
ReplyDeleteDeanna Rabe
Thank you so much, Deanna! I had fun with this one.
DeleteVery lovely! - Briana from Texas
ReplyDeleteThank you so much, Briana! I have to say, I'm going to be on the lookout for more of these at the thrift store.
DeleteKim, I love it. So pretty. As you might know by now that I attempted a piece of decoupage. I used mod podge and I don't think I like it either. I used a scrunched up piece of saran wrap but mine tore anyway. Not my finest hour but in my defense I should have not picked such a curvy shape, Maybe next time! xxoJudy
ReplyDeleteJudy, I get it. When I first started with decoupage it was a mess. It took me a long time to figure it all out and find a way that worked well for me. I think you should try again, you can do it, but yes, start with something flat! ☺️
DeleteKim , I love it. Thanks so much for the Dixie tip and link. I use Modge Podge but it’s great that the Dixie is water resistant. Love your tutorials. If I ever learn to sew( I should have paid better attention to my grandmother and Mom) I will take a crack at those valances❤️
ReplyDeleteSusan! I love when I see your name in the comments. You always make me smile! ❤️ Trust me, I didn't listen to my aunt or my grandmother either. I should've, but that's why I'm making these kinds of valances as opposed to pinch pleat drapes...🤣...and trust me, if I can do it, so can you! Happy (almost) spring, my friend!
DeleteI haven't decoupaged anything in a LONG time....but I always loved doing it. I think I need to try my hand at it again. I had one of those glass cutting boards many years ago but I could not stand the 'sound' when I actually used it for cutting. lol
ReplyDeleteI read your peanut butter method for removing labels. I have never used it for that but I used it a lot of times over the years to get gum out of my kids' hair. Bad mouthing the people that gave them gum the whole time. It works like magic and their hair was soft and silky afterwards. lol
Have a wonderful Wednesday- xo Diana
Hello Diana! Oh gosh, I wish I knew that peanut butter/ gum trick when I was babysitting. I remember one little girl went to bed and snuck a piece of gum without me knowing and when I went back to check on her it was stuck in her hair. Yikes! Definitely not worth the $3/ hour I was being paid! 🤣 Happy Wednesday to you, too!
DeleteWhat a beautiful transformation, Kim--and oh-so thrifty!
ReplyDeleteThank you so much, Cecelia! I just linked it up at your pretty party!!
DeleteIt turned out fantastic.
ReplyDeleteI do appreciate the time you put into your tutorials for us readers.
Carla
You're so sweet, Carla!! I'm glad you enjoyed it. ❤️
DeleteWhat great results and a great budget stretcher, too. Pink roses are my fave and I collect vintage dishes with them. Your tutorial was nicely detailed with the pictures, too! I think I'd decoupage a few Easter eggs with those napkins, too!
ReplyDeleteThank you so much, Kathy!! I'm so glad that you really liked this makeover. It was an easy one and glass cutting boards are so readily available. So I was excited to share. Your pink dishes sound lovely. I am a dish addict, too, so I get it!!
DeleteThis does look very nice, well done :)
ReplyDeleteAll the best Jan
https://thelowcarbdiabetic.blogspot.com/
Thanks so much, Jan! It's a bright spot in my kitchen for sure.
DeleteI ❤️ it, Kim!! The roses add such a charming cottage flair to the board. Great job!!
ReplyDeleteThanks so much, Kitty! I was so happy I finally had an occasion to use those napkins. ☺️
DeleteYour cutting board turned out so lovely, Kim. Sadly, I struggle to find any of the Dixie Bell products here in S Africa and when I do, they're way out of my budget (I think it's the shipping costs that make it so expensive). Maybe I should ask the kids to smuggle some in next time they come visit ;-)
ReplyDeleteKim,
ReplyDeleteWhat a great idea!! Love the way it came out! Very pretty!! Another great transformation!! Thanks so much for sharing!!
Hugs,
Deb
Debbie-Dabble Blog
What a beautiful piece this turned out to be! I just love the floral design you chose - speaks to my heart too! Nice that it works as both decorative, and functional too! Always enjoy your amazing tutorials :)
ReplyDeleteI love anything with roses on them, I especially love the way you married the two napkins together Kim! I will have to be on the out for future cutting boards because this is a phenomenal makeover. I really need to get out to the thrift store soon so I can see what they have available. The last time I ventured out, I could not get over the pricing, it was so high! I will have to take another looksee. Hope you are doing well!
ReplyDelete