I don't know about you, but I seem to craft in waves.
While it probably looks like there's always something in the works around here, there are actually weeks when nothing happens.
Nada.

No painting, no crafting or even thrifting.
Then there are weeks when I do nothing but...the creative juices start to flow, I have boundless energy and I tear through my DIY to do list.
Last weekend was a perfect example.
My headphones were charged up, Spotify was playing lots of moving and grooving tunes and I was in the zone.
I engineered a new cabinet mounted sink skirt.
I finally committed to red trim on my kitchen bench cushion.
And I dressed my living room for spring and summer.

It was 48 hours of nonstop creativity with fabulous results.
However.
Sometimes when I'm working at this frenzied pace, I encounter a few - shall we say - bumps in road...and self inflicted bumps, at that.
Some cause irreparable damage, but most just slow down the process, requiring me to stop, redo steps I'd already completed and start all over again.
And in the spirit of true transparency, I've decided to share some of last weekend's mishaps.

You know, just in case you were under the illusion that I'm always over here crafting like Snow White or Cinderella.
Me twirling around from one project to another, while sweet little birds handed me pieces of ribbon and thread.
Yes, there are bright colors, music, singing and maybe even a little twirling, but trust me, the similarities end there.
There's no evil nemesis trying to thwart my creative happy ending, my only enemy is clumsiness, distraction and haste.
Ah well, like my daughter said, where others see mistakes, I see editorial content. 😉
So without further ado, let's start in the living room and peel the curtain back...literally.
Blooper #1:
I wanted to swap out the red checked panels that I'd had hanging in there for a few seasons. I decided that rather than buy (or wrestling with my machine to make new) I would hang up the floral panels I made about 4 years ago.

I didn't keep them up for long back then.
It was late October, the holidays were coming and I had new white velvet panels I wanted to try out for Christmas. Then I replaced those with the red checks and the floral curtains have remained packed away in my closet ever since.
Unfortunately, when I took them out I remembered why they stayed packed away for so long. They were skimpy.
Sure, they looked good in photos, but in real life, not so much. There was very little pleating and not enough gathers to make the double window look fully dressed.
You see, I'd found the fabric online, when everything was locked down. It was clearance and for less than $30 I scooped up the very last 6 yards.
It wasn't enough.
This time around though, I really did like them and was determined to make them work. Or at least to make them look fuller, by adding some more pom pom trim to the outer edges.
Apparently, pom pom trim is my solution for everything. It was a job that probably took me about an hour to complete on all 4 panels after setting up and fighting with my machine.

In a last ditch effort I took a photo of the fabric, did a reverse image search and wouldn't you know it, JoAnn was still selling that last chance, never to be seen again, going, going, gone fabric from 2020...and at the same $4.99/ yard.
I was ready to scream.
I placed my order online and then spent 2 hours, ripping out 10 yards of pom pom trim I'd added mere moments before, with the smallest seam ripper known to man. Not fun.
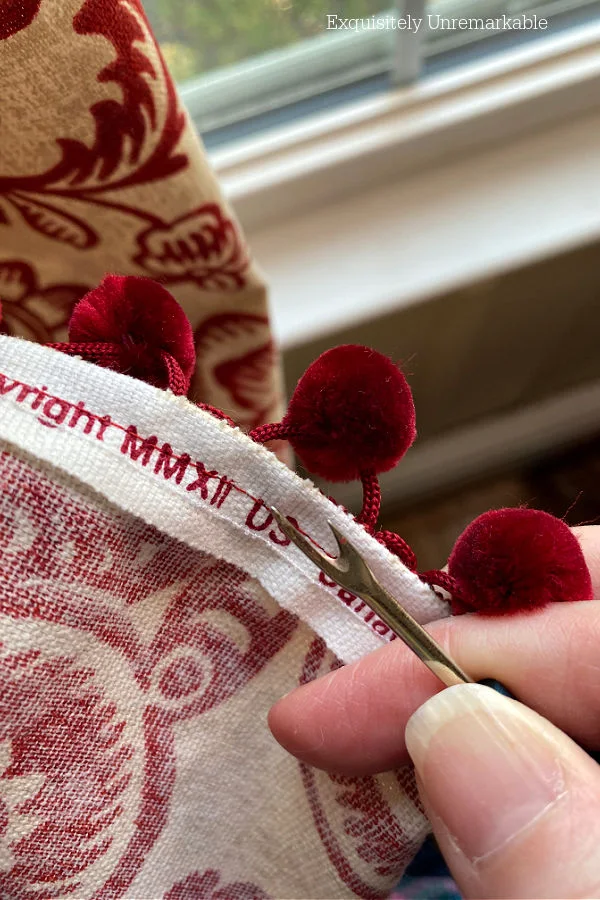
In the end, I picked up the fabric, cut it to size, matched the patterns as best I could and stitched them all together to create appropriately sized drapery panels.

Nice and full.
With red pom pom trim sewn on both edges. Again.
Blooper # 2:
The next debacle occured in the kitchen while I was making that pretty sink skirt.

I was so excited by the prospect of my new easy on/ easy off velcro design, that I wasn't really paying attention when I stitched the velcro onto the skirt panel.
I just knew it wasn't sticking to the cabinet door very well and I couldn't understand why. I was using sticky velcro on the door and sewing velcro on the fabric.
However, that shouldn't have made any difference. No. It was the fact that I had stitched the hard loopy side of the velcro to the fabric and stuck it to the door.
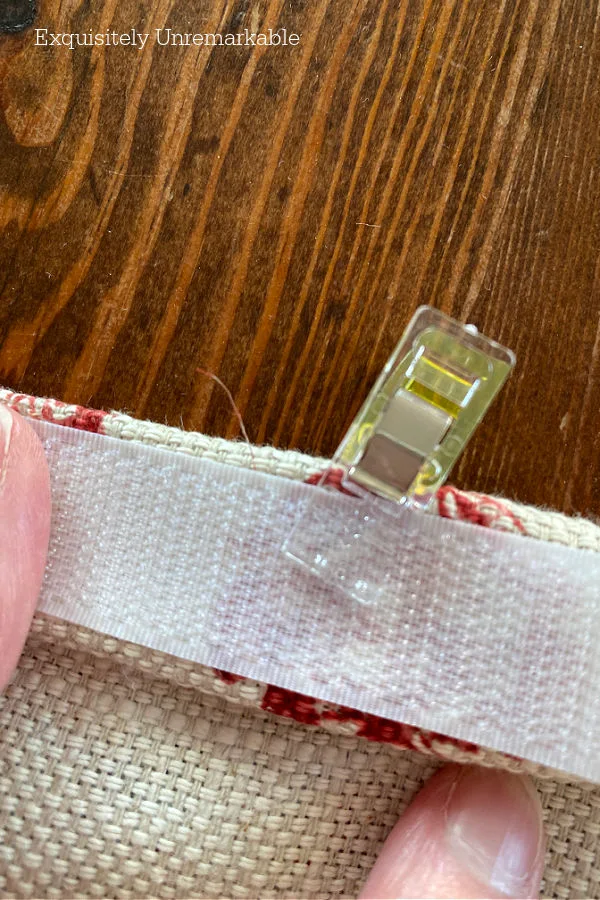
Just like magnets, two of the same velcro pieces repel each other. I needed the soft piece stitched to the fabric and the loopy side on the door.
Or vice versa.
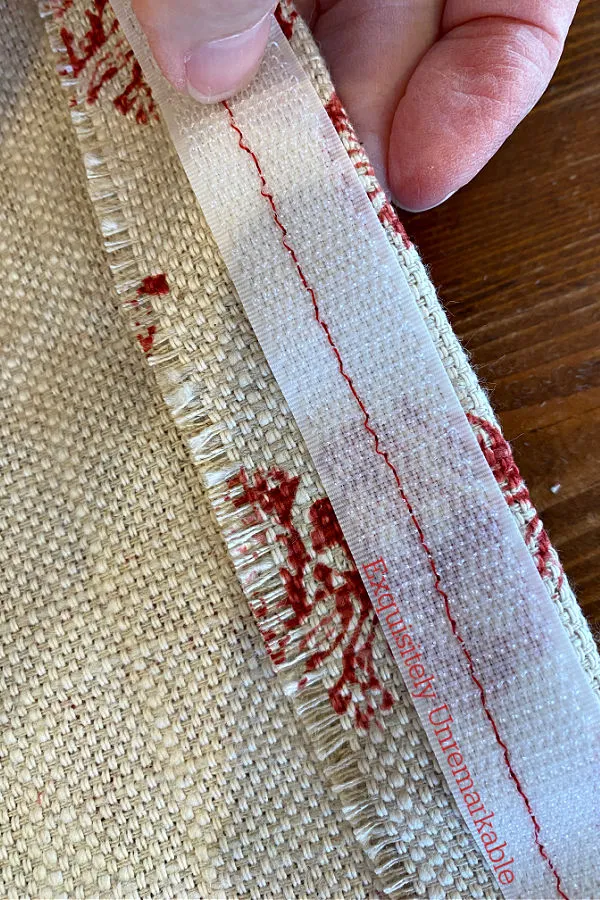
Of course, it would've been much easier to rip the sticky velcro off the cabinet door and replace that, but for some odd reason, I couldn't find the box with those pieces.
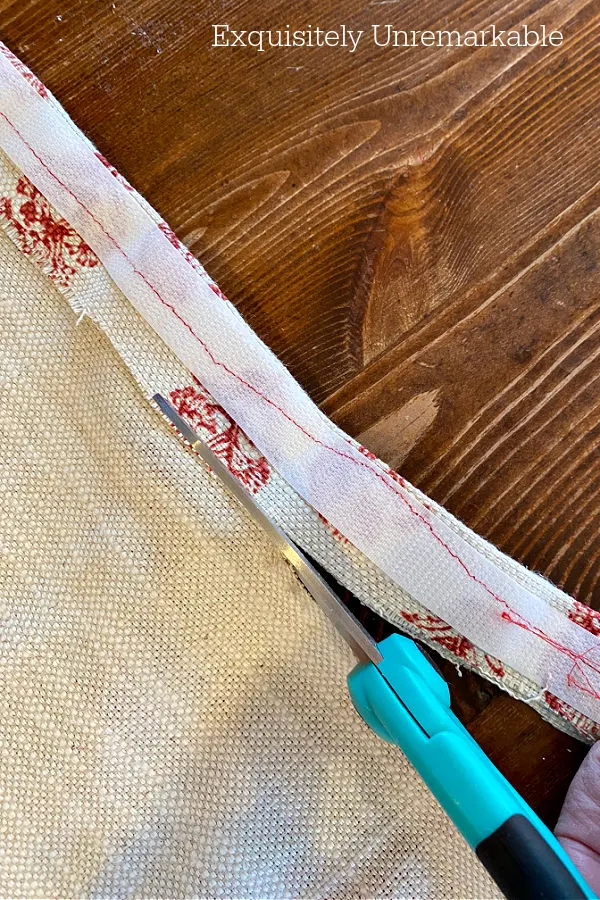
Instead, I grabbed a pair of scissors, cut that Velcro off and stitched the fuzzy piece on.
I really should've removed it from the fabric, but my hands were still aching from all the curtain seam ripping, I just couldn't go through that again.
And no little birds to help me out.
Blooper # 3:
The last boo boo was a real mess. The irreversible kind and certainly nothing a seam ripper could fix.
It happened while I was working on the bench's pom pom trim.
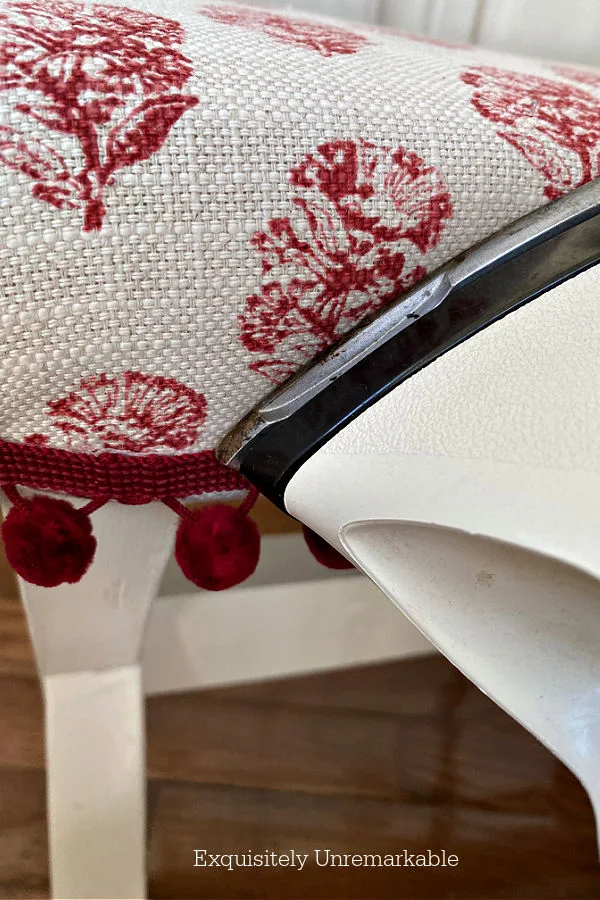
I'm sure I've mentioned it before, but my craft iron was way too big for most projects. I ignored that fact for far too long, because it worked so well.
It had a slick metal bottom that was easy to clean and got very, very hot. Hot enough to use on fabric transfers, patches, decoupage projects and creatively reupholster a chair. Lovely.
Of course, it did have one broken leg, which made it a bit wobbly, but other than that it was a reliable workhorse.
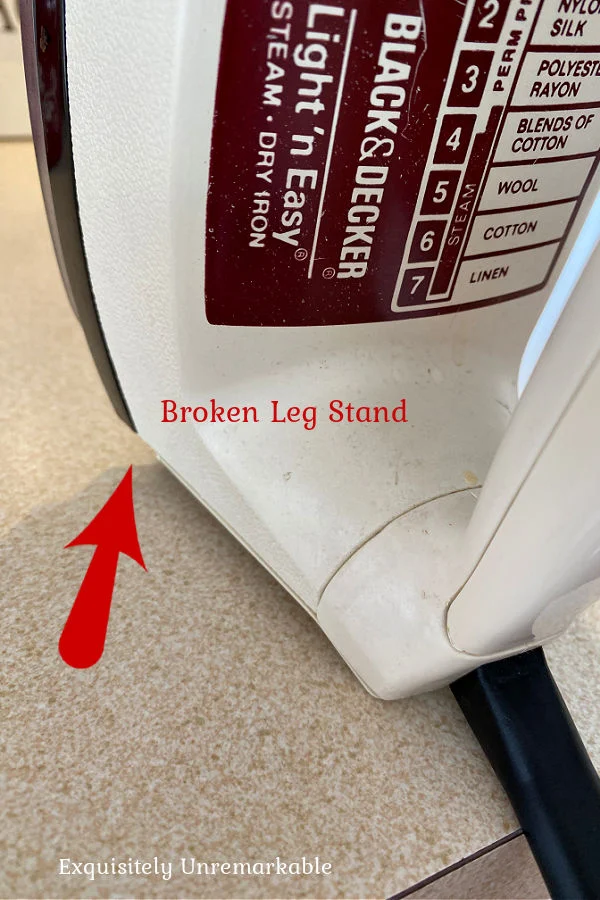
So when I saw a tiny spot where the trim looked like it needed a bit of heat, I plugged the iron in.
Then I sat on the floor, started eyeing the area that needed attention, grabbed the iron and set it down on the floor next to me.
Where it promptly wobbled on that one leg and fell over, straight onto the rug.
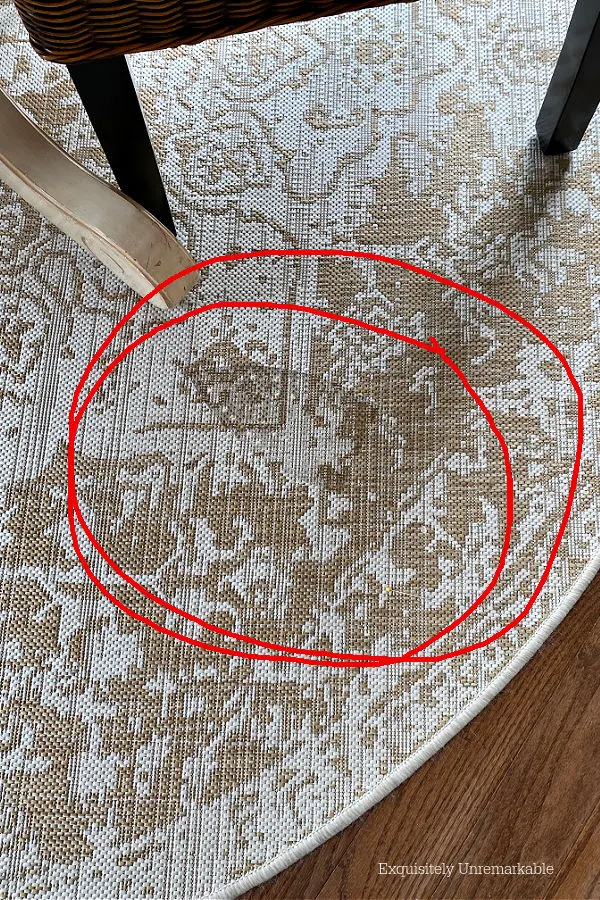
One that couldn't be scraped, wiped or cleaned away. Nope, this boo boo was a doozy.
The only solution was to rotate the rug around, so the burn mark would be hidden from view.
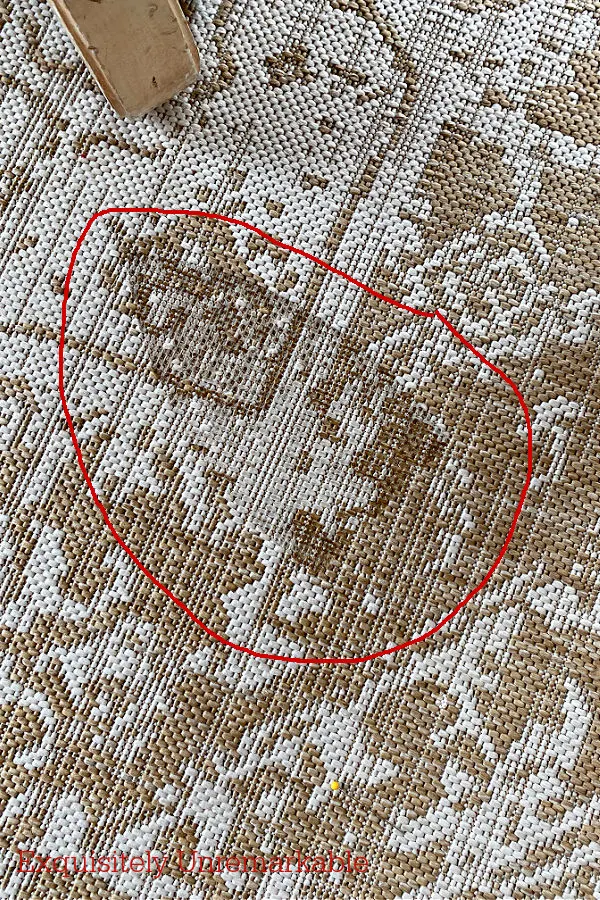
Well, not my view. I can never unsee it now...but hopefully no one else will notice it on this busy patterned rug.
Of course, at that point, all I could do was laugh.
I wasn't even upset.
Just numb, from all the other blunders of the weekend.
And all that crafting.
Which I will be taking a break from...at least for a couple of days.
To give my calloused hands and my ego time to recover.
While I practice my twirling.
And admire my {mostly} crafty happy endings.
👑
Do you have any DIY blunders to share?
Happy Crafting, Folks!!



I use a swing out curtain rod for the curtain hiding the kitchen garbage can. Off the rack kitchen tiers are the perfect length!
ReplyDeleteThat's a great tip. I tried the swing rod, but it didn't cover my doors all the way. I keep searching for one that will make it...and yes!! Next time I'm going to try premade tiers. Much easier...and no seam ripping! 🤣
DeleteOh dear ... blooper #3!!!
ReplyDeleteOh yes, bloopers and more bloopers... blooper might be my middle name. Ha Ha!!! That T-shirt quilt... I am almost done with.. has given me more trouble then ever. And to keep things honest here, I have garden bloopers too. ;-) Love you... this was a fun post!!!
I'm glad to hear I'm not alone, Carla...but of course, I'm sorry you have bloopers, too. I guess it's just part of the process! I can't wait to see that quilt. I just know it's beautiful! ❤️
DeleteYikes! The iron debacle was a doozy! 😲 I love how you just rotated the rug and kept on going. That’s called keeping it real, and we all have those moments for sure. I love how everything turned out, though, even if it was a lot of extra work.
ReplyDeleteOh Mandy...that iron!! It was a real oops moment for sure. I'm glad you liked my quick fix. I was not ready for a new rug, so right now this is as good as it gets!! Haha!! Shhhh.
DeleteMy heart (and hands) hurt for you. Yes, I know I have had craft mishaps but can't think of any right at this moment. I love your posts and read them all. You are a real trooper. :)
ReplyDeleteOh Kim - you know, these things just happen! Sometimes things are fix-able, and sometimes hide-able, and sometimes re-doable - but whatever the case, you are my favorite DIY gal - you've got a solution and a fix for everything! I'm sorry about the iron falling over. Like Carla said - blooper can be my middle name too. :)
ReplyDeleteThanks so much for our sweet words of encouragement, Marilyn! I'm smiling over here and giggling in solidarity with you ladies over the "blooper can be my middle name" comments! I guess when you're a do-er it comes with the territory.
DeleteI spent the better part of a day with a seam ripper recently too! My latest iron blooper was that I got a brand new big girl super iron that has all the bells and whistles I’ve dreamed about and started a sewing project requiring interfacing. I placed my brand new iron on the wrong side of the interfacing which immediately sealed itself to the new iron. I was undone. By the way I have several seam rippers in various sizes and they’re all terrible, I ripped right through the bodice of a dress I was making, ACK! but fortunately the rip was later encased within the seam allowance. But the burned rug, OH MY! DIY is not for sissies. pamela
ReplyDeleteOh Pamela!! DIY is not for the faint of heart, that is for sure!! I'm glad to hear that a larger seam ripper would not have made a difference. That was brutal...but oof...your iron story sounds brutal, too. Did you have to buy a new iron or were you able to clean the interfacing off? That sounds terribly frustrating...I'm so sorry!!
DeleteDIY blunders? Who, Me??? Too many to count, my friend. Let me know when you find those little birds, I could really use a few around the Cottage!
ReplyDeleteIf I find them, Ann, I'll send them your way. You can count on it!!
DeleteKim, you are too funny. How many DIY projects have you done and only three boo-boos. You are lucky. Even with the boo-boos everything looks gorgeous but sorry you had the troubles. I was glad the iron didn't fall on you. I have a few birdies around here but so far none have been helpful to me and I can't even twirl anymore because I might trip over the rug and that would not be a good look for an old lady. Keep on..xxoJudy
ReplyDeleteJudy, you are so funny!! Trust me, I'm not even twirling sometimes and I manage to trip...and also, there are lots more than those three boo boos. I think I could start a whole new blog call Exquisitely Not So Remarkable and have plenty of content to keep me going for years!!
DeleteSometimes things do not go exactly as planned right?!!! You always seem to make things work well. Have a great week. Hugs. Kris @ Junk Chic Cottage
ReplyDeleteThanks Kris...and yes, sometimes things go sideways in DIY!! Enjoy the week!
DeleteWow, don't feel bad, we all have some blunders. You just keep going.
ReplyDeleteThanks Linda! I'm not easily discouraged and thankfully I'm not a perfectionist...but I will say that the rug burn hurts. 😉
DeleteKim,
ReplyDeleteI really enjoyed reading this because I too have been there way too many times than I really care to mention!! I did get a chuckle out of it because yes, in some times, all you can do is laugh...Like when I counted up all the pairs of socks Joe had when I was donating them to Catholic Social Services....90 pairs of socks!! Who in heaven's name has that many socks!! We did get a good laugh out of that under the circumstances....
Hugs,
Deb
Debbie-Dabble Blog
You know what, Kim, I'm convinced it's this time of the year. This whole weekend was filled with bloopers for me and you're right most of them were because I was trying to do too much too quickly. One day I'll learn to calm down to a panic And. Just. Breathe. Oh, and I tossed my unpicker out a long time ago and just use a razor (very, very carefully).
ReplyDelete