I wanted a kitchen sink skirt, but I didn't want to remove my cabinet doors. No tension rod or ring clips were going to stand up to my family's daily use.
So I came up with an under sink skirt that attaches with velcro for easy installation and functional use.

I've always loved the look of a kitchen with a sink skirt.
I think there's something so charming, so warm...so homey...about a room with fabric softening the hard line of wood cabinets.
You just know there's someone with an apron roaming about.
And a pie in the oven.
Well, not my oven, but you get the idea.
When we added the kitchen, way back in 2002, the thought of a skirt went out the window, when I was overruled by my contractor and my husband in my quest for a farmhouse style sink.
It wasn't until more than solid decade later that I figured out a way to make one work with our standard sink - This is the original DIY for reference.
And one that mounted to our base cabinet doors.

One that opened and closed easily, no sliding rings or tension bars, nothing that required me to remove the center support bar. Most importantly, one that functioned in a busy household with people who were not careful about design or decor.
However, I was persistent and once I'd engineered a solution that worked for my family and my home, I was hooked on the look.
My sliding garbage pail and cleaning supplies were easily accessible, yet completely hidden behind pretty patterned ruffles.

Like I said, super charming.
Unfortunately, there was one flaw in my design. Removing the sink skirt, either to swap it out with a new one or wash it, was not easy. The original design used nails and staples to anchor the fabric to the wooden dowel.
That meant they needed to be ripped out, to slip the fabric off the wooden dowels, and after six years and multiple sink skirt swaps, I knew I had to find a better way.
Finally, this weekend, after months with my thinking cap on, I had my eureka moment and reengineered that cabinet door mounted sink skirt to make it an easy on/ easy off DIY design, using my old friend, velcro.

Here's what I did and what I used to attach my sink skirt to my kitchen cabinet doors.
It was a pretty simple DIY, one that anyone can do, and sew or no sew, is up to you.Supplies:
- Wooden dowels
- Small finishing nails
- Sticky velcro
- Sew on velcro
- Fabric
- Gutermann thread -if you're sewing
- Fusible Web - if you're not
First, I used the same wooden dowels I had the old sink skirts mounted on and just tacked them into the holes I made for the first skirt.

You can remove this step if you like, however, I found that my skirt looked much better with the addition of the dowel. Plus, my dowels were a bit longer than the doors, to support the fabric so it would cover the space between the doors.
Next, I made two rectangular fabric panels. I needed one for each cabinet door.
Since, I already had several sink skirt panels on hand, I picked one to use as my template.

I simply cut my fabric to the correct width, a little wider than my template panel, so I had enough to fold over and finish the edges.

I didn't worry about the length yet, I left my piece very long since I would set the hem height after I mounted it to the cabinet door.
Then I used my machine to finish the sides and top of each panel, by folding each edge over about 1/2 inch and stitching it up.
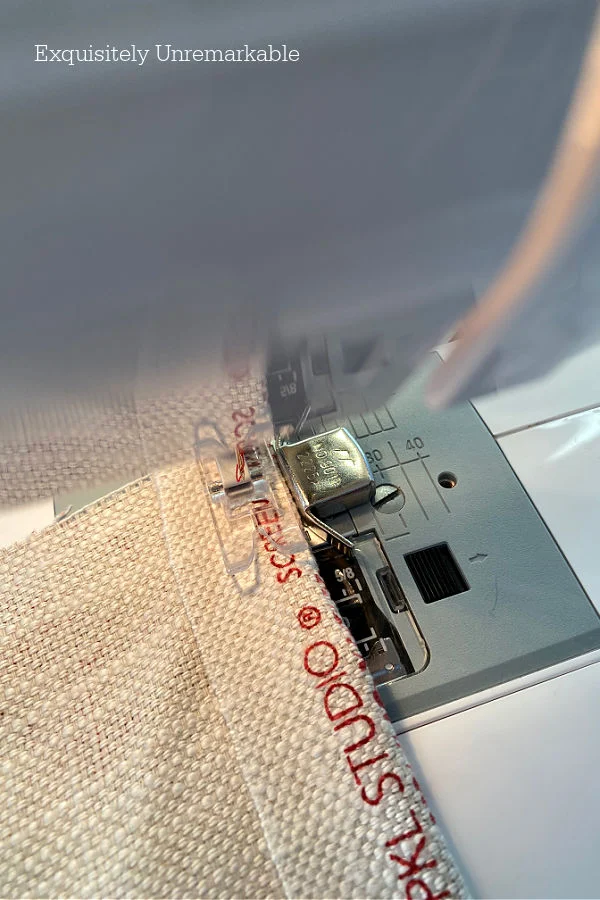
I've had great success using iron on tape for other decor projects, but the adhesives don't always hold up well in the wash.
With the panels stitched up, I grabbed my sticky velcro and placed a strip on the inside of the cabinet door, about a quarter of the way down from the top.

I placed it there, since the gathered fabric bunched up and if too close to the top of the door, I found that it was too thick and prevented the door from closing.
Moving the velcro further down on the door alleviated that problem.
With the velcro set, I grabbed my panel and threw it over the front of the door to see where I would need to sew the velcro onto the fabric.
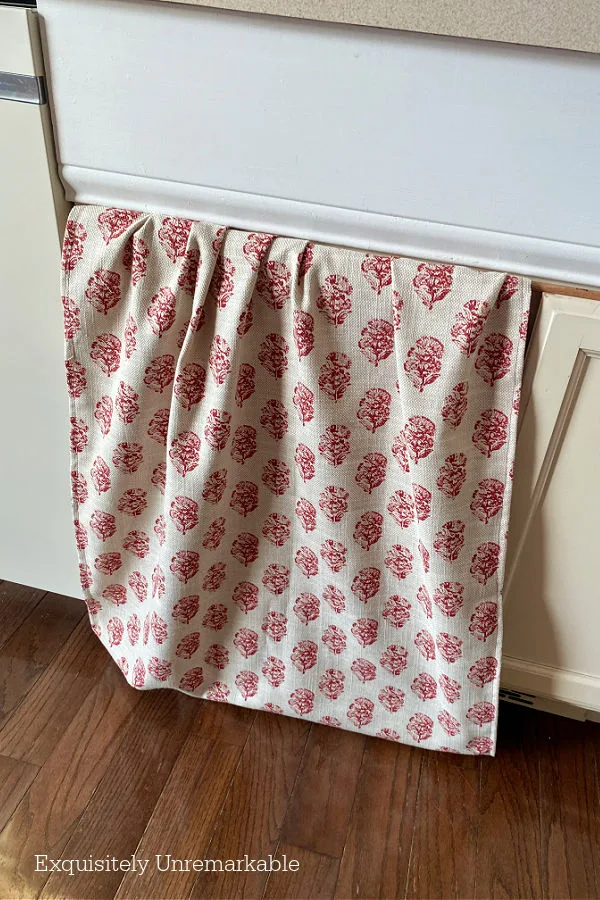
I moved the fabric around a bit to mock up pleats, but I didn't worry about the length yet. I folded the extra fabric under to get the proper look.
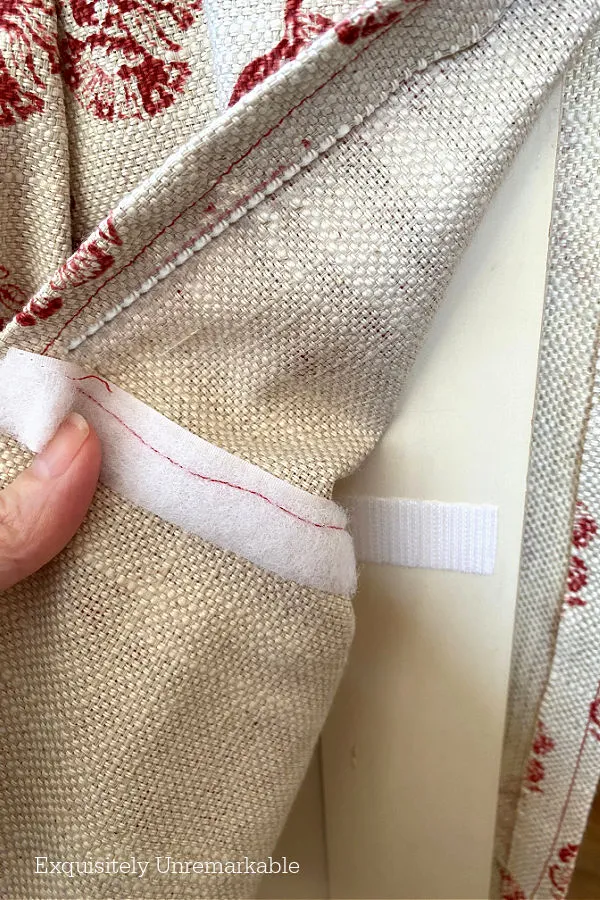
When I was happy with the placement and how the door would open and close, I marked the fabric and stitched the velcro in place on the back of the fabric panel.

I'd like to note here that I used two different kinds of velcro for this project. I used the sticky backing on the door and the sewable velcro on the fabric.
These doors get opened and closed many times on a daily basis and, while sticky velcro works well on the fabric panels mounted on my glass doors and bathroom vanity, I was concerned that the weight of the heavy upholstery fabric skirt and the constant use would be too much for sticky version over the long haul.
Again, you could use fabric tape or glue for your velcro, but I really like the strength of a stitch.
The last step involved hemming the panels. To do that I attached the panels to the door by pressing the velcro strips together and arranging the pleats.

Then I shut the door and used pins and clips to mark the proper length of each panel and hemmed them using the machine.

First one panel, then the next.
I did them individually, since nothing is straight or even in this old house.
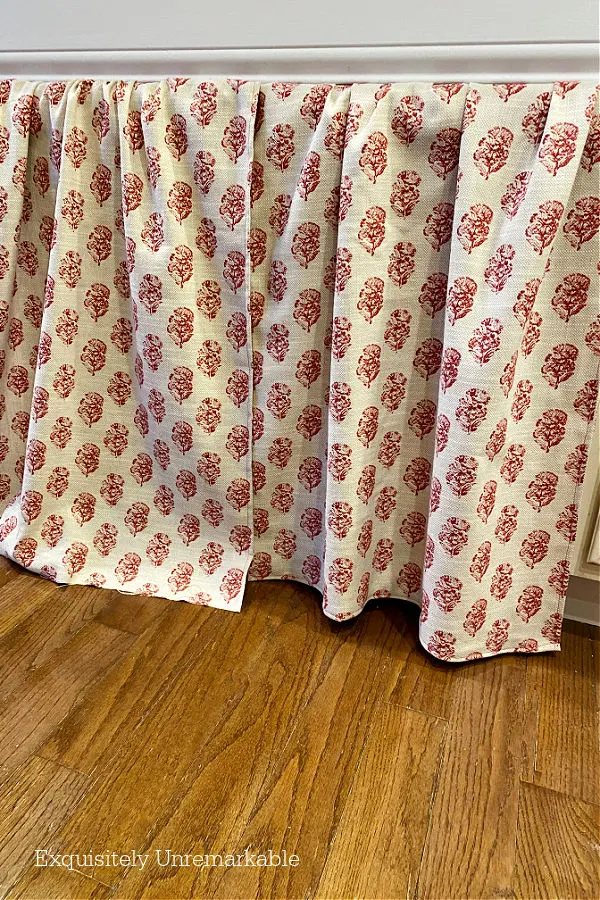
Then I placed the panels back on the door, sticking the velcro sides together and arranging the pleats one final time.
Between the measuring and the figuring, modifying my plan and sewing, not to mention several silly mistakes, this project took a bit longer than I thought it would.
But I had great music and I was so energized by the way my latest DIY was turning out, I kept going despite the late hour.

Which of course, it did.
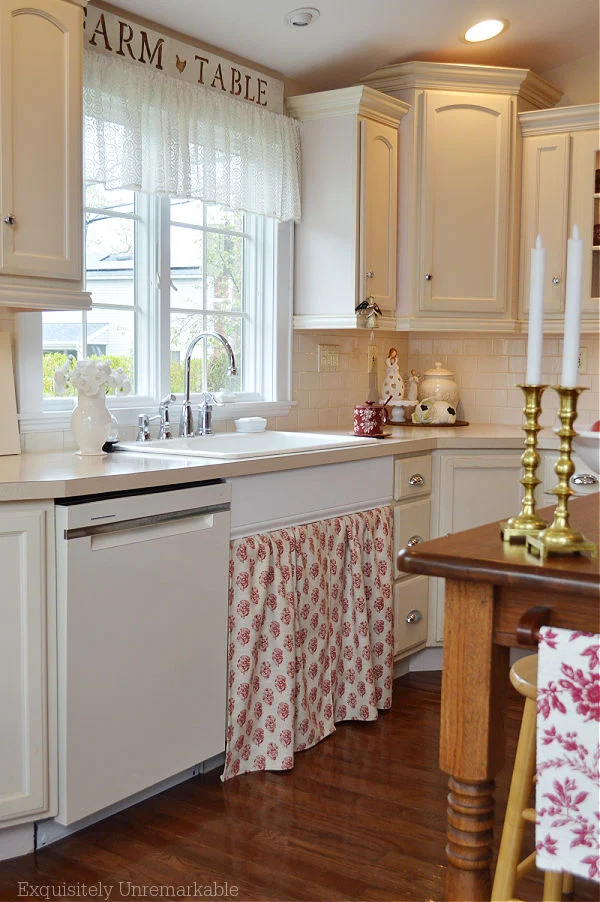
Even better, it functioned as well as the old sink skirts did. It didn't move or shift when the cabinet doors were opened or closed.
The velcro kept the panels firmly in place and best of all, if - well, when, is more accurate - it gets dirty or I get tired of this pattern and want to replace it, I can do it on my own.
In minutes.
No husband with the strength necessary to yank those nails out.
Plus if I used premade panels, like long curtain tiers, I won't even need to construct my own.
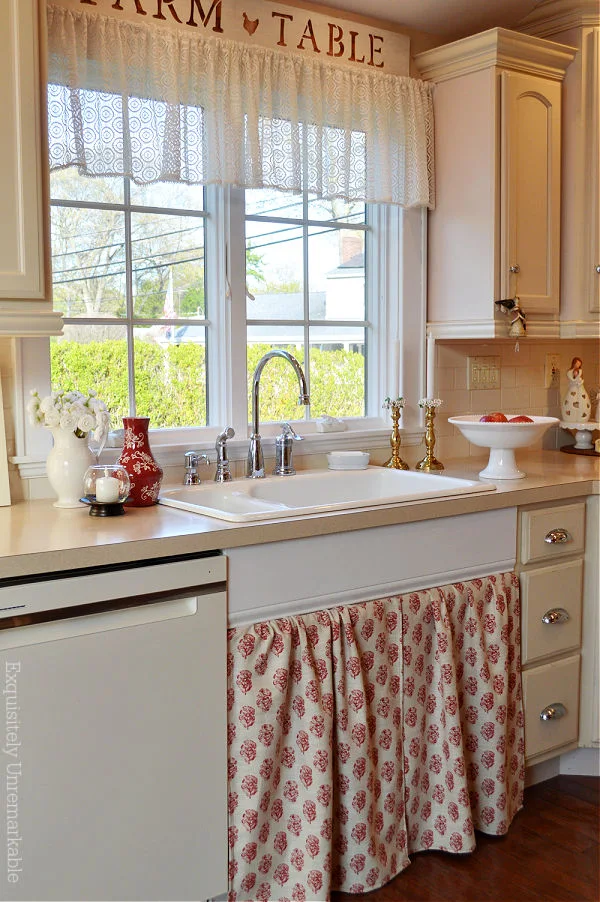
Which leaves me with a lot more time to bake that pie.
Or whip up another easy DIY.
Because who are we kidding, that's a whole lot more likely.
😉
What will you be making this week?
Other skirted DIYs:
Happy Decorating, Friends!


Velcro is amazing - and I love your brainchild of using it to make your doors functional and open easily, and wash easily! All a must in a kitchen!
ReplyDeleteVelcro is amazing, Marilyn!! It certainly came to rescue again with this DIY...and thank you!!
DeleteI would like to try it with a pair of curtains on a dowl rod.
ReplyDeleteYes! I actually had a pair of long curtain tiers that I was going to use, but they weren't the right pattern for my kitchen, so I ended up making my own. It would go a lot quicker if I didn't have to make the panels though, hoping to try that next time around. ☺️
DeleteThis is excellent and a game changer for me. I've followed you for a long time and this is a DIY I've always wanted to try. Unfortunately, I don't have a handyman and the on and off process in your previous DIYs looked too difficult for me to attempt. I can certainly handle some velcro though. Thank you for the update. I'm off to buy some fabric now.
ReplyDeleteYou just made my day!! Thank you!! You're not the only one who has said this about the process and I've been in the same boat, needing my husband to yank those nails out when I wanted a swap. This is so much easier and I hope it makes it much more accessible to others now, too. Good luck and have fun fabric shopping...it's my weakness. 😉
DeleteThat is a great idea and I love how it looks! My garbage can is under my sink, too, in this place. I wish I had a full cabinet with a pull out garbage/recycle can but....nope.... If/when I redo this kitchen I am going to think about using this method to skirt the sink. Love the idea. xo Diana
ReplyDeleteThanks so much, Diana!! I love a skirted sink, too, but that garbage pail was always a roadblock. So when I figured out how to skirt the doors I was thrilled, but the nails made it hard to remove or swap. This is so much easier...and I've seriously been considering your scotchgard tip. I have visions of my husband outside spraying all my flowery fabric panels as his buddies walk by on their way to their fishing boats. Haha...poor guy. I get him into all kinds of DIY trouble!
DeleteI love this Kim. It looks so pretty and I love that you can open the doors. I always have loved the skirted sink and may think about doing this in my kitchen. Thanks for all the tips. Hugs. Kris
ReplyDeleteThanks Kris!! I loved my old cabinet mounted sink skirts, but getting them off and then back on again with all the nails was a bear. I honestly didn’t have the power to pull those nails out of the hard wood myself. So I was always dependent of Mr. Handy Dandy to do it for me…and I’d have to wait until he was ready, tick tock. Now that I can do it on my own, I see a lot more swapping in my future!!
DeleteVelcro for the win! Great idea, Kim because, in my house, that skirt would need to be washed all the time...I'm a sloppy cook...and so is someone else!
ReplyDeleteThanks Ann!! Yes, this is much easier...although I have to say, those skirts have to be washed a lot less than I thought they would. I think there was only one time, when my daughter turned the blender on without a top and her blueberry smoothie covered the kitchen, that I actually had to remove it to wash it. Most fabrics today are stain treated and wipe pretty clean with soap and water. So far! Haha!!
DeleteKim, I love the how pretty the sink skirt looks and the new fabric is so pretty. Thanks for the tutorial on how to make this kitchen sink skirt.
ReplyDeleteThanks Julie! I needed an easier way to do this and I’m glad I figured it out.
DeleteKim just adorable and you made it look like an easy project. I love the look and might be bringing mine back again. Pretty fabric and great job. xxoJudy
ReplyDeleteIt was so easy, Judy! Trust me...I'm usually an easy DIYer and, while the original design was complicated, this one was a piece of cake. If you try it, you must let me know. I'd love to peek!! xo
DeleteI love that fabric! It just fits the kitchen perfectly. I haven't made anything this week, but I have extra time on my hands today and I would love to stitch up a quick toss pillow or two for my bedroom. Happy Weekend!
ReplyDeleteThanks Gina! I really like that fabric, too. I sat on it for a while, not sure about the pattern, but I’m glad I tried it. I can’t wait to see your pillows, I hope you’ll share them. I’m such a fabric junkie!! I hope you have a lovely weekend, too!
DeleteAnother fantastic tutorial. Thank you!! I LOVE your kitchen, your living room, dinning room.... your entire house!!! :-)
ReplyDeleteYou are the sweetest!! Thank you, Carla!! I'm still struggling with that family room...ugh...somehow I'm always quicker on the decorating draw when it involves red! Happy Weekend!!
Delete