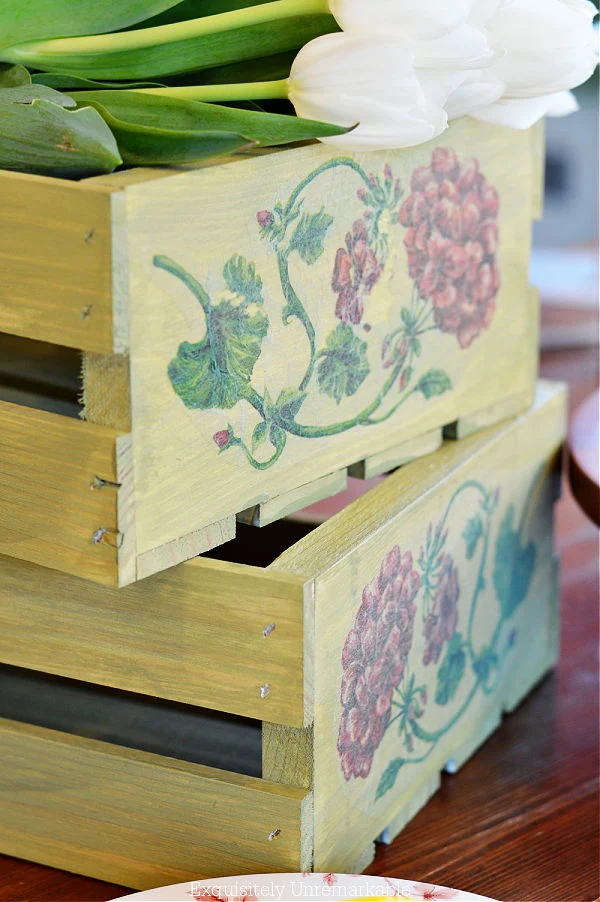
Create vintage style crates with napkins in minutes.
Just follow these simple steps, using stain and Mod Podge to makeover an unfinished crate.
 |
| This post is sponsored by Crates And Pallet |
Two weeks ago, I received a few small unfinished wooden crates and spent an afternoon decorating them.
For a girl with a craft obsession, it was a dreamy day.
They came in a set of four, and while I could've given them all the same treatment, I thought it would be much more fun to accent them using different techniques.
I also didn't want to spend any money transforming them, so I decided to use only what I had in my craft cabinet.
All in all, it worked out well.
The first crate makeover was done with paint and a farm style transfer. Quick, easy and beautiful.
I briefly considered simply aging these crates with paint, but I was looking for more...
So I grabbed some delicate red and green floral paper napkins and decoupaged them to the front of two of the crates.
Since, my family room decorating plans are set and those are the featured colors, I thought they'd be cute stacked.
Or maybe separated and placed around the room for storage...a his and hers if you will.
Anyway, here's how I did it!
How To Decoupage Wood Crates
I started with a few simple supplies.

Unfinished Crates
Mod Podge or Clear Coat in Satin
Brush
Napkins- They also have this pattern in paper placemats
This Green Stain
Gloves or Plastic Wrap
Plastic Cups
Mod Podge or Clear Coat in Satin
Brush
Napkins- They also have this pattern in paper placemats
This Green Stain
Gloves or Plastic Wrap
Plastic Cups
Step 1: Stain The Crates
I started by staining the unfinished crates, one at a time.


And since I wanted a rustic look and for the wood grain to show through a bit, I only gave the crates one coat of stain.
Then I set them aside to dry on plastic cups so the wet stain wouldn't stick and get marred or damaged in any way.

Step 2: Separate Napkin Layers
Decoupaging with napkins can be tricky business.
In all honesty, I have to say that decoupaging with rice paper is infinitely easier.
As a matter of fact I used rice paper to makeover another crate.
It doesn't tear, it doesn't really wrinkle and it's literally made for the task. Of course, that doesn't stop me from buying napkins that catch my eye.
What can I say? I'm a sucker for a pretty face.

You can use any kind of paper napkin for decoupage crafts. And you can add them to virtually anything.
I've even used them to makeover glass cutting boards.
However, napkins are usually two or three ply, which is great if you're actually going to wipe your face with them. Not so great when you're using them for decoupage.
You must separate the layers.
All of them, which could be tough to do since they are very thin.
I usually peel the apart one at a time, leaving the decorative top layer ready for glue.
Step 3: Attach The Napkins To The Wood

Ok, so right off the bat I have to say that I don't use Mod Podge anymore for anything.
I use Dixie Belle Clear Coat instead. It doesn't smell and it works so much better.
But most people associate decoupage with Mod Podge and if that's what you like, have at it.
Either way, I just brushed on a generous amount of clear coat so the napkin would stick.
Step 4: Smooth Out The Napkin Wrinkles

I tried my best to center it and not wrinkle it.
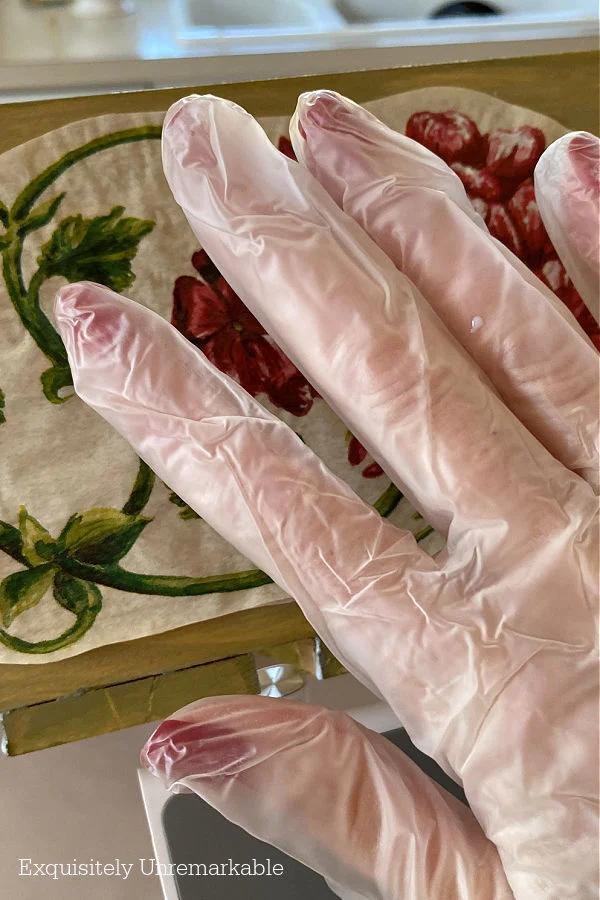
Of course, there were a few bubbled spots, so I used a gloved hand to smooth them out.
You could also use a piece of plastic wrap or a zippy bag to smooth out the decoupage wrinkles. That tactic works equally as well.
One note...I did flip the second napkin so the patterns wouldn't be exactly the same. I wanted to add a bit of whimsy and interest and that did the trick.
Step 5: Add Mod Podge On Top Of The Napkin

The last step in this process is to coat the top of the napkin with more decoupage gel with a bit of the green stain mixed in.
That extra drop of color added to the weathered look of the crates.
I simply brushed it on, gently, over the napkin to seal it in place.

And because I like a bit of shine.
That's it, that's all it took to make two vintage styled custom crates that matched my decor.

And ready for my new cottage style family room.
Fabulous.
Now if that sofa would show up, I'd be in business. 😉
Which crafty crate makeover is your favorite so far?

How To Decoupage Wood Crates
How to decoupage wood crates with napkins for a vintage style.
materials:
- Unfinished Wood Crates
- Mod Podge or Clear Coat in Satin
- Green Stain
- Napkins
tools:
- Paint Brush
- Gloves or Plastic Wrap
- Plastic Cups
steps:
How To Decoupage Wooden Crates
- Stain The Crates
- Separate Napkin Layers
- Attach Napkins To Wood
- Smooth Out Napkin Wrinkles
- Add Sealer Mixed With Stain On Top Of Napkin
Copyright © Exquisitely Unremarkable 2021. All rights reserved.
This post is sponsored by Crates And Pallet. You can read my full disclosure here.


I've never seen green stain and I like it! And mod podge - I used to use it a lot. Now you must have the new and improved version. So cool to use a napkin that way, and it turned out perfect. You are the queen of stencils, transfers and decopauge!
ReplyDeleteThanks so much, Mari!! I have to say I loved these napkins so much I had to find a place to use them and the crates were the perfect palette. So glad you like them!
DeleteLove the green stain. They turned out very pretty.
ReplyDeleteThanks so much, Penny. That green stain is a favorite of mine for sure!
DeleteWinner winner chicken dinner..you rocked this!
ReplyDeleteWhy thank you! It was the perfect project for my geranium napkins!!
DeleteI'm in love with these, and I need to find those napkins!!!
ReplyDeleteThank you for the links for the stain and the finish!
Blessings,
J
My pleasure J, and thank you! I love this one...and if you want to decoupage and can't find the napkins let me know. I may have a couple to spare!
DeleteI love these, Kim. xo Laura
ReplyDeleteTHanks Laura! They make me smile.
DeleteAnother great tutorial with all the information we need too, I appreciate that.
ReplyDeleteYou are the sweetest, Carla! I’m glad you enjoy the tutorials…it’s that teacher gene for sure!!
DeleteThose will be perfect with your new decorating plans! Well done!
ReplyDeleteBrenda
Thanks Brenda! I like that green stain a lot.
DeleteThose napkins are perfect against the green stain. Beautiful!
ReplyDeleteThank you, Ann! That green and red combo gets me every single time.
DeleteI love the green crates with the flowers Kim. You did a great job decorating the crates and they will look great in your family room.
ReplyDeleteThank you so much, Julie. I have to say these are my favorites so far. These crates are so easy to work with, I could keep decorating them for days on end!!
DeleteThese are so pretty & so simple to do. I love it.
ReplyDeleteThanks Jenny!! It love the way the napkins look against the green stain.
DeleteHi Kim. That stain color is great and I love the pretty napkins you mod podged onto the crate. Some of the napkins out there are so pretty. The crate looks like the flowers are painted on. Very cute as always sweet friend. xoxo Kris
ReplyDeleteThank you so much, Kris! I saw these napkins at a cute home shop in a village nearby and I had to grab them. They were just too pretty to let go. When I saw that they had paper placemats in the same pattern, I was tempted to get them, too. Maybe...Hoping you're having a great week!! xxoo
DeleteKim what a great tutorial. You make every craft look so easy. What a great tip to add a bit of color to the sealer. It gives it such a nice finish. I love a little shine too! Brava my girl!
ReplyDeleteSusan, you are just too sweet!! Thank you my friend. I had fun doing these and trust me, these crafts are easy. If I can do it...anyone can!! I hope you have a super week!!
DeleteVery pretty! I didn't even know there was such a thing as green stain!
ReplyDeleteThanks Melanie! Yes! I love that green stain...it actually does come in a lot of colors. I think the green is my favorite though.
DeleteI started using Mod Podge back in the 1970’s, Kim! That really ages me, doesn’t it?? My mom and I had such fun doing projects. I still like doing them! Your crates turned out super cute!
ReplyDeleteSo funny, Kitty! I remember using something to get small pieces of newspaper to cover old glass bottles in a craft class when I was small. Thinking back it must’ve been Mod Podge!! And thank you so much!!
DeleteThe crates came out great, Kim. Furniture deliveries are out of control! Hope your sofa comes soon. I am looking forward to seeing the crates in your new family room!
ReplyDeleteThey really are, Amy. We actually ordered a sectional for the basement that was supposed to be here in a few weeks, part of their "quick and ready to ship collection" but nope. Pushed back...and thanks!!
DeleteI have not decoupaged in decades but your pretty green crates and those geranium napkins make me think about trying it again. Maybe that's why I've held onto some blue willow paper napkins. Maybe a project for my granddaughters to help me with? I know you must be anticipating your knew sofa so much! We waited 4 months for a sofa about 18 years ago and I was so impatient but now people are waiting a really long time for orders to arrive.
ReplyDeleteOh Dewena, it’s crazy. Apparently, there was a shortage of the chemical they use to make the foam. Now everything is backed up. Hopefully, it shows up before the holidays!! And keep me posted with those pretty blue napkins. I bet your granddaughters would have a ball making something with you.
DeleteThey turned out lovely, Kim. The pretty napkin does look like it's been printed on and faded over time. Just like the real thing.
ReplyDeleteP.S. Hope your sofa arrives soon. I'm dying to see how the great big makeover turned out
Thanks Michelle! This one was fun to play with...and I'm waiting for that sofa, too!!
DeleteI can't get to the craft store fast enough to get some Mod Poge!
ReplyDeleteThanks so much, Christine! I had fun with this one.
DeleteKim,
ReplyDeleteI LOVE this!! Love the green! I decoupaged napkins on all kinds of things about 20 years ago...I guess i will have to do so again because i forgot how nice they come out!! Thanks for the reminder!! Stay safe, healthy and happy!!
Hugs,
Deb
Thanks Debbie! Yes, what’s old is new again, isn’t that always the way? I used to do it all the time too, then I stepped away from it, but all the new rice papers and alternatives to Mod Podge, I’m back in the game! xo
Delete