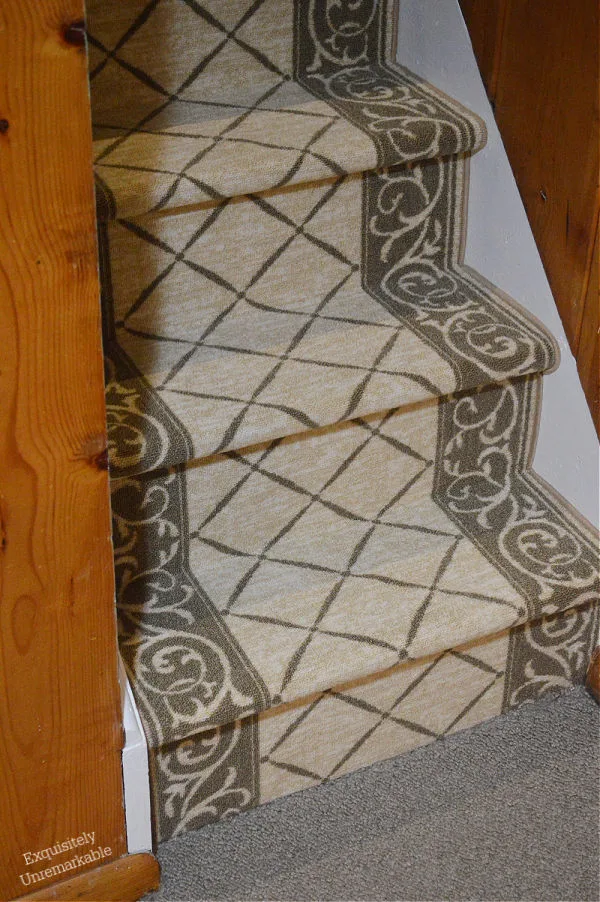
We added a carpet runner to the basement stairs in our old house.
They weren't a standard size and we started with the wrong tools, but we worked it out and we're sharing so you can avoid the pitfalls.

Our family room renovation/ redecoration project began way back in January.
And believe it or not, that space is still in process.
What started with the {not so simple} desire to replace my old, worn out floral sofa, turned into a total gut job.
Complete with a new paint on the walls and ceiling, a new window and laminate floor.
Of course, when you start a project, others follow.
That meant when the wall to wall carpet was ripped up, it also had to be removed from the adjoining stairs that lead to the basement family room.

So it goes.
The original plan for those stairs was the leave them alone.
Uncarpeted.
And we diligently considered all the options to dress them up. Cottage style.
We toyed with the idea of covering them with the matching vinyl flooring, stripping and sanding them and, my favorite, painting them and adding the new wallpaper to the risers.
Unfortunately, during one of these design sessions I slipped on one of the bottom 3 steps and tore up my shoulder.

It was not fun.
It was totally my fault. I was wearing fuzzy socks, and the bottom steps were really old, and covered in a slick varnish.
Nevertheless, suddenly design wasn't my priority, I was all about safety.
And carpet. Ugh.
Back to the drawing board.
I was still holding on to my vision that included painted floors and installing wallpaper, until I realized that finding a runner to fit was going to be a pricey custom install.
You see, nothing is standard in this almost 100 year old beach cottage.
Including the stairs.
And most standard carpet runners are 26 inches wide.
That's essentially the entire width of some of the stairs. Well, of most of them anyway.
They're actually all different sizes, which made this DIY even more fun.
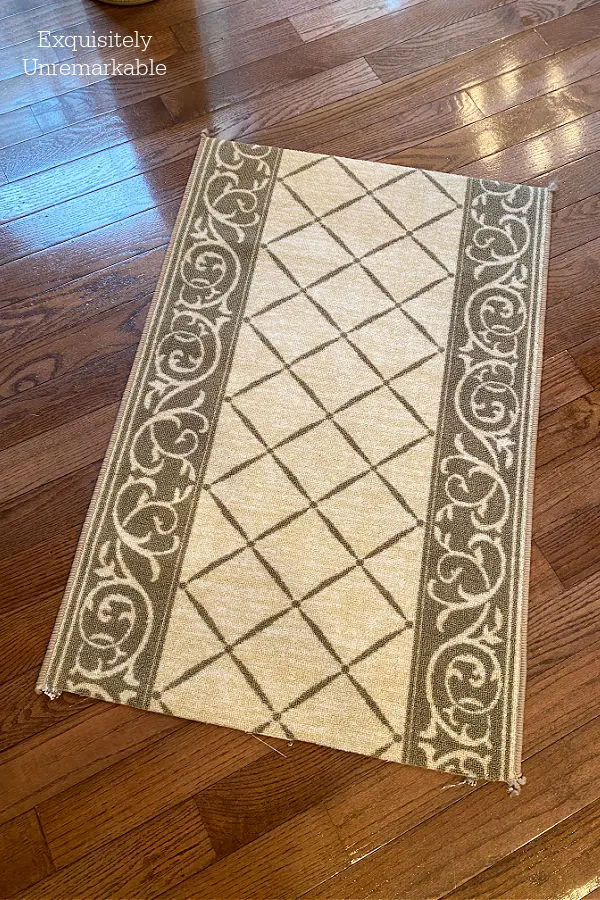
Anyway, after months of looking for the perfect runner to coordinate with both the new family room sofa and wallpaper and the updated basement decor, I gave up, went to Home Depot and grabbed what they had on the roll.

**Just an FYI, this Home Depot stair runner was a little more green in person than it looks on their website.
Installing A Rubber Backed Runner To Stairs
Now. I want to tell you that this was an easy process, and it was, relatively easy, but it wasn't without a few snags.
Hopefully, our mistakes will serve you well and help you to avoid some of the issues we ran into.
Of course, most of our problems were due to the uneven stair treads and the original build. However, others were not.
You'll see.
Measure and Plan
We started by deciding on a method. You have a choice, you can use a waterfall method or you can wrap the tread and riser tightly. That's called the Hollywood method and what we settled on.
Then we measured the stairs. All parts, width and length, around the treads and the height of the risers to determine how much carpet we'd need.
Then we bought a few feet more. At $4.97 a foot it was worth it to have extra on hand.
As a matter of fact, our steps were just 26" wide in some places, which was an exact match to the runner. We weren't sure it would fit.
So we went to the store and I bought a 3 foot piece to test it.

I figured I could use a piece that size as a runner...which is also what I did with the extra. There's a tape you can purchase to finish the edges. I didn't buy it yet, but it's on the list.
Padding
The runner we bought had a plushy rubber backed pad. So we didn't add any additional, I also didn't want the stairs to be too squishy. They'd already proved dangerous and squishy meant slippery.
I was looking for grip. However, if you want padding, you can add it to the the treads.
Supplies

Staple Gun
Staples
Carpet Tape
Scissors
Razor
Straight Edge
Ok, so this is where some of the problems started.
We bought a new power staple gun for this job, but it was bad. Great brand, but not appropriate for our task.
First, the part of the tool where the staples came out was set down about an inch from the tip, which meant we couldn't get it tight enough to the edge of the carpet.
Second, the standard T150 staples were huge and visible. They looked horrible.

It was cheap, like $20, but boy did it change the job. It had a head that allowed us to get into very tight spaces and close to the edges.
In addition, it used smaller staples, 18 gauge 1/4 inch narrow crown staples. And they were gold to match the carpet. What a difference.
Once they were in, they were basically invisible.
Installation
While we were searching for the second staple gun, we spotted carpet tape and were advised that it could be helpful, especially since we weren't adding padding.

Then we started stapling.

The top step was first. We pushed the edge right up under the nose of the first tread and stapled it in place.
Then we pulled the carpet very taut, stuck it on the tape, wrapped it around the tread and stapled it some more.


The process was rather simple.
Until. Until we got about half way down and the pattern was off. Something was crooked and buckling.
At first, we thought it was us. We moved that rug around, we measured and puzzled, when we finally realized it was the house.
Our lovely, old, quirky cottage had one tread that was uneven. It was shorter on one side by nearly an inch, so when we stretched the runner over it, it buckled.

It totally changed how the runner fit and changed the path so it wouldn't sit right.
Had we realized this earlier, we could've cut the tread and made it even, but it wasn't evident until after the rug had been stapled into place.
And you remember those staples, the ones that disappeared?
Yeah, well they worked so well, they were impossible to remove. A) we could barely find them and B) there was no way to get them out without damaging the rug.
So we cut the runner right below that tread and then continued on down.

Another diversion.
We used a straightedge square to ensure a level cut. We also made sure our pattern matched.

I've seen some DIYs online where people buy small runners and add them in pieces to the stairs. I wanted to do that, since the choices were better, but my husband didn't like that idea.
He felt that installing separate pieces could be problematic. Joining them could be messy, or they could come apart with pressure and wear.
Which is why we bought the long piece from the roll.
Our fix here kind of defeated the purpose of buying that long stretch of carpet, but we did what we needed to do to make it work.
I guess only time will tell.

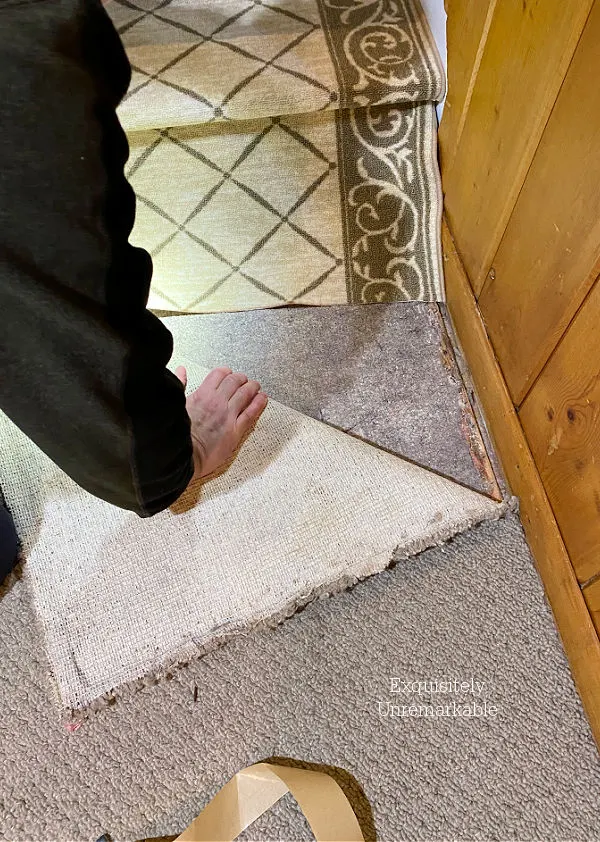
We just pulled the carpet back and tucked the runner under it. We trimmed it and then stapled it.
Pushing the old wall to wall back in place was the final step. Of course, that wall to wall no longer exists after our basement flood...but that's another story.
Like I said, relatively simple.

If you start with the proper tools and have standard size steps or newer construction, you shouldn't have any of the issues we did.
You'll also end up with a true runner.
Ours is only a runner at the top.

Then it ends up being a full wall to wall rug at the bottom.
But that's ok,
As long as I never end up at the bottom again.
😉


Absolutely gorgeous!
ReplyDeleteThanks so much, Betty!! It's made such a difference.
DeleteBeautiful result, Kim. If you didn't tell us about having to cut the runner, no one would ever know. These are the joys of owning old houses!
ReplyDeleteThank you, Ann. That cut may not be ideal, but it certainly straightened out our wacky, old steps!
DeleteThat looks great. Good job! Judy Clark
ReplyDeleteThanks so much, Judy! It was a very necessary DIY.
DeleteOh my gosh this is awesome. It looks great and the ton of money you saved SCORE!!!! You just need a few nice tools and confidence this will work out and it did. My husband uses his compressor all the time and that thing is great. Your family room is looking so great. Bravo!
ReplyDeleteKris, it really was a huge score! I can't believe after months of shopping for more expensive options, this bargain runner was the winner. I wish I'd thought of it sooner. I hope you have a fabulous weekend!
DeleteI think it looks great! Our house is 140+ years old so I can totally relate to nothing being straight, level, even, etc.
ReplyDeleteOh gosh! 140 years old, I can only imagine all the charm. It sounds like a dream!
DeleteYou guys are great DIYers! Me and my hubby would have to (and WILL have to - soon) hire out to have this done. The carpet on our stairs going down to the basement is the original of the house - I think about 35 years old. Gross! I am so sorry that you fell and tore up your shoulder. I hope that you've gone to PT and are on the mend. xoxo
ReplyDeleteThanks Melanie!! I get it, our carpet was about 20 years old and it was icky, too. Lots of kids, cats, dogs and mess up and down definitely took a toll. It definitely wasn't a priority, but after my tumble it became one...and yes, thanks for asking, PT has done wonders! xxoo
DeleteYou would never know you had to cut it. It looks great and the pattern fits your cottage style!
ReplyDeleteThanks Mari! Thank goodness for those big hardware stores…like your husbands! They really have more great solutions that people realize.
DeleteYou too are supreme problem solvers. It looks terrific. You lucked out at Home Depot. I would never have thought of using a compressor. All of my stairs are newly polyurethaned wood. So I can’t wear fuzzy socks and look like Frankenstein going down them in the middle of the night.
ReplyDeleteThanks so much, Susan! I can't believe they had this at Home Depot on the roll, just ready to go. Lucky for us...and yes, that compressor was great. I bet your stairs look fabulous. I love that look, but girl, trust me, put some grippy socks n your list for Santa!
DeleteHa! yes!
Delete❤️
DeleteYou two are a Dream Team! You never face a difficulty without figuring out a fix, always love your creations and DIY inspiration! I am sorry you hurt your shoulder, that is just awful, but then again, perhaps saved you a lot of work in the long run. The carpet looks amazing! Blessings to you Kim!
ReplyDeleteThanks so much, Marilyn. We do work well together and usually we enjoy the process. The tumble was unfortunate, but it's starting to heal and I guess I learned a good lesson in the meantime. Avoid slippery socks! Ha!!
DeleteWell, it looks absolutely wonderful...even if it was a bit wonky putting it in. I am assuming there are one or two swear words hidden under the carpet nap? lol. I hope you have a wonderful weekend and it looks like you are ahead of schedule for the holidays! xo Diana
ReplyDeleteDiana, you are a perceptive lady...a few choice words indeed. They just add a little character, right? 😉 They do look very nice and they're much safer now, but they're still wonky. Now you just can't see it! Happy Holidays!!
DeleteHi,
ReplyDeleteHow are you healing?
I have started to wear shoes in the house during most of the day and during any projects, because I too would be bare foot or in socks and I had a few mishaps. ;-)
Your project turned out fantastic. :-) I appreciate the tutorials, because we have several house projects to keep pressing on into 2023.
Healing up nicely, Carla, thanks for asking! We’re so happy with the way the stairs turned out.
DeleteKim, I think it looks great! Safety should always come first, and it doesn't matter that it started out as a runner and ended as wall to wall carpeting. Older homes have their charm, and although our home is only 26 years old, it has developed some quirks as it "resettled" after the tornado. We will probably need to order a couple of new windows this spring, and our limestone flooring in the kitchen is cracked in places, but that just adds to the char, right?!?!? ;P
ReplyDeleteBTW I didn't know that there was a staple gun attachment for air compressors. That's very helpful for me to know because Mr. Bookish has an air compressor!
Oh boy, Ricki, I didn't realize how much damage your house sustained in the tornado...but yes, cracks always add charm. At least that's what I tell myself! 😉
DeleteLooks great, Kim!
ReplyDeleteDeanna Rabe
Thanks Deanna! SO much safer now, too.
DeleteLooks great, Kim. You and hubby make a great team. Do be careful on stairs, my friend. Hugs.
ReplyDeleteYou guys are DIY rockstars, in my opinion! I could never imagine tackling such a complicated project, but you did it and it looks amazing!
ReplyDeleteI think it looks really great! Good job and major improvement to the stairs. Merry Christmas, friend. (:
ReplyDeleteWonderful post
ReplyDeleteKim,
ReplyDeleteOMG!! It looks amazing! Love how it came out!!
Hugs,
Deb