I gave a unfinished wooden thrift store box a makeover using three different, simple techniques. Use them separately or combine them, like I did, for a dramatic new look.

Ok friends, are you ready for a little before and after fun to kick this holiday weekend off?
Gee, I hope so because today I'm joining eleven of my Do It Over Designer friends as we share our DIY projects.
Talk about a crafty party!
Now, normally we don't have a theme, but this month our lovely hostess, Ann from The Apple Street Cottage suggested that we each feature a wooden DIY and I was all in.
I love a challenge.
Plus, I already had a wooden treasure that desperately needed a makeover.
A few weeks ago, along with a few other items, I shared this wooden box. Unfinished and a little dusty, but full of possibilities.
I grabbed it for a $1 at my favorite thrift store. I had no idea what I was going to do with it, but honestly, for a buck it was too good to leave behind.
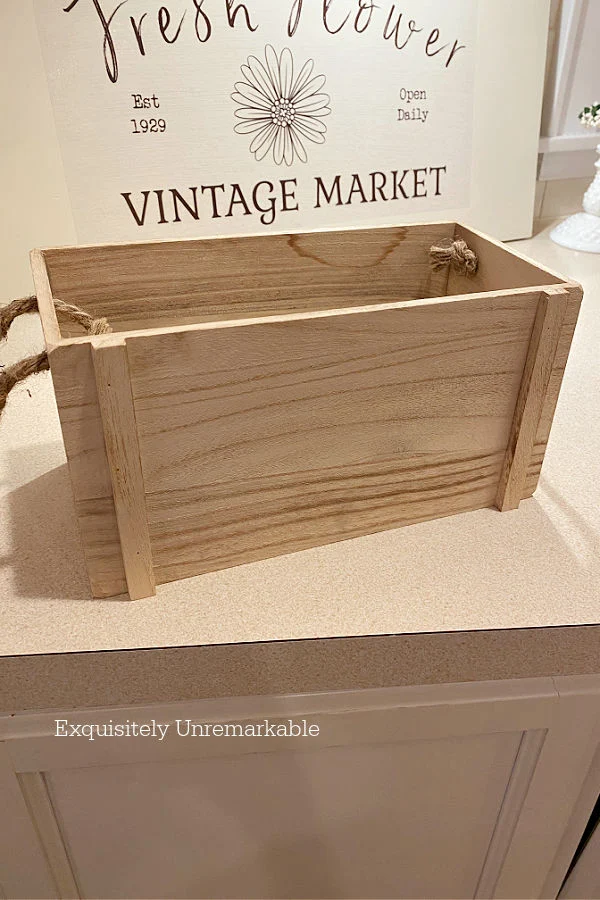
I wasn't worried though, like most crafters, I have enough supplies in my stash to make several of these boxes over in a variety of ways.
And I contemplated many of them separately...painting it, decoupaging it, adding transfers to it.
But then I let my crafty imagination run wild and I decided to use them all. At once.
And while I suppose it could've looked like a jumbled mess, I think the result is fabulous.
Here's what I did...
How To Decorate An Unfinished Wooden Box
Ok, so step one, I started with paint.I was so in love with this delicious berry color, after I used it on my tin tile floral wreath, that I decided to use it on my box.
Two coats of chalk mineral paint, no priming.

Once the paint was dry, it was time for the decoupage details.
I decided to use this pretty floral rice paper instead of napkins. I find it's much easier to work with and I like the texture.

It's sturdier than napkins, it doesn't tear and there's no separating layers.

First, though, I decided to remove the rope handles. I could've worked around them, but I wasn't a fan to begin with and the idea of trying to decoupage near that rope wasn't appetizing.
So I untied them and pulled them out.
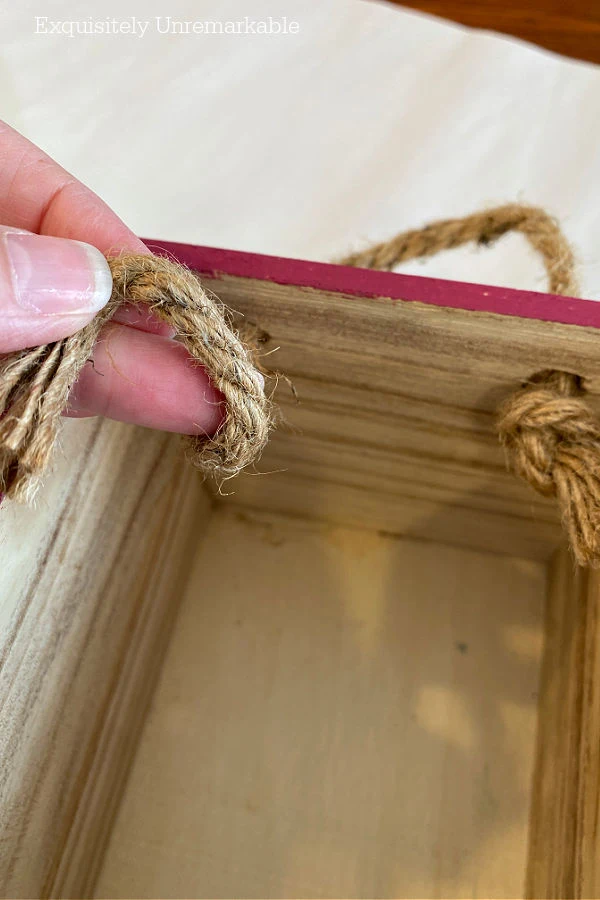
Then I grabbed that pen, laid my box down on the paper and traced around it.
Super easy.
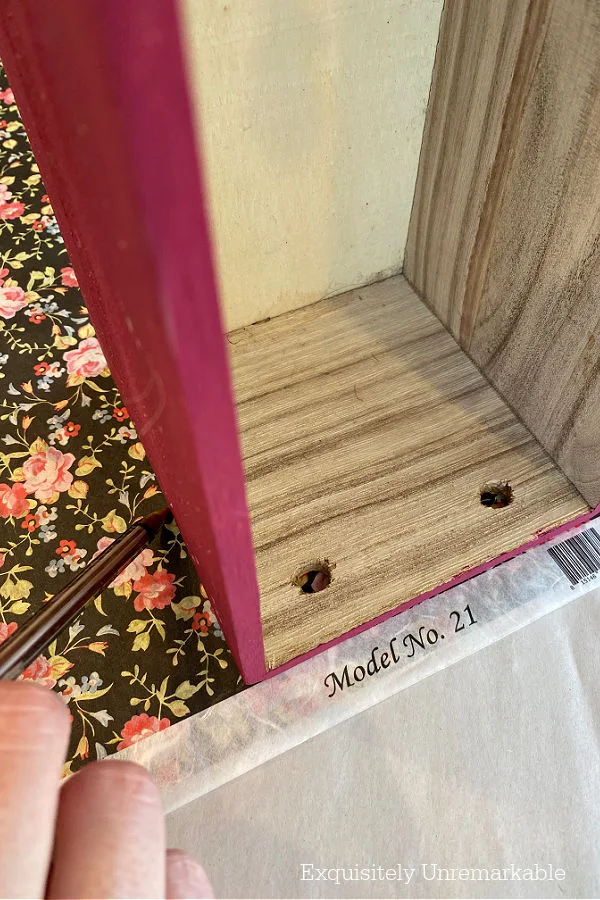
Then I just cut it out on the lines I made.
To make it even simpler, I doubled my paper and cut through both layers at the same time, resulting in two paper squares.

At this point, it was time to whip out the decoupage gel.
Most people use Mod Podge. I do not. Well, not anymore.
I think it's goopy and it smells terrible.
I used Dixie Belle's Clear Satin Sealer. It's not cheap, but I think it works so much better, goes on cleaner and smoother and it doesn't smell at all, which is big for me.
I applied it to the wood first.
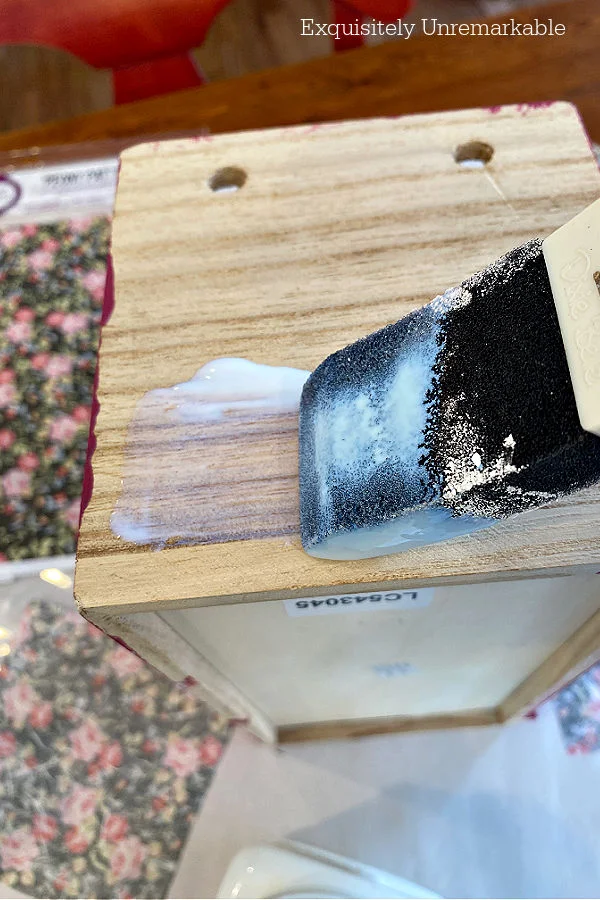
Then I put the paper on the box and added more satin sealer on top of it with a foam brush.

I was ready to stop there, but then I decided that this paper was far too fetching to be hidden on the sides of the box.
So I added two strips of it to the front. There were two raised bars just begging for some attention.
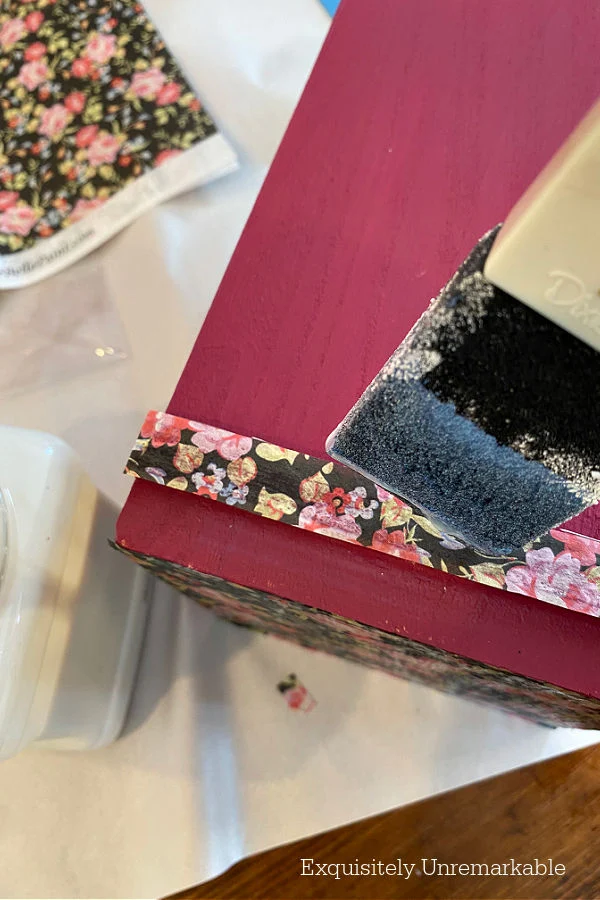
Again, at this point, I could've stopped, but what fun would that be?
So I grabbed a few black rose transfers and added them to the front.

I love vinyl furniture transfers for the same reason I love that rice paper. They making crafting easy.
Flawless results without the fuss. I look like a pro every time, without any special training or technique.
It's especially true of the transfers. Just peel the backing off, place them on the wood and rub until the pattern releases.
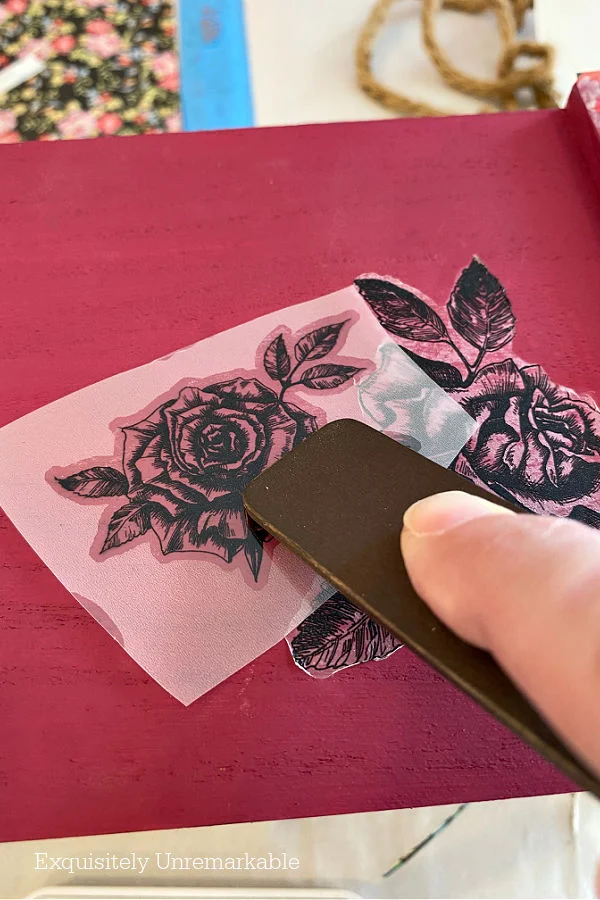
When I was done, that plain, unfinished, dusty wooden box was unrecognizable.
It was a colorful treasure.

Ready decorate my kitchen with its cheerful makeover.
And it owes its glow up to Ann and her fun challenge.

Thanks Ann!
😉

Are you ready to see what everyone else has to share? Me too!!
Let's go!
Happy Hopping!!
I used Dixie Belle's Clear Satin Sealer. It's not cheap, but I think it works so much better, goes on cleaner and smoother and it doesn't smell at all, which is big for me.
I applied it to the wood first.

Then I put the paper on the box and added more satin sealer on top of it with a foam brush.

I was ready to stop there, but then I decided that this paper was far too fetching to be hidden on the sides of the box.
So I added two strips of it to the front. There were two raised bars just begging for some attention.

Again, at this point, I could've stopped, but what fun would that be?
So I grabbed a few black rose transfers and added them to the front.

I love vinyl furniture transfers for the same reason I love that rice paper. They making crafting easy.
Flawless results without the fuss. I look like a pro every time, without any special training or technique.
It's especially true of the transfers. Just peel the backing off, place them on the wood and rub until the pattern releases.

When I was done, that plain, unfinished, dusty wooden box was unrecognizable.
It was a colorful treasure.

Ready decorate my kitchen with its cheerful makeover.
And it owes its glow up to Ann and her fun challenge.

Thanks Ann!
😉

Are you ready to see what everyone else has to share? Me too!!
Let's go!
Exquisitely Unremarkable - It's me!!
Little Vintage Cottage
Modern on Monticello
Pandora’s Box
Purple Hues & Me
Southern Sunflowers
Unique Creations by Anita
Sum Of Their Stories
Tea And Forget-Me-Nots
The Apple Street Cottage
Birdz of a Feather
Color Me Thrifty
Little Vintage Cottage
Modern on Monticello
Pandora’s Box
Purple Hues & Me
Southern Sunflowers
Unique Creations by Anita
Sum Of Their Stories
Tea And Forget-Me-Nots
The Apple Street Cottage
Birdz of a Feather
Color Me Thrifty
Happy Hopping!!


Well, for just a dollar it would have been rude to leave that wooden box behind! I love the triple craft makeover you've given it, all 3 elements work so beautifully together.
ReplyDeleteHaha!! Yes, I agree! Truth be told, it may have even been 50% off...the old memory isn't what it used to be, but either way, it was a steal! Thank you for the sweet comment, always fun to hop with you!
DeleteYou're so welcome, Kim! Your thrift store box is so pretty now. The strips of rice paper and the transfer on the front are just the little 'extra' it needed. Great project!
ReplyDeleteThanks Ann! It was such pretty paper, I just had to place a bit of it where I could see it clearly. Thanks for the hop!
DeleteCute idea - the floral paper was perfect to dress it up!
ReplyDeleteThanks Patti! I’m a total sucker for a pretty paper!
DeleteFabulous Kim and I love the restraint with the decoupage paper. It would've been too much of a good thing to cover the whole box.
ReplyDeleteThanks Sara! Yes, I agree, that busy pattern would've been a bit much all over that box. Plus, this way I was able to use some more of that delicious berry paint, inside where I can see it all day long.
DeleteThat turned out really cute. I am not crazy about ModPodge either but have to use up what I have before I get anything else....which may take a while the way I am going. lol. You did a great job on that piece. Happy Memorial Day- xo Diana
ReplyDeleteThanks Diana! Happy Memorial Day to you, too. I have some Mod Podge in my stash too, I feel guilty about letting it sit there. Maybe I'll take it outside and use it up this summer. Maybe! 😉 Enjoy the holiday weekend!!
DeleteSuper cute as always!! What a beautiful transformation! I hadn’t thought about using DB’s clear satin instead of Mod Podge. Great idea!
ReplyDeleteThanks Stephanie! Yes, I watched a Dixie Belle video once and saw the artist using it and now I'm hooked. It's expensive for sure...it does go a long way though and I really do prefer it.
DeleteWhat a pretty makeover! I really like the colours you chose to go with the paper. Great job on finding a bargin
ReplyDeleteAnd turning it into something great.
Thank you so much! I'm very happy with the way it turned out. It was certainly a dollar well spent! Haha!!
DeleteVery clever way to turn that boring wood into a beautiful piece of home decor. I love the colour combination you chose.
ReplyDeleteThanks Anita! It really is a very fun {and colorful} decor accessory now.
DeleteYour wooden thrift box turned out gorgeous, Kim! You did great in designing this! I love the look of the transfer with the decoupage paper along with the berry colorI It's all so pretty! think we would all love to have this featured in our decor!
ReplyDeleteThanks so much, Gail! I have to say, I’m usually a devoted red girl, but this berry color is quickly becoming a favorite. Happy Hopping and enjoy the weekend!!
DeleteThat turned out so cute, I love the combo of the black with pink! Great job!
ReplyDeleteThanks Tania! I picked that paper out over a year ago, I just never found anything worthy of all that pretty color...until now!! Happy weekend!
DeleteVery cute little project. Love ❤️ the florals you added along with the pink color and transfer.
ReplyDeleteThanks Linda! That box needed a little zhuzh! I hope you’re having a lovely long weekend!
DeleteAbsolutely beautiful. I love the combination of colours and florals. Perfect!
ReplyDeleteRachel - Tea and Forget-me-nots
Thank you, Rachel! I love the pop, especially this time of year!
DeleteLove it Kim, the rice paper is so pretty!
ReplyDeleteThanks Cindy! I've been saving it for a special project and I really think this is the right one.
DeleteYour box transformation turned out great Kim. Being a pink Ioving girl I love the paint color, and the floral paper is lovely.
ReplyDeleteThanks Tuula!! Pink is my new summer obsession. There's just something so cheerful about it. Happy weekend!!
DeleteI just love this Kim. Some of the napkins now are so beautiful and that you could use them on this box is genius. Love it. Happy Memorial Day Weekend. We are in Michigan on the lake and the weather has been beautiful. Big Hugs. Kris
ReplyDeleteThanks Kris!! Enjoy your lovely cottage by the water this holiday weekend. I hope it’s sunny and warm the entire time. xoxo
DeleteThis turned out so cute Kim! Love the rice paper you chose and the bit on the front just sets the stage. It's so fun turning oh hum items into treasures. ❤️
ReplyDeleteThank you so much! The rice paper is so easy to work with, I highly recommend it.
DeleteI can tell you enjoyed working with this project. You found it at such a great price too! It really did turn out so nice and pretty.
ReplyDeleteI really did have fun with this one, Donna! I'm glad to hear that it shows!!
DeleteWhat a beauty this turned out to be Kim - I love your do-it-over projects, and decoupage is always so much fun! Have a wonderful rest of your week!
ReplyDeleteThanks so much, Marilyn! I love hearing that you enjoy the makeovers. They're truly my favorite kind of crafty DIY. 😊
DeleteI love the eye you have to transform... thank you for sharing with us, you are always inspiring me.
ReplyDeleteCarla
Carla, your comments always make me smile!!
DeleteThe color combination of black and berry looks so striking together. You succeeded in giving your plain box a great transformation!
ReplyDeleteThank you Allyson! I just love that berry color!!
DeleteKim, another great makeover. The box will be perfect to use for the summer.
ReplyDeleteThanks Julie! It really looks sweet filled with summer blooms.
DeleteYour box turned out so adorable, Kim. I’ve always used Mod Podge, but I’ll have to look for your favorite when I run out of my bottle.
ReplyDeleteThanks Kitty! I like the price of the Mod Podge much better, but I do really like the satin sealer so much more overall. Thankfully, it goes a very long way!!
DeleteI’ve recently done several! So fun and the possibilities are endless! Thank you for sharing.
ReplyDeleteThanks so much, Jennifer! I really enjoyed this DIY. So glad you did, too.
DeleteKim,
ReplyDeleteI love the color that you used to paint this box and the paper and rose are just the perfect additions to it...! So pretty!! Thanks for sharing!!
Hugs,
Deb
Thanks so much, Deb. I am so smitten with this color. I'm looking for other places to use it.
Delete