
I found an old glass cutting board at the thrift store for $1.99. It was scratched up, but with a little bit of decoupage magic, I turned it into a showstopping, functional new addition to my cottage style kitchen. Here's how I did it. Several years ago, I found an old glass cutting board at the thrift store and decided to give it a makeover . It was a pretty piece and in pretty good condition. I just didn't like that paper bag pattern. So I grabbed this paper guest towel and gave it a makeover. One that was more fitting for my home. And fall. Unfortunately, after one season in the kitchen, it disappeared and found its way to the bathroom.

Decorative wooden risers and charcuterie boards have become all the rage in the last few years. On their own they are each beautiful and useful. By combining the two you get the best of both worlds, form and function. Here's the easy DIY that will take you less than ten minutes and cost you less than ten bucks. It's no secret that crafting is my passion, my zen and my meditation. Any form of creation takes me away from the whir of daily life and drops me smack in the middle of a calm and pretty place where I become an artist. The laundry, the dishes, the news, the daily chores and errands all fall into the background and I stand confronted with a pile of possibility instead.
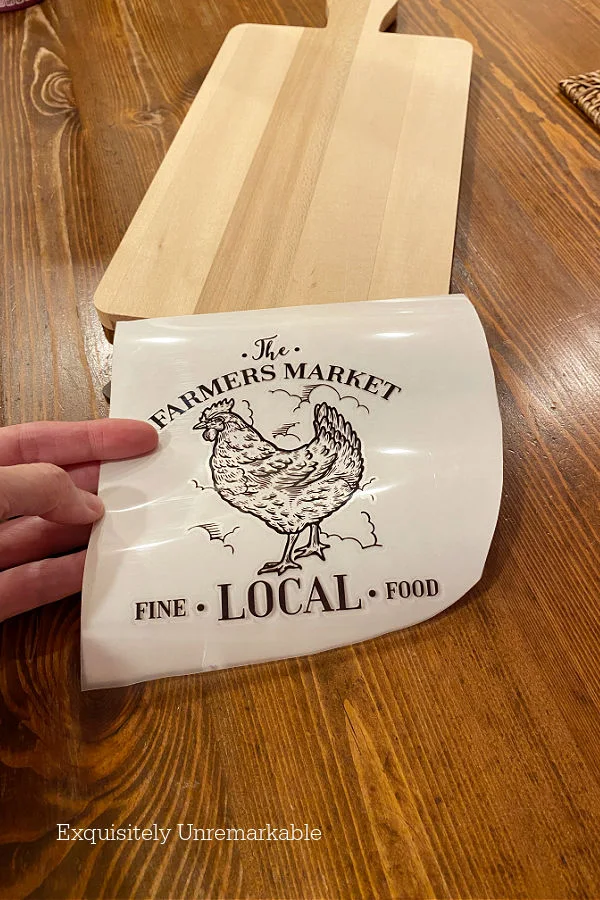
Are you looking for an easy way to upcycle an old cutting board? They make great wooden signs and with this crafty hack, using vinyl transfers, you can turn your thrift store find into a beautiful and unique piece of wall decor in minutes. Hello friends! I'm so glad you're joining me today, because I have a super doable upcycle that I can't wait to share. If you've followed me for any length of time, you know that turning inexpensive thrift store finds into home decor accents is one of all time favorite activities. It's my meditation, my creative outlet and a way for me to get some really beautiful {if I do say so myself} custom decor pieces without breaking the bank.

I turned a two dollar, unfinished wooden cutting board into a charming, cottage style kitchen decor accessory with rice paper. So much easier than using napkins. No fancy techniques or cutting machines needed...just a simple decoupage DIY anyone can do in minutes. Several weeks ago, I shared my latest thrift store finds. Among them was an unfinished paddle style, wooden cutting board, that I grabbed for two bucks. To be honest, I don't think it was ever meant to be a working kitchen accessory. It wasn't made of butcher block or bamboo. It was a soft, white pine, that splintered a bit when I touched it. Clearly, no one was going to be preparing food on that surface.

I bought at glass cutting board at the thrift store and gave it a crafty makeover for fall. It was a super easy craft that will dress up your kitchen and decorate your table. Check out the tutorial. So last night I was crafting at 1:00 am again. I was working in the kitchen, balancing a glass cutting board on my lap, decoupaging with a foam brush...and trying not to get it on my pjs. I used to think I crafted this way because my kids were small and there wasn't any other time during the day to get it done. But now that they're in college that explanation doesn't really hold water. Nope. Turns out, I'm just crazy. And a night owl .

Turn those old thrift store or Dollar Tree cutting boards into beautiful wooden signs, cake stands, trivets or serving pieces. A little paint and wall decal to make those letters is all you need. Check out the easy DIY. Hello friends! Well, it looks as if autumn is on its way despite my best efforts to thwart it. Can't fight Mother Nature , so I decided to get into the spirit and make a few new fall crafts yesterday.

When the sun is shining and the weather is warm, yard sales just seem to pop up on every block in my area. The weekends are full of them. Of course, I have no willpower when it comes to second hand treasures, so I basically stop at every one. And head straight to the table with the kitchen supplies.

Working with stencils is not always easy, especially when they're paper. Here's what I learned...the hard way! Fall may not be my favorite season, but it's definitely one of the best times for crafting. For some reason, inspiration seems to be all around. Maybe even more than at Christmastime. Which, let's face it, is the craftiest time of the year.

Let it snow! Turn an old thrift store cutting board into a festive, Christmas wooden sign with a few vinyl letters and a stencil. Ok, so it's no secret that I am not a fan of snow. But I should probably be clear, because that's not actually 100% true. You see, the thing is, I really like some snow. Like December snow.

Upcycling thrift store cutting boards has become my favorite new decor obsession. They're super cheap, easy to find and even easier to completely makeover with a stencil. Last weekend, the temperatures soared to almost fifty degrees after a solid week of single digit days. It was so nice outside that several of the thrift stores in our area decided to host sidewalk sales. My husband and I had been dreaming of warmer weather, so we were game. I didn't really need anything, but it was a perfect excuse to go shopping. And that we did.

Holiday gift bags make great wooden signs. With a little imagination you can use them to decorate your home at Christmas. Come see how... For a long, long time, I've wanted a festive sign to hang over my kitchen window during the holidays. Unfortunately, the space is tiny. Store-bought signs are generally too large. Leaving DIY as my only option. Which is fine. Most of the year.
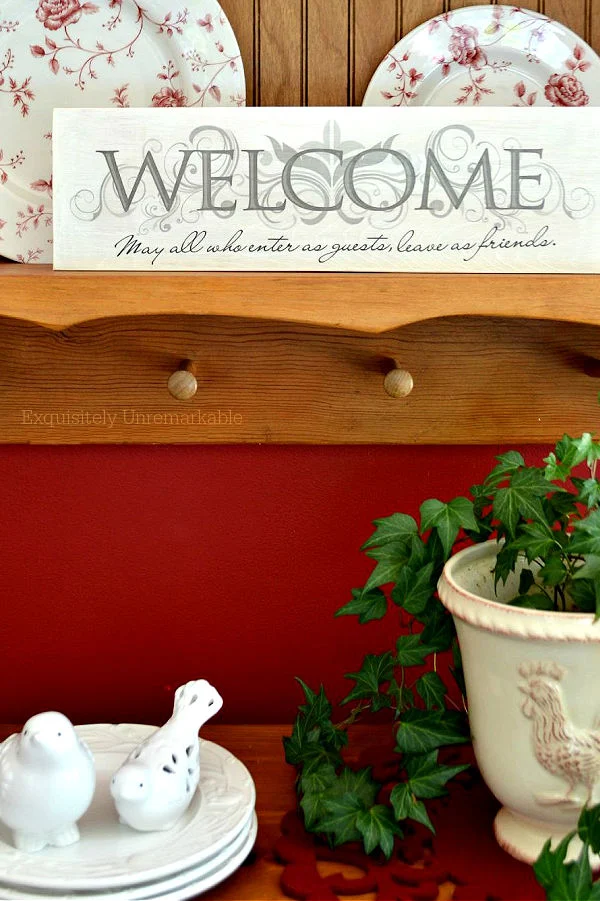
Make a professional looking wooden sign with wall art stickers. Just paint, peel and stick for a fabulous result! I've been making these lovely wooden signs using Dollar Tree wall art stickers and removable wall decals for quite a while and yet, I'm always amazed when I'm finished. They're perfect for any style decor, they cost almost nothing and can be whipped up in a matter of minutes. That's my favorite kind of project, one with a quick cheat.

Upcycle, makeover, recycle and transform that trash to beautiful home decor treasure. Check out these ten fabulous ideas for your home. Well, folks, it's hard to believe, but we've come to the end of another year. What's even harder for me to believe is that this is my sixth...yes, sixth...Exquisitely Unremarkable wrap up. And even more unbelievable is that today's installment is the 500th article I've published. 500. Yikes that's a lot of words...

Look what I found at the thrift store! A mystery item, a few cute pieces to DIY. Did I pay too much? You be the judge. Then see at what I did to them! Hello friends. Today I have something a little different for you. It's me.

Thrift stores are an ideal place to find vintage treasures loaded with cottage style charm. However, it's easy to get caught up in the excitement and walk away with items you'll never use. Here's how I shop without overbuying and get the most for my money. While I don't make New Year's resolutions anymore, this year, when the calendar page turned over, I did promise myself to ease up on those thrift store purchases. My house is tiny. The shelves are full. I'd need a crowbar to squeeze anymore furniture inside. And honestly I should be donating far more than I'm purchasing. Unfortunately, I have an addiction.

Decorate your home for pennies this fall, with these ten fabulous home decor crafts. Oh fall. While it certainly isn't my favorite season, being the devout summer girl that I am, I do love the extra time for crafting and decorating I suddenly have, as I'm forced indoors. There's something about all those jewel tones that get my creative juices flowing. I think I do my best work in fall. And I certainly do a lot of it.

Check out these 20 fabulous and thrifty home decor DIYs and crafts. Elegant doesn't have to be expensive. And here's the proof. Come see! My goodness, how did we get here so fast? I can't believe we're staring not only a new year, but a new decade in the face.

You can grab some great Christmas decor items at the thrift store, just keep your eyes and your mind open...even in July! Hello friends! I hope you are enjoying the season. We have been getting a lot of snow around here lately, which is contributing to that holly, jolly spirit. Since I did less decorating this year, I have had more time to really enjoy what I did put out, taking it all in while I sit by the fire...keeping warm. The one thing I realized, while I was staring at my treasures, was that many, if not most of them are either sentimental heirlooms, family pieces or thrifted items. They seem to be what holds my heart at this time of the year.

Gift bags come in so many beautiful patterns so they make great wooden signs for Christmas. They're cheap and it only takes a few minutes to whip one up. Come check out the easy DIY. Way back in 2015, I saw the most gorgeous gift bag for $3 in Marshalls. Of course, at that price, it hopped into my cart. But right off the bat, I knew it was way too pretty to hold a present and then be tossed away. So instead, I used it to make this elegant, wooden sign for Christmas . It was solid and looked very expensive with its nailheads, wood patterned paper. And all that chunky glitter.

When fall rolls around, the first thing I think about is crafting with pumpkins. Maybe because I adore the weekends we spend at the farms, picking them out of the patch. Maybe it's because they remind me of my childhood. Jack-O-Lanterns, Charlie Brown, carved or painted faces and salted pumpkins seeds. Or maybe it's just their bright orange color. Either way, from late September straight through to Thanksgiving Day, I can't get enough of their sweet, smile inducing shapes. So it's no wonder that over the past decade, I've made more than my share of pumpkin crafts. Here's A Peek At My Pumpkin Crafts For Fall None of them were expensive or difficult to make and every last one of them added a little bit of festive flair to my fall home. Inside and out. 1. My Sweet Carved Pumpkin Planter This bright orange pumpkin planter is one of my favorite ways to welcome fall, and guests, into my home and add some autumn cheer to my garden. It's a quick DIY and one that...


Social Icons